
Handling an Incoming Call
Contents
You can start receiving calls as soon as you set your status to Ready on the voice channel in the Gplus Adapter for Salesforce.
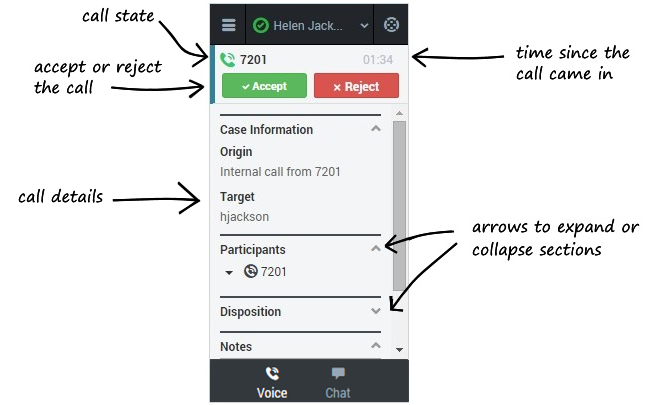
When you receive a call, the adapter's incoming call screen displays the call overview area, where you can Accept or Reject the call and see the amount of time since the call came in. You also see the call details area, which displays sections for Case Information, Participants, Disposition, and Notes. You can review this information, using the little arrows (![]() ) to expand and collapse sections, before deciding whether to accept or reject the call.
) to expand and collapse sections, before deciding whether to accept or reject the call.
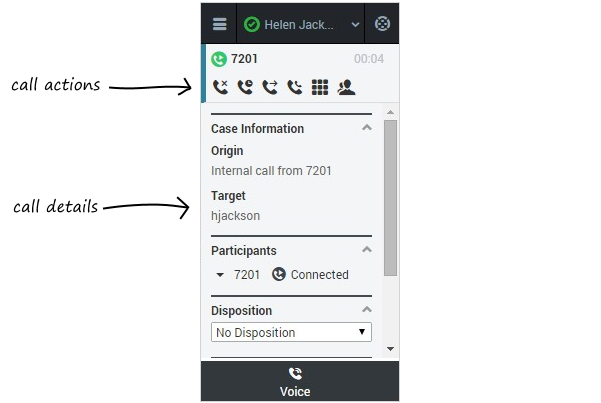
If you Reject the call, you'll be taken back to the main view for the voice channel. If you accept the call, you'll see a call section at the top of the adapter with a list of actions you can take (the rest of the view still displays the call details area):
| Action | Button | Description |
|---|---|---|
| Hang up | Ends the call. | |
| Hold | Places the call on hold. If you do this, you'll see a slightly different list of actions with a Retrieve button ( | |
| Instant Transfer | Redirects the call to another contact you select using Team Communicator. See Transferring a Call for details. | |
| Instant Conference | Starts a voice conference instantly with the current call and another contact you select using Team Communicator. See Initiating a Conference Call for details. | |
| Keypad | Calls up the keypad. You can use this to attach numerical data to the call by entering dual-tone multi-frequency (DTMF) digits into the call case history. Enter or select the digits and then hit Enter on your keyboard.  | |
| Consult | Starts a consultation with another contact before transferring or conferencing the call to that contact. See Initiating a Consultation for details. |
Accepting Another Call
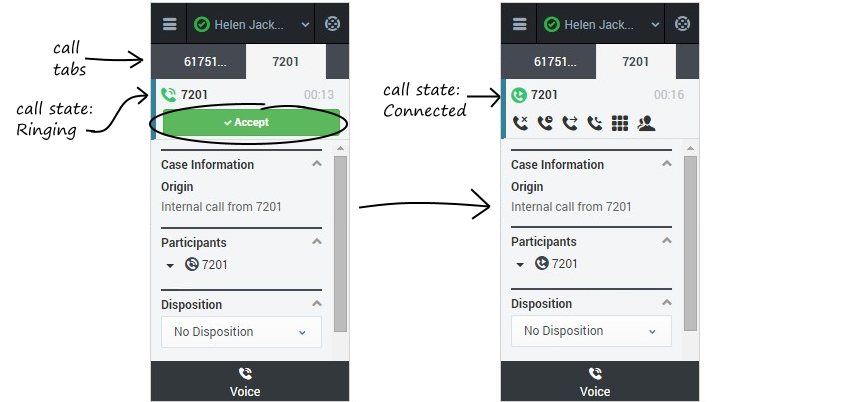
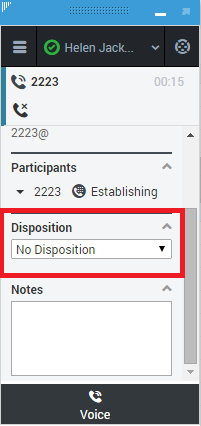
While you're on an active call, you might get another unrelated direct call from someone else. If this happens, the adapter opens a new tab and shows you the same call overview information with the option to accept.
As soon as you accept the new call, the adapter puts your original call on hold. You can go back to your original call by selecting the corresponding tab and clicking Retrieve (![]() ) — this puts your second call on hold.
) — this puts your second call on hold.
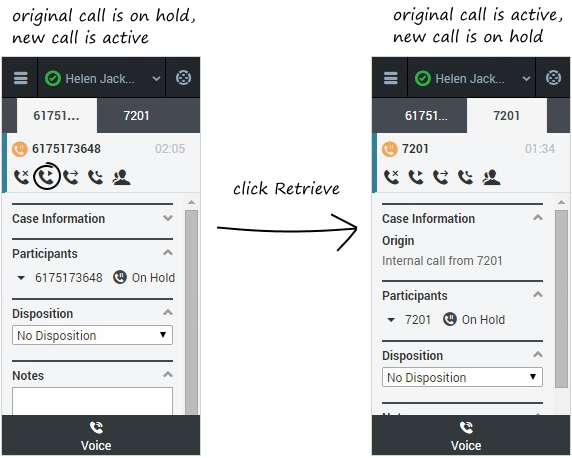
If you have more than two active calls, the rest are displayed in a dropdown list next to the tabs.
Finishing a Call
When your call is over, either because the initiator left the call or you clicked Hang up (![]() ), you will probably need to update some information in the call details area. Your environment might be configured to automatically change your status to After Call Work to give you time to complete this task; if not, you can change the status yourself.
), you will probably need to update some information in the call details area. Your environment might be configured to automatically change your status to After Call Work to give you time to complete this task; if not, you can change the status yourself.
Now you can set the disposition or add any notes about the call. When you're finished, click Mark Done (![]() ) to complete the call and go back to the main voice channel view. This updates the call with the information you entered and, if configured by your administrator, automatically changes your status to Ready, Not Ready, or some other value; if not configured, you have to change it yourself.
) to complete the call and go back to the main voice channel view. This updates the call with the information you entered and, if configured by your administrator, automatically changes your status to Ready, Not Ready, or some other value; if not configured, you have to change it yourself.
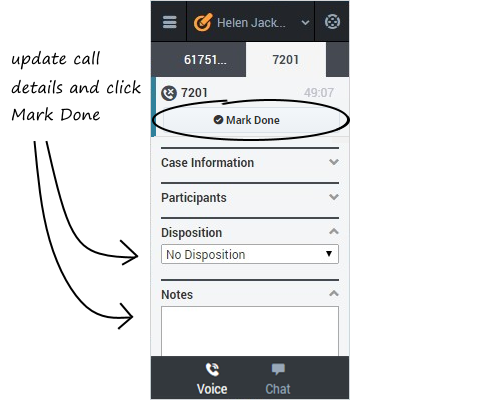
If you are finishing multiple calls, the process is the same: just click the tab for a call, enter any necessary information in the call details area, and click Mark Done (![]() ). Then, move on to your next call tab.
). Then, move on to your next call tab.
Content TDB below this point
Case Information
The Case Information (attached data) view provides information about an interaction — for example, an account number or type of service. Your system administrator configures which attached information is displayed.
The following are examples of the type of critical information the Case Information view provides about the active interaction:
- Contact name
- Call type
- Account information
- Subject
Participants
Disposition
The Disposition Code view enables you to assign one code to an ongoing or terminated interaction to qualify the outcome of the interaction.
The Disposition Code view is a menu in the Interaction view. It contains a list of choices that you can click to specify the outcome of the interaction:
Select a disposition for the interaction from the list of dispositions avaialable:
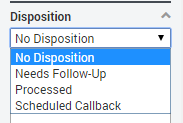
Once a disposition is selected, the disposition list is hidden.
Note
The Notes is a feature that enables you to enter comments about the current interaction or about a selected interaction in the History database.
The comments are stored as a part of the history for the contact. The contents of the Notes can be viewed by any agent who views the contact's history.
Notes is available as a field in the following view:
- Voice Interaction
Type notes in the Note text field and click the Mark Done icon (![]() ).
).