How to set up your agents
Before your contact-center agents can begin interacting with customers, you must set up their account.
The Basics
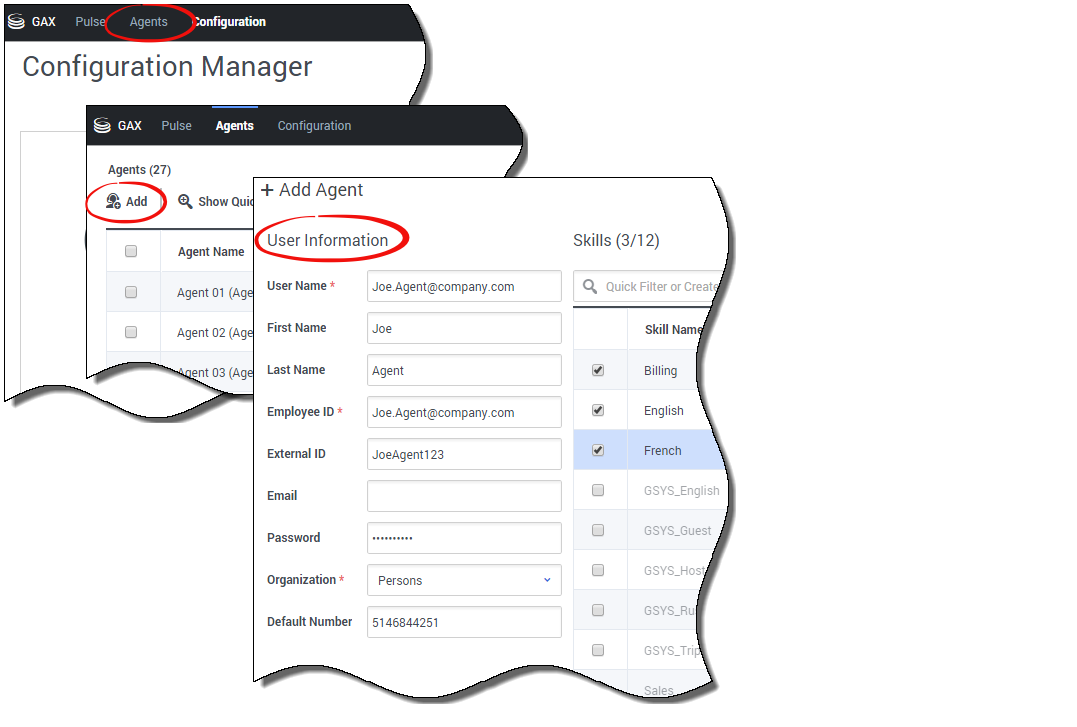
From the Agents screen in Platform Administration you are going to:
- Create the Agent account.
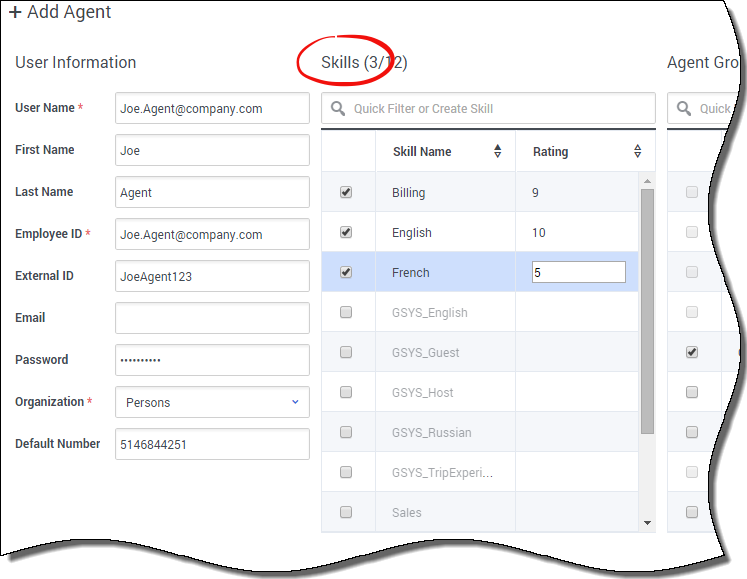
- Assign one or more Skills to the Agent.
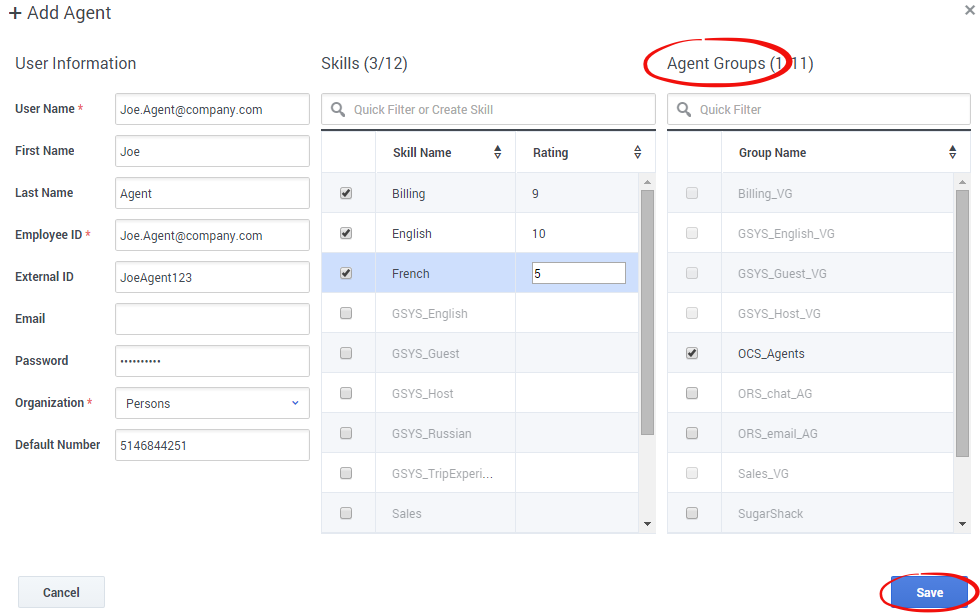
- Assign the new Agent to an Agent Group.
Create an Agent Account
Select Add and enter the agent's personal information. Mandatory fields are indicated by a red star (*).
To help you fill in these fields, remember:
- User Name is normally the agent’s email address or login_name@company_domain.
- Employee ID is a unique corporate ID.
- Password might be required (even though it is not indicated as mandatory) depending on the corporate password policy and rules.
- Default Number is the agent's telephone number, either a regular directory number or an international number (preceded by + and the country code).
Assign Skills to Agents
Select the Skills that the Agent possesses, and then assign a Rating, or proficiency level, for each assigned skill. Inactive skills are grayed out and unavailable.
A Rating is a numerical representation of the proficiency of the Agent in a skill. Values are 1 to 10, with 10 being the most proficient.
Assign Agents to Agent Groups
Comments or questions about this documentation? Contact us for support!


