Customizing your Agent Desktop
As an administrator, you can customize what a given agent sees when they login to their Agent Desktop. You also have flexibility in deciding who gets to see what — for example, you can apply a given customization to a single agent at a time (set this on the Person) or to a whole group of agents at once (set this on the Agent Group).
You have three options for customizing what your agents see when they open their Agent Desktop:
You also have the option to configure inactivity timeouts for your agents:
Since these customizations are unique to you and your business, they are not available out of the box. To get started on any of these customizations, you need to contact Genesys first. We will do the initial set up for you — create the phone numbers, URLs, or caller IDs that you tell us you need for your business.
Once things are set up in the system, you decide who can access the customization — by setting options in Person or Agent Group objects in Platform Administrator (see Configuration Notes below).
Let’s take a closer look at the options available to you.
Setting up custom web content
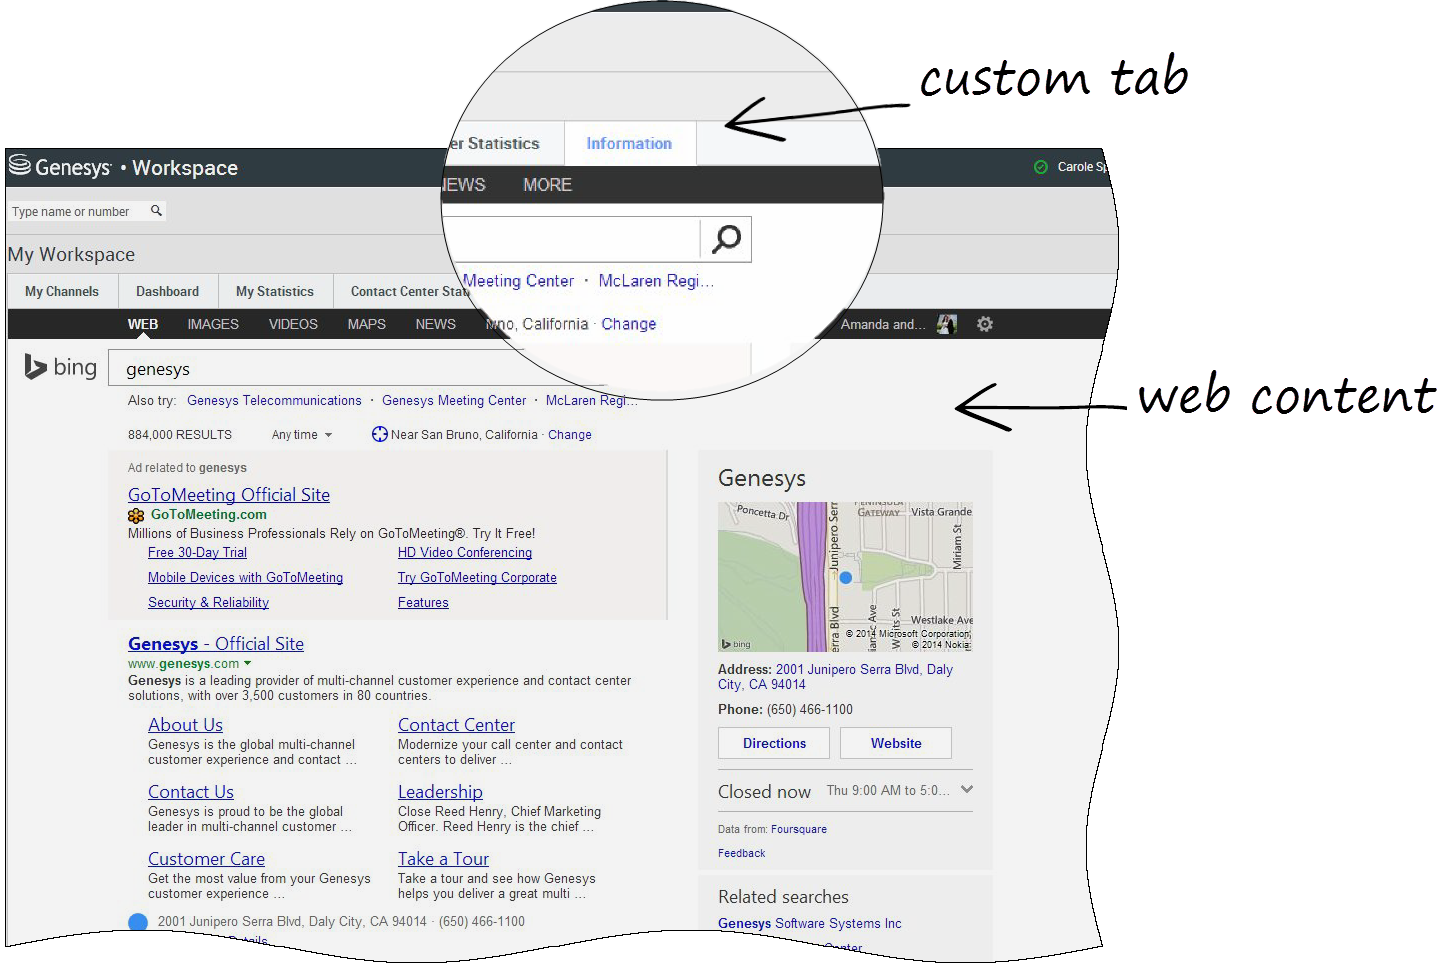
You can integrate external web sites into Agent Desktop, displayed in dedicated tabs.
These tabs give your agents quick access to any web sites that you decide they need, without their having to leave Agent Desktop. For example, your company's knowledge base or corporate search page.
You can set up these web sites to appear in either the Main View or the Interaction View.
Setup
First, contact Genesys to get codes set up for each URL that you want to add to the Agent Desktop.
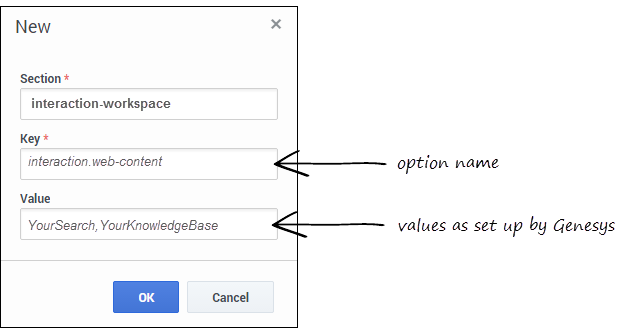
- Main View — You can set the Main View so that multiple tabs appear for different URLs. After you get your codes from Genesys enter them as a comma-separated list in workspace.web-content.
For example,
YourSearch,YourKnowledgeBase,YourHelp - Interaction View — For Interaction View, you can only set up a single web site to appear when the interaction opens. When you get your code from Genesys, enter it in interaction.web-content.
For example,
YourSearch
Setting up Caller ID selection
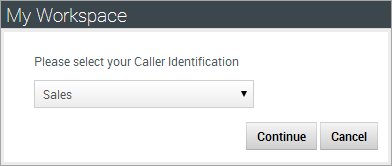
When the Caller ID feature is enabled, a "Please select your Caller Identification" popup box will appear to your agents when making a call.
Agents can then select the appropriate caller ID from your predefined list to display to the person receiving the call.
Setup
To setup the Caller ID list, contact Genesys. You will receive a code that maps to the list that you want displayed in the Caller ID popup.
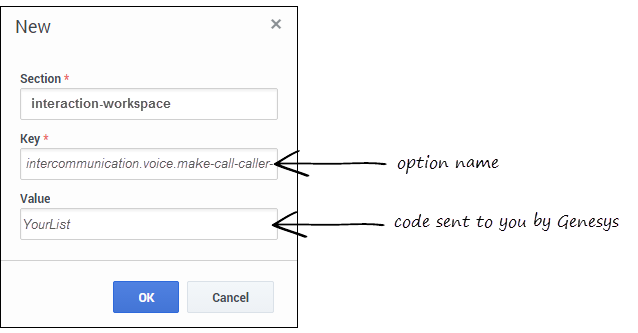
Once you get this code, enter it in the intercommunication.voice.make-call-caller-id-business-attribute option.
For example,
YourList
The change will show up for the next time your agent logs in or starts a new session.
[+] See sample configurationSetting up corporate favorites
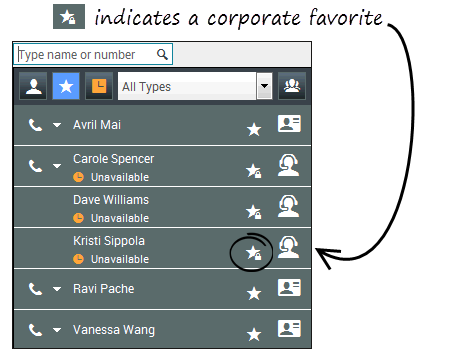
A corporate favorite is an internal target or contact that people in your company need to call frequently, or who you want your agents to find quickly.
In your agents' Team Communicator, corporate favorites are marked by a locked gold star (![]() ).
).
You can designate corporate favorites as context-sensitive, determined by a user role, or by the contact you are currently interacting with.
Setup
Basically, you need to create new options for a Person or an Agent Group objects to:
- Define corporate favorites
- Display corporate favorites for select Person(s) or Agent Group(s) in Agent Desktop Team Communicator
Define corporate favorites
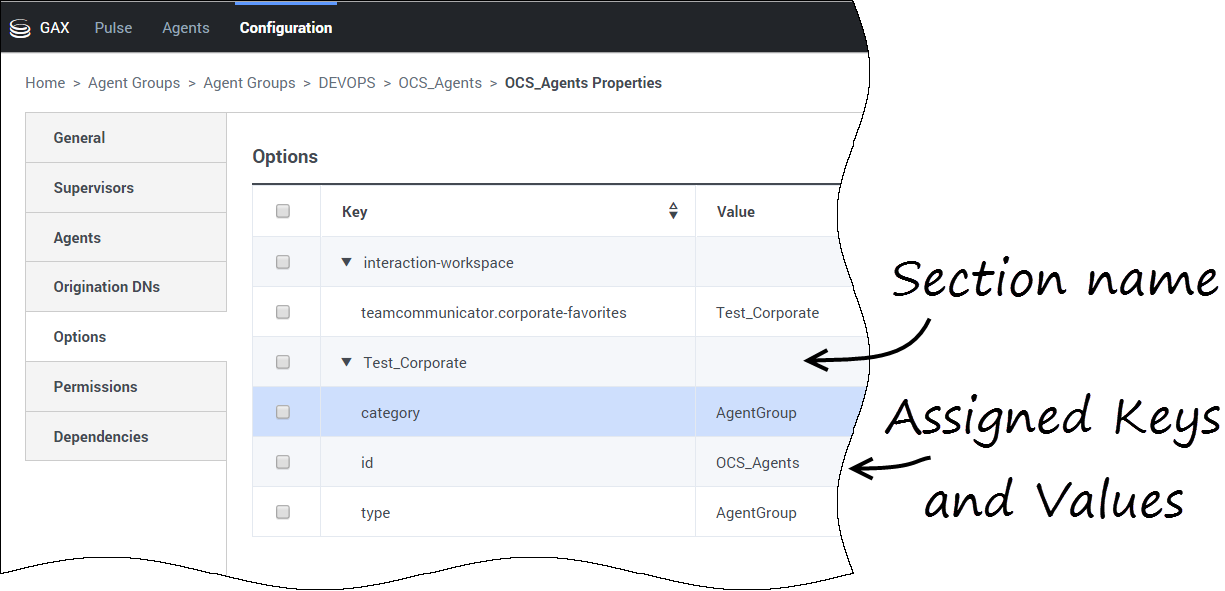
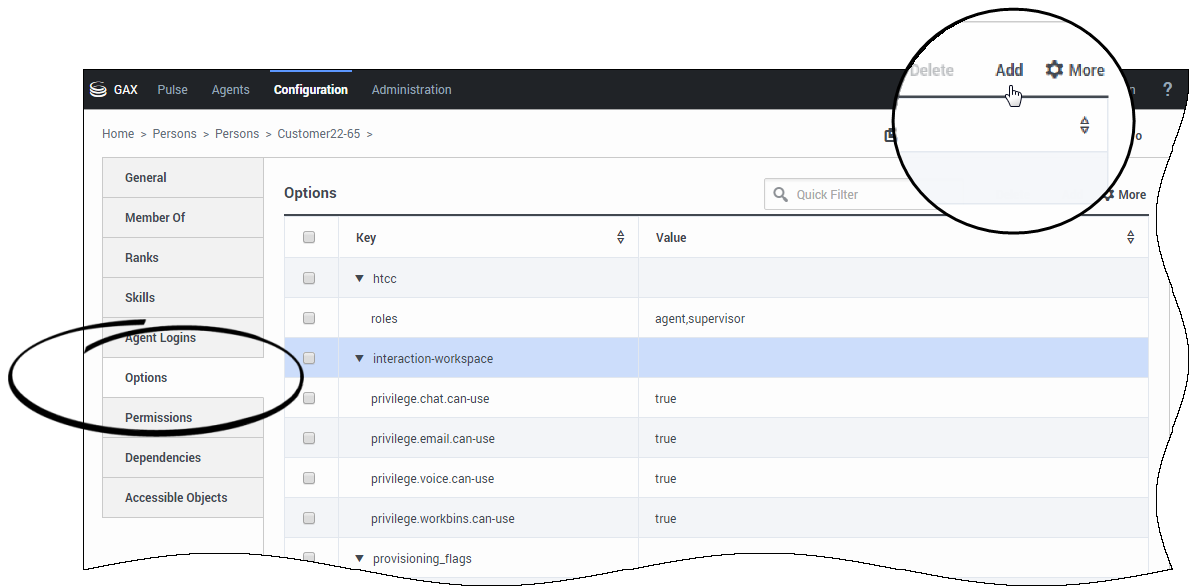
To do this, in Platform Administrator, open the properties for the Agent or Agent Group you want to modify and go to Options. Add a new entry and enter the details as follows:
- For the Section, enter any name of your choosing.
- For the Key, enter one of the options available for the section type (see Corporate Favorite Options by Type, below). For example, you could enter category, id, type, or display-name.
ImportantYou can only enter one key at a time, so you will need to repeat this process for each option. Make sure to use the same Section name so that the keys are grouped together.
- For the Value, enter an option that applies to the key. For example, an id key would have a value of the Agent's user ID. A type key would have a value such as AgentGroup, Agent, Skill, or RoutingPoint. If you are entering more than one value, separate them with semi-colons.
Display corporate favorites for select Person(s) or Agent Group(s) in Agent Desktop Team Communicator
After you have defined the section and applicable key/value pairs, create a new section to display the Corporate Favorites in Agent Desktop Team Communicator:
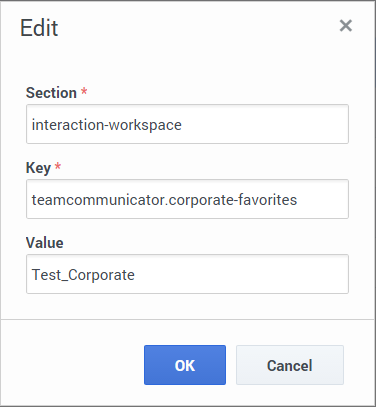
- For the Section, enter interaction-workspace.
- For the Key, enter teamcommunicator.corporate-favorites.
- For the Value, enter the name of the section(s) you want the favorites to apply to. If you are entering more than one value, separate them with semi-colons.
Security
Setup
To set this up, configure the following options in the [interaction-workspace] section:
- security.inactivity-timeout
- This option specifies how long (in minutes) an agent can be inactive (no mouse or keyboard activity) before Agent Desktop ends their session. The default value for this option is 0, which disables the inactivity timeout.
- security.inactivity-alert-dialog-before-timeout
- This option specifies how much advanced warning (in seconds) Agent Desktop will give to an agent who is about to have their session ended due to inactivity. The default setting is 30 seconds. (You must set this option to a value that is less than the value of security.inactivity-timeout.)
The changes for both of these options take effect as soon as the session is started or restarted.
Configuration Notes
- For each option, you must set the section name to interaction-workspace.
- You can set these customizations individually, on the Person object for each agent, or globally for each Agent group. Note that the group settings takes precedence over the individual setting.
- Whenever you add multiple values to an option, separate each value with a comma.
Update
To update an existing option, just click on it in Platform Administrator. The Edit window opens with all existing values filled out, and you can edit as you need to. For example, to add more favorites to your Corporate Favorites quick dial list.
Delete
To delete an existing option, you need to select the check box next to the option. This enables the Delete button in the toolbar. Once the button is enabled, you can click to remove the option. Note that there is no prompt — as soon as you click Delete, it's gone.
Finalize
When adding or changing an option, you always need to close out the change by taking one of these actions:
- Click Save to accept the changes and return to the object list.
- Click Apply to accept the changes and remain in the Options tab.
- Click Cancel to discard the changes.

