Getting started
Agent Desktop is your gateway for handling both inbound and outbound calls and Genesys Digital channels.
Now that you know what Agent Desktop is, you’re probably wondering how to use it. This Getting Started page will get you logged on and ready to take a call. Let’s get started.
Log in to Agent Desktop
To start Agent Desktop click its icon in Genesys Portal, or open a browser and go to the link for Agent Desktop that your supervisor gave you.
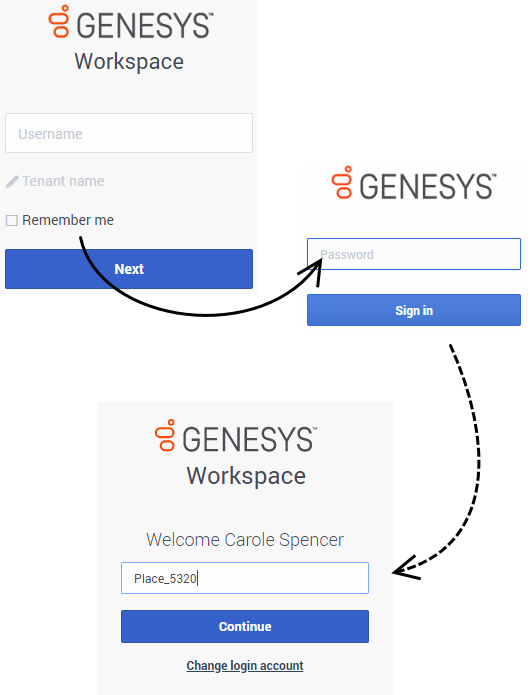
Log in with your username and password. You might also have to enter some additional information such as your tenant name.
In some environments you might also be required to enter your Place after your password is authenticated (see broken line in the graphic). If you do not know what to enter, contact your supervisor.
- You enter your password on a different login screen. Don't enter it in the Tenant field.
- Clicking Change login account takes you back to the main log in screen.
- Agent Desktop has a security feature that might be set up for your account that logs you out if you stop using Agent Desktop or your computer for a while. Agent Desktop first displays a message to warn you that you are going to be logged out. If Agent Desktop logs you out, just log back in again when you are ready to start using Agent Desktop.
- You may login only to a single Agent Desktop session at a time. You must log out of one session before logging into a new session.
- To log out of Agent Desktop, you must use the Exit option from the menu in the upper right-hand corner. You won't be able to log out if you have any active calls or Digital interactions.
Single Sign-On environments
You might work in an environment that uses Single Sign-On (SSO) identity authentication. If you do, your log in experience will be a little different. After entering your username in the application login screen, you will be taken to your company's authentication provider where you will enter your username and password. After that, you will no have to log in again until your authentication expires which is typically every eight hours. Using SSO means that once you log in to one application, you will not have to log in to any other applications that are also set up for SSO.
Remote and virtual desktop environments
You might work in an environment that uses Virtual Desktop Infrastructure (VDI, sometimes called VMware) to run Workspace. This means that when you start Workspace, it is displayed on your screen, but it is not actually running on your workstation, it is running on a remote machine.
In VDI environments, your administrator installed the Genesys Softphone on your workstation before you logged in, or, you were instructed to install it by clicking on an installation hyperlink in an email or other document.
When you start your workstation, the Genesys Softphone automatically launches and the Genesys Softphone icon is displayed in your system tray. Until you log in to Workspace, this icon looks like this: ![]() . After you launch Workspace and the Genesys Softphone is connected, the Genesys Softphone icon looks like this:
. After you launch Workspace and the Genesys Softphone is connected, the Genesys Softphone icon looks like this: ![]() .
.
Handling a system disconnection
Workspace is designed to handle system disconnections. If the server that directs interactions to you becomes disabled or disconnected for some reason Workspace automatically tries to connect you to a back up server so that you can keep serving your customers with minimal interruption. If a connection loss occurs you are informed right away by the Connection Lost message. Workspace immediately tries to reconnect you.
If Workspace cannot reconnect you, you must log in to the back up server when the Re-establish Connection log in window is displayed. Log in just like you do when you first log in at the start of your shift.
If you have pop-ups blocked in your browser, you might see a message asking you to enable pop-ups to see the log in window. You might be able to click the Open button in the Re-establish Connection window to open the log in window.
In the event that the back up server is not available, the Host Not Available message is displayed. Click Refresh to refresh your browser and log in to your company's system as soon as the server become available again.
What if the system is down when I log in?
For agents who are voice-only, if the system is down when you try to log in you will see the Connection Lost message right away. If Workspace is unable to connect immediately to the back up server, the Connection Failed window is displayed requesting that you log in again. You might have to keep trying until Workspace is able to connect to the server or the back up server.Change your status to Ready
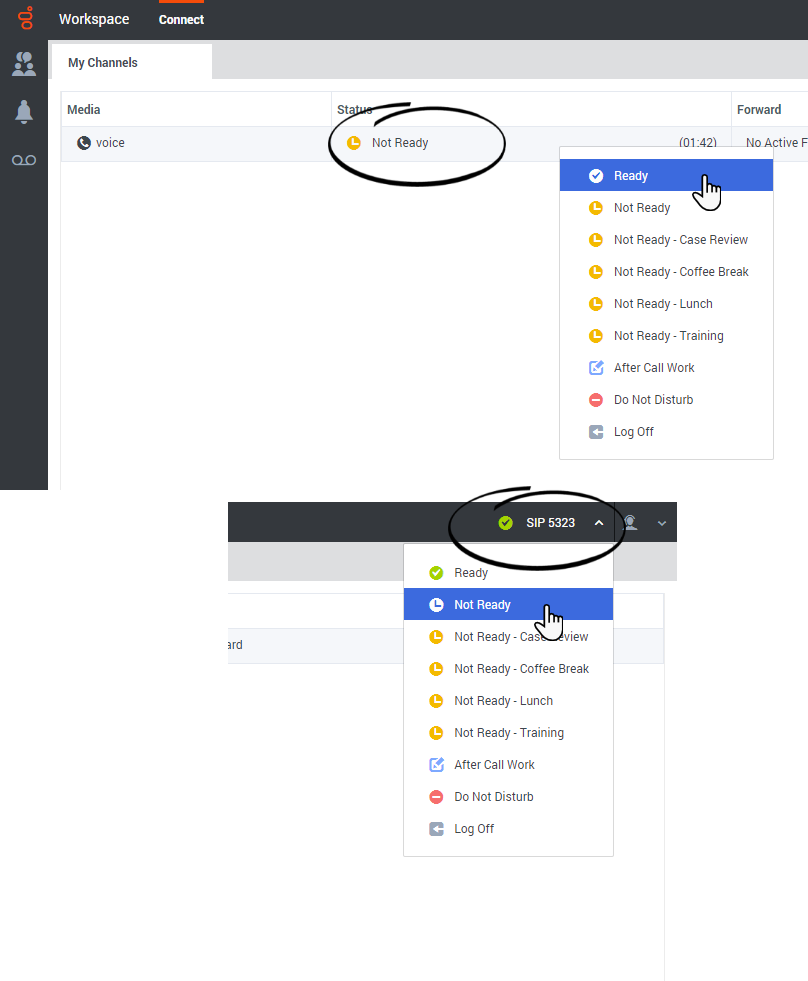
To receive calls, you must be in a Ready status (indicated by a green check mark beside your name).
If you need to change your status, click your name at the top right-hand corner of the screen and select Ready, or go to My Channels and toggle the voice channel or one or more of your Genesys Digital channels to Ready.
Watch the video for a short demonstration of changing your status. Note: This video show Agent Desktop in an environment that has many different media channels available, such voice, chat, and email. Don't worry if not all these channels are available in your environment.
What happens if not all channels are available when I log in?
Sometimes when you log in, one or more of the channels that you are assigned might not be available.
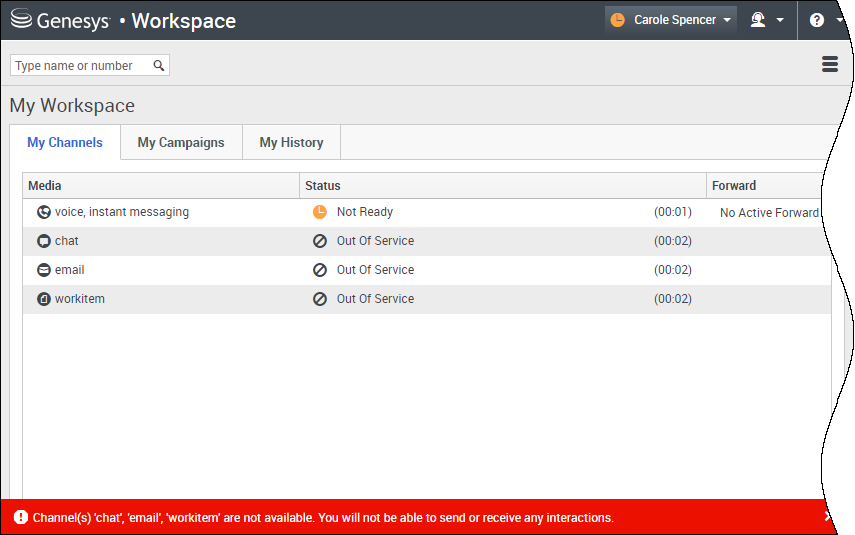
You will know that one or more channels are not available because you will see a warning message at the bottom of the Workspace window.
When this happens, you can still log in, but when you look at your My Channels tab, you'll see that one or more channels have the Out Of Service status. When a channel is out of service, you cannot log on or off on that channel and you cannot set your status.
When the channel becomes available again, a message will be displayed at the bottom of the Workspace window. You can use the My Channels tab to change your status on that channel.
Setting your status to Not Ready with a Reason
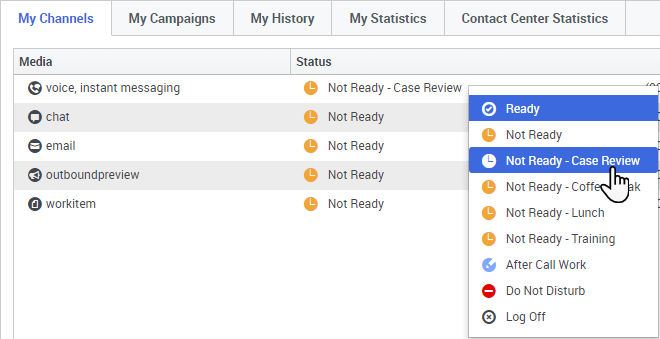
Sometimes you need to set your status on one or more channels to Not Ready so that you do not receive new interaction on that channel. You can choose to set the status to Not Ready or Not Ready with a reason. Your administrator sets up the Not Ready Reasons that are available to you from the Status drop-down menus.
Handle an inbound call
Make sure your phone device is connected and ready.
When a call arrives, you'll get a pop-up in the bottom right-hand corner of your screen. You might also hear a sound to alert you that a call has arrived.
Click Accept to connect the call. If you Reject the call, or ignore the pop-up, it goes to the next available agent.
Watch the video for a short demonstration of how to handle a voice call. Note: some of the features shown in this video might not be available in your contact center.
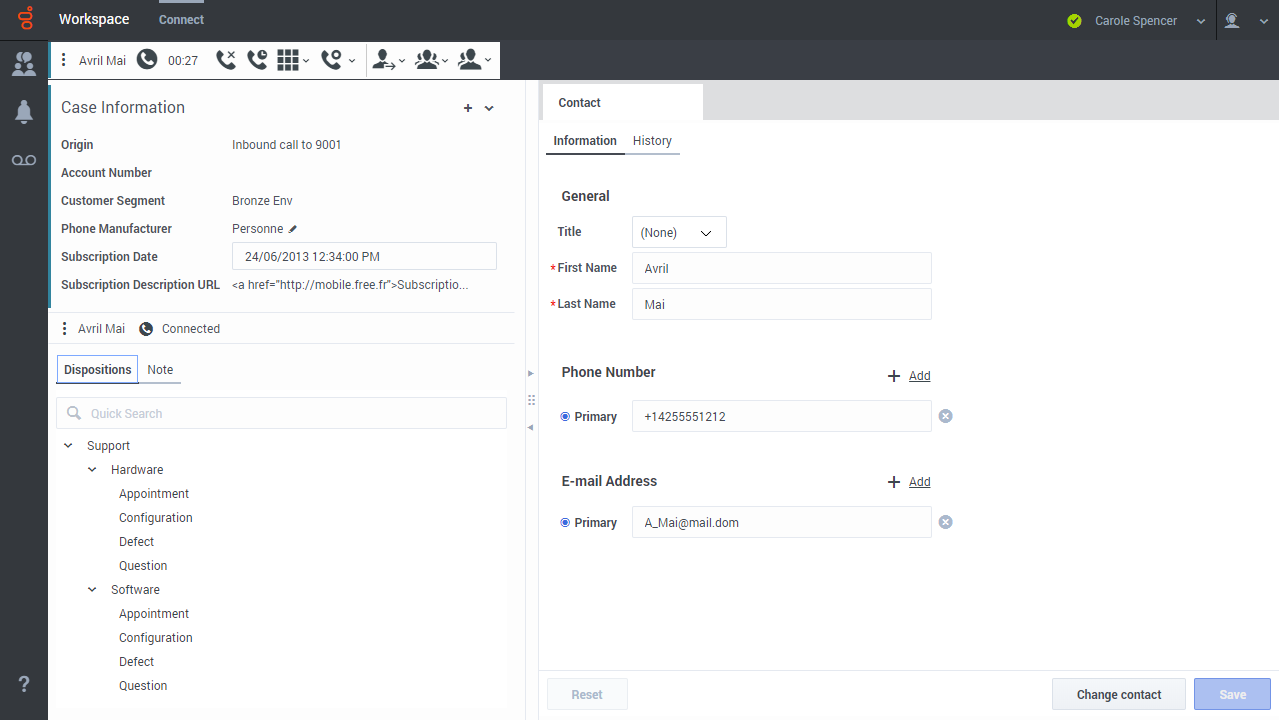
To get you started, here are some common call handling features:
![]() = Hold
= Hold
![]() = Resume
= Resume
![]() = Transfer
= Transfer
![]() = Hang up
= Hang up
![]() = Mark Done
= Mark Done

