Contents
Plan and Build a Category Tree
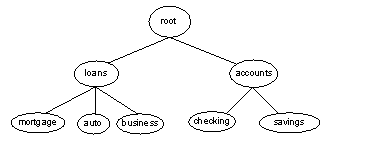
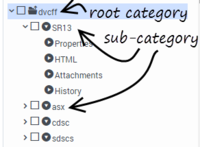
A Category Tree consists of one or more root categories, each of which can have subcategories under it. Standard Responses are nodes under categories or subcategories in the Category Tree.
Step 1: Planning
We'll start by planning your Category Tree. To make your Standard Responses useful, you need root categories and subcategories that make sense in your business.
For example, you might create root categories for business units such as Sales, Service, and Billing. Then create useful subcategories. You might want to separate out customer type, such as Platinum, Gold, and Silver customers; or maybe it would work better for you to separate types of products, such as Pet Food, Pet Toys, and Cleaning Supplies; or you might want to respond differently to customers in different locations.
- Make sure that all the Standard Responses you need will fit within the categories you create.
To read more about how category structures work, see [+] How Categories Structures Work
Step 2: Build your Category Tree
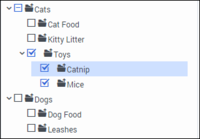
You've done your planning. Now let's make it happen. For our example, we are going to create two new root categories, Cats and Dogs, with subcategories, and sub-subcategories:
First we'll create our two root categories:
- Make sure you have selected the right Tenant and Contact Server.
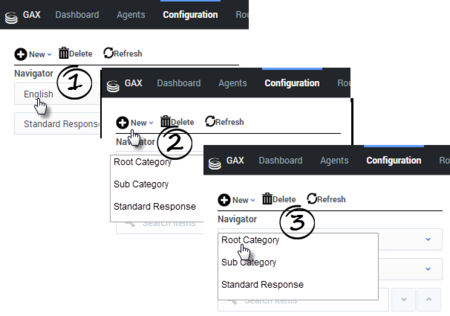
- Select the language. Note that in this release, the language choice does not affect how messages are handled.
- Select New > Root Category.
- Then enter the root category name, Cat, and click Save. Repeat the same process to create the Dog root category.
- Now create the subcategories. For each subcategory, highlight the correct root category and then follow the same process as above, but select New > Sub Category instead of New > Root Category.
Characters Allowed in Object Names
| Name | Character | Name | Character |
|---|---|---|---|
| Hyphen | - | Exclamation point | ! |
| Number sign, pound | # | Dollar sign | $ |
| Caret | ^ | Asterisk | * |
| Underscore | _ | Curly brackets | { } |
| Angle brackets | < > | Period, full stop | . |
Names can be no more than 64 characters long.
- To change a category name, select it, edit the name in the text box, and click Save.
- To delete a category, select it and then click Delete.
- Be careful to select only the category check boxes you want to delete!
- Deleting an upper-level category also deletes all the categories under it.
Search the Category Tree
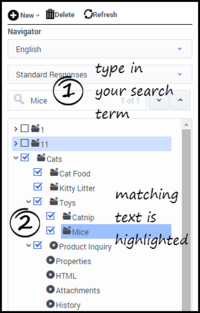
To locate a category, Standard Response, Field Code, or Screening Rule:
- Select the type of object you want to search for and then enter your search term.

