Standard responses
The Responses view enables you to access a database of prewritten standard responses for your interactions. You can insert a response as a reply into any outbound interaction, such as an email or a chat message, or you can read them to the contact during a phone interaction.
After inserting a response into an outbound interaction, such as an email or a chat message, you can modify the contents of the text.
Show video: Adding a Standard Response to an outgoing email:
Contents
Using the Responses View
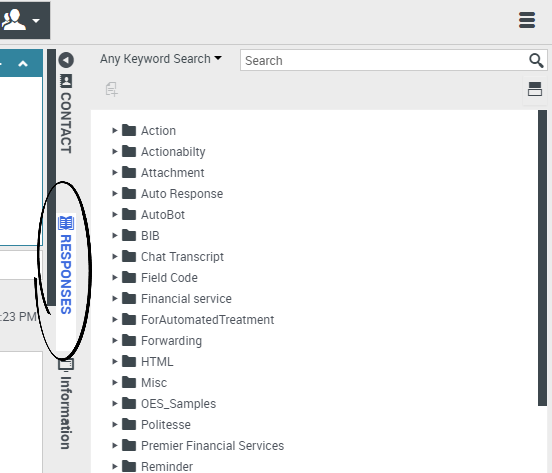
To access the Responses view, select the vertical RESPONSES button on the active-interaction window.
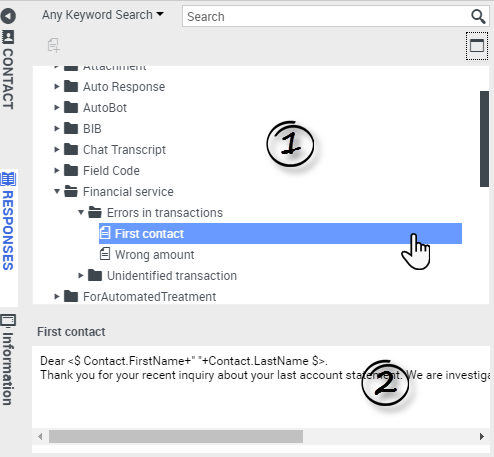
The Responses view comprises two main areas: the Responses Explorer folder view and the response display area. You can find responses in one of two ways:
- Browse using the Responses Explorer folder view
- Search the responses database by typing in the Search and Filter field.
Responses Explorer
The Responses Explorer contains a tree view of folders (standard-response categories) and pages (standard-response documents). You can:
- Select a response in the explorer area (1) to view its contents (2).
- Navigate the responses folders and documents by selecting folders to open or close them and selecting documents to select them.
- Insert standard-response text into the current interaction at the insertion point by selecting a response document and then selecting Insert Standard Response Text
 .
. - Show and hide the responses details area by selecting Show Detail/Hide Detail
 .
. - View the contents of the selected response document in the responses details area.
- Copy content from the responses details area and paste it into the message area of your email or chat interaction. Standard responses use "tokens" (such as <$ Contact.FullName $>) that replace a code with specific text. For instance, Dear <$ Contact.FullName $> becomes Dear John Smith in the email. If you copy and paste token code (such as <$ Contact.FullName $>) into your draft email, the replacement happens only after you send the email. To see the replacement text before sending, you must click Insert Standard Response Text.
Search and Filter
The Search and Filter area enables you to specify keywords for which to search in your company's Standard Response Library. It has the following features:
- Search field—Enter the keyword for which you want to search, and click the magnifying-glass icon to initiate the search.
- Search type—A drop-down list that enables you to search using one of the following strategies:
- Any Keyword Search—Find all responses that contain at least one of the specified keywords.
- All Keyword Search—Find all responses that contain all of the specified keywords.
- Exact Text Search—Find all responses that contain the specified keywords in the order in which they are specified.


