Graphical User Interface
Also known as a GUI. A program interface that takes advantage of the computer’s graphics capabilities to make the program easier to use.
Glossary
Genesys Administrator Extension
Also known as GAX, Genesys Administrator Extension is a web-based User Interaction Layer component that provides user-friendly interfaces to help users perform complex operations while at the same time preventing user error. GAX provides an interface to the Configuration Layer, Management Layer, and other Genesys solutions.
Glossary
Contents
Using Genesys Info Mart Manager
The Genesys Info Mart Manager (GIM Manager) provides an interface that you can use to manage Genesys Info Mart jobs.
GIM Manager provides the following views to monitor and manage jobs:
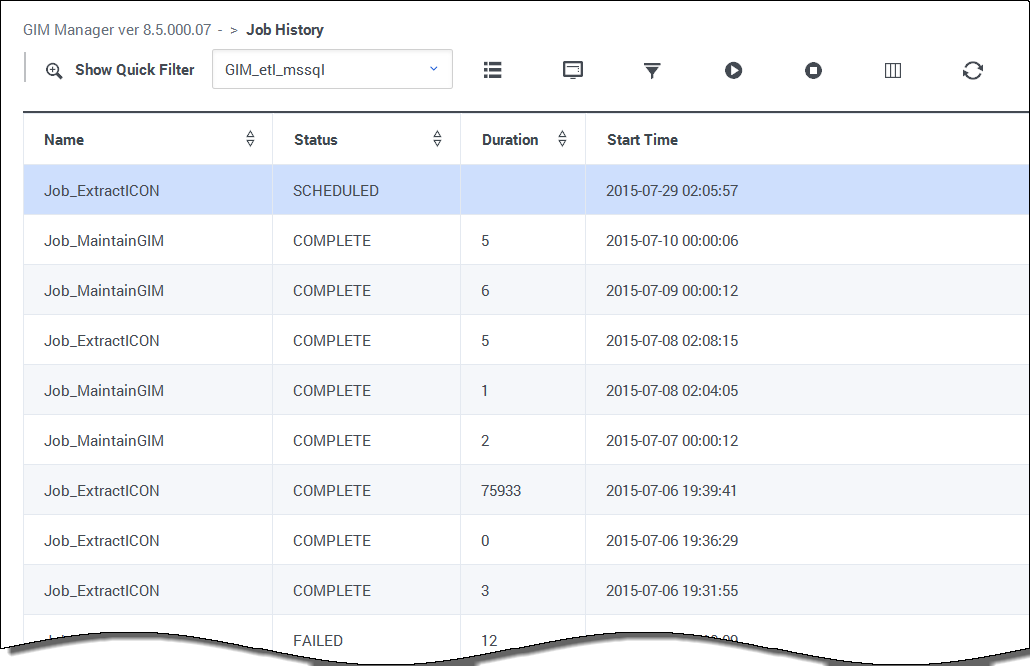
- Job History view, where you can view detailed historical information about jobs.
- Displays the current job execution status.
- Displays a history of job execution, such as start time, stop time, duration, and final status, and displays detailed information about any delays in processing jobs.
- Enables you to filter the jobs based on time, status, and other factors.
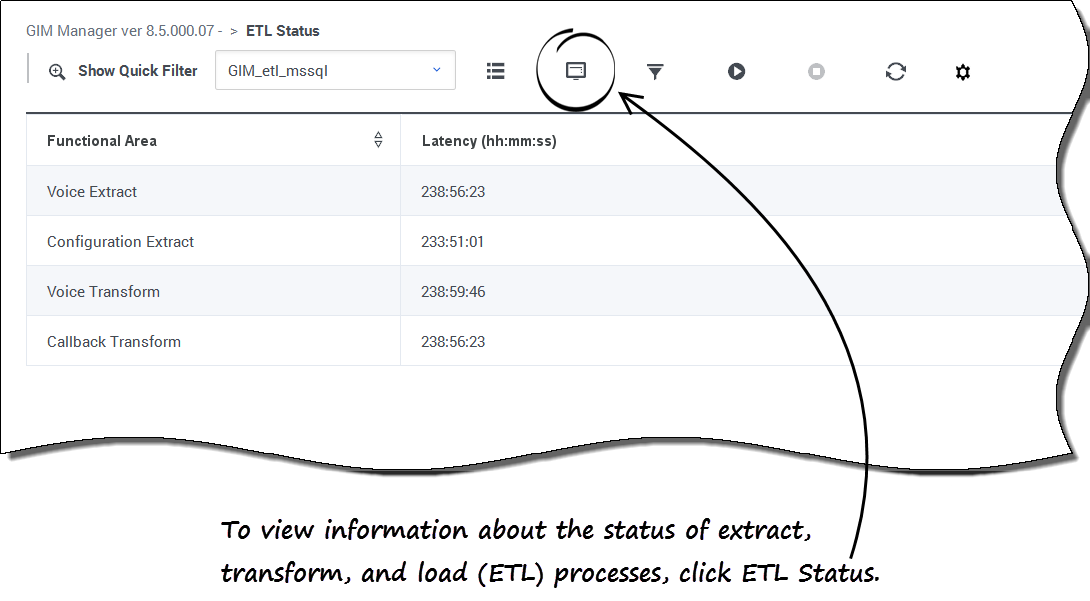
- ETL Status view, which displays information about latency for each functional area.
The following subsections describe the mechanics of using the GUI. For information about using Genesys Info Mart Manager to manage jobs, see Managing Jobs with Genesys Info Mart Manager.
Accessing Genesys Info Mart Manager
The following brief explanation partially duplicates information from the Genesys Info Mart Deployment Guide. For more detailed instructions about accessing Genesys Info Mart Manager, see the Post-Installation Activities in the Deployment Guide.
[+] Expand: Prerequisites: Before you can access Genesys Info Mart ManagerTo access Genesys Info Mart Manager, use a web browser to log in to GAX, and select Administration > GIM Manager.
The GIM Manager page displays the status of the Genesys Info Mart ETL jobs. If there is more than one Genesys Info Mart Server in your deployment, use the drop-down list box to choose a server to manage.
How do I view job history?
To view detailed information about jobs, click Job History. You can customize and filter the display:
To Control What Information is Displayed About Each Job
- To sort the data in the list view, click the column headings. For example, to sort by duration, click the Duration column heading. Click again to sort in reverse order.
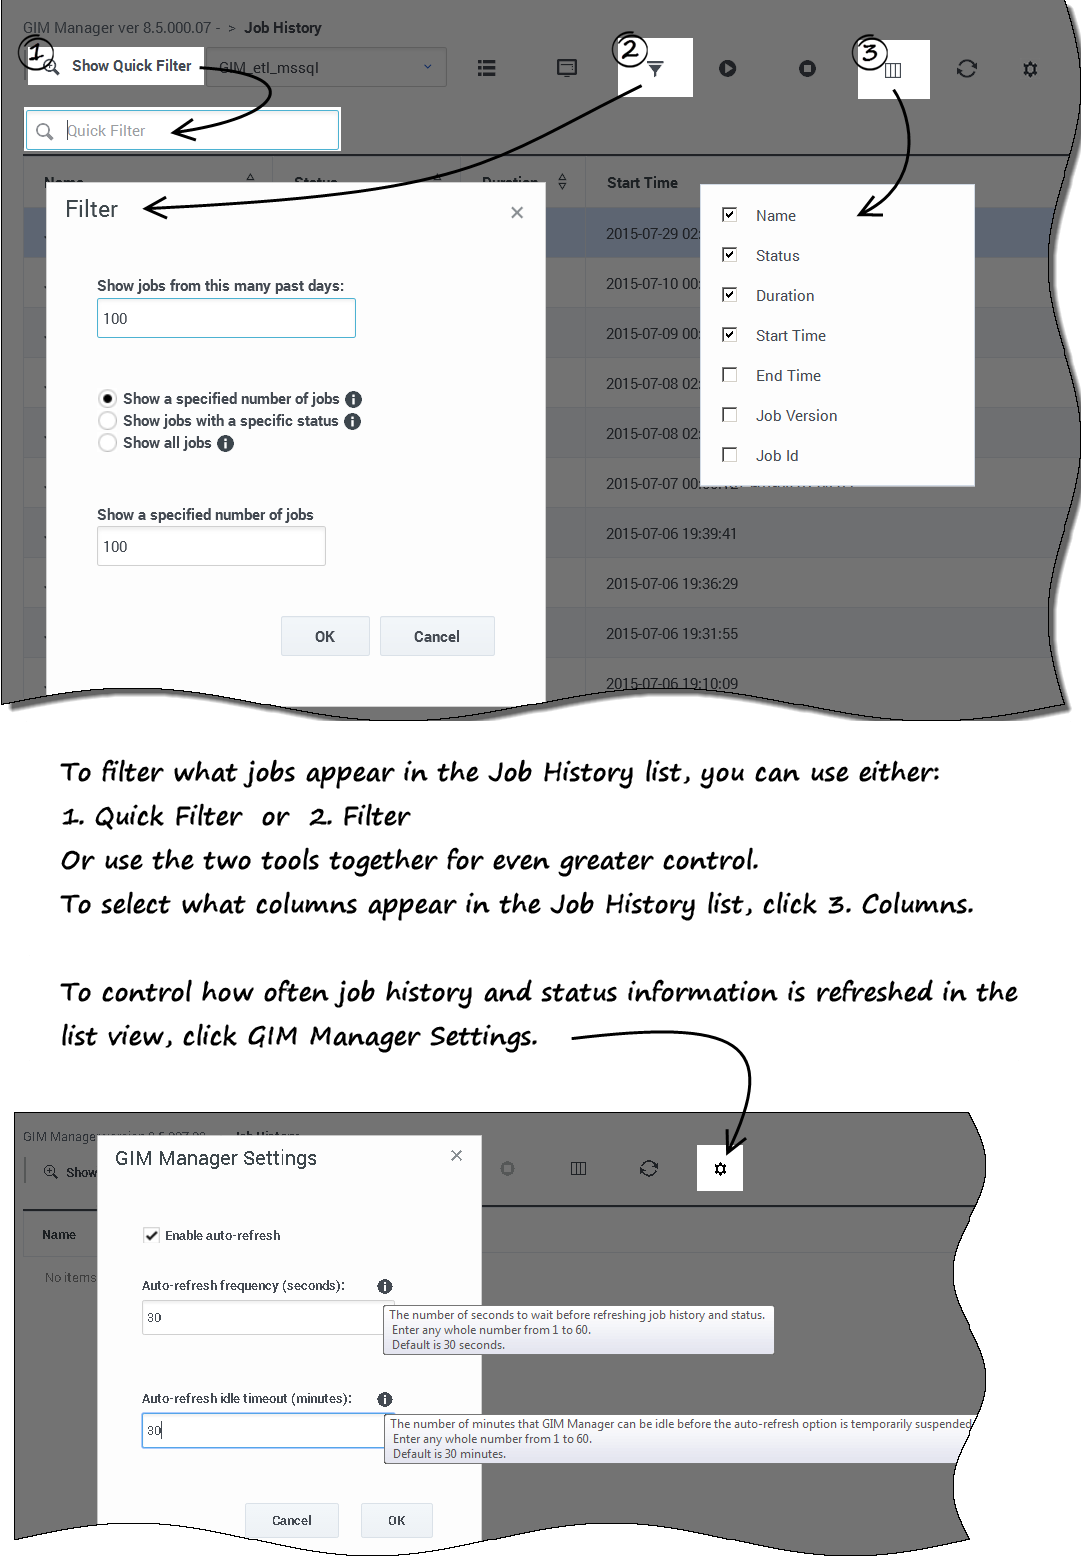
- To choose what columns appear in the list view, click Select Columns. In addition to the default columns, you can, for example, add a column to show the End Time, Job Version, or Job ID.
To Refresh the Data in the List View
In Genesys Info Mart Manager 8.5.007 and later, Genesys Info Mart Manager automatically refreshes the data in the list view. To enable, disable, or configure this feature, click GIM Manager Settings. In the GIM Manager Settings dialog, you can configure the following options:
- Enable auto-refresh—Select this option to enable auto-refresh (enabled by default).
- Auto-refresh frequency—Enter the number of seconds Genesys Info Mart Manager should wait before refreshing job history and status information. Enter any whole number between 1 and 60; the default is 30 seconds.
- Auto-refresh idle timeout—Enter the number of minutes that Genesys Info Mart Manager can be idle before the auto-refresh option is temporarily suspended. Enter any whole number between 1 and 60; the default is 30 minutes.
If Genesys Info Mart Manager is inactive for a period of time, the auto-refresh option is temporarily suspended. Click Refresh List to resume auto-refresh. You can manually refresh data at any time by clicking Refresh List.
To Control (filter) What Jobs Appear in the Job History List View
Genesys Info Mart Manager offers two filtering tools: the Quick Filter filters the jobs already listed in the Genesys Info Mart Manager view, while the Filter dialog retrieves fresh, filtered data from the Genesys Info Mart Server:
- Click Show Quick Filter to display the Quick Filter field. In the Quick Filter field, type one or more characters. As you type, the list of jobs automatically updates to show only those jobs that contain the text you type. This filter checks all visible columns, so you can easily filter by job name, status, duration, job ID, or start/end times. Often a few characters is enough to usefully filter the view; for example, type Ext to show only JobExtractICON jobs.
- Click Filter to open the Filter dialog box. On the Filter dialog box, you can enter a value in the Show jobs from this many past days field, which controls how many days' worth of data is displayed. This value works in parallel with any one of the following three filtering options:
- Show a specified number of jobs: Enter the maximum number of jobs to display. For example, enter 10 to display 10 jobs with the most recent start times.
- Show jobs with a specified status: Select an option from the list to display only jobs that have the selected status. For example, select Running to display only jobs that are currently running.
- Show all jobs: Show all jobs from the specified past number of days.
For example, to view all of the jobs that failed in the last week, enter 7 in the Show jobs from this many past days field, and select FAILED from the Show jobs with a specified status list.
TipSelections you make in the Filter dialog box persist between sessions. Also, the Quick Filter and Filter features interact with each other. Thus, if you set options in the Filter dialog box, you can further refine the filter by entering a value in the Quick Filter field.
How do I start or stop jobs?
You can easily start and stop jobs using Genesys Info Mart Manager:
To Start a Job
To start a Genesys Info Mart job:
- Click Run Job to open the Run Job dialog box.
- On the Run Job dialog box, select a job to run. Job_AggregateGIM can optionally accept parameters using the Job Parameters field; for all other jobs, leave the Job Parameters field blank.
- Click OK to start the job.
Note that the job may not run immediately (for example, the job cannot run while other jobs are running). In this case, the status will change to Scheduled, and the job will run as soon as conditions permit.
To Stop a Job
To stop a currently running job, or cancel the Run Job command for a job that has not yet started (in other words, a job that has a status of Scheduled), first click Job History and select the job, then click Stop Job.
The data in the list view is automatically refreshed when you stop a job by clicking Stop Job.To Re-aggregate Data
Run Job_AggregateGIM, and in the Job Parameters field, enter:
-insertPendingAgg <AGR_SET>:<START>:<END>
where:
- <AGR_SET> indicates what set to aggregate (ALLSETS, or an aggregate set name). Aggregate set name is formatted as follows: <HIERARCHY_NAME>-<AGG_LEVEL>[.Flavor])
where:- <HIERARCHY_NAME> is the name of the hierarchy to be aggregated.
- <AGG_LEVEL> is the aggregation level (SUBHOUR, HOUR, DAY, MONTH, QUARTER, YEAR).
- [.Flavor] indicates what data to include (Online or Offline).
- <START> is a value (YYYY-MM-DD) from the DATE_TIME table that indicates the beginning of the reporting interval.
- <END> is a value (YYYY-MM-DD) from the DATE_TIME table that indicates the end of the reporting interval.
Re-aggregation is possible only if Job_AggregateGIM is already running. As a result, if you attempt to pass re-aggregation job parameters when Job_AggregateGIM is not running, Genesys Info Mart simply starts aggregation, ignoring the job parameters. In this case, you can re-aggregate by issuing the command to run the job, with the re-aggregation parameters, a second time.
How do I view ETL status?
To view information about latency for each functional area, click ETL Status.
Latency, which is expressed in the hh:mm:ss format, reflects the time elapsed since the occurrence of the last contact center event for which reporting data has been successfully stored in the Info Mart database. Latency of a few minutes indicates a typical value in a normal operational environment. Immediately after the maintenance job runs, you may notice that latency values are higher than what you usually see for your environment. If there is no activity for a particular data domain over a number of ETL cycles, the latency indicated for that type of data will noticeably increase.
In Genesys Info Mart Manager 8.5.004 and earlier, the data displayed represents the status of jobs in the most recent cycle. To display the most recent data at any time, click Refresh List.
How do I see the Genesys Info Mart Manager Help in another language?
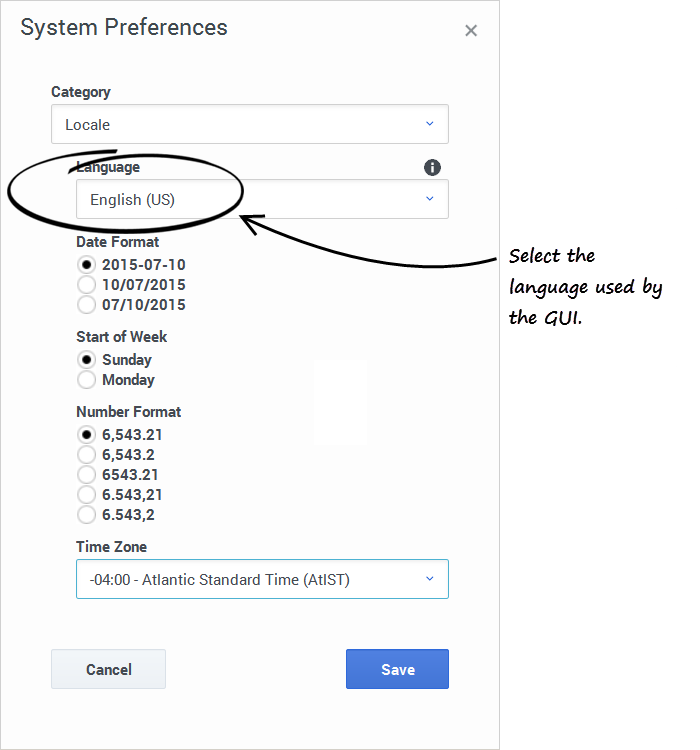
You can select the language used by the GIM Manager GUI. Select the language in the Preferences menu (click your user name in the menu bar, and choose System Preferences > Locale or User Preferences > Locale). If the language you want is not listed, see Installing Language Packs for information about how to install localization toolkits for the GIM Manager GUI.
GIM Manager uses the time zone setting, date format, and number format that you select in Genesys Administrator Extension preferences.


