Installing the Workspace Desktop Edition Plugin
Installing the Plugin for Workspace Desktop Edition
Agents can use the Knowledge Center Plugin for Workspace Desktop Edition (WDE) to access knowledge-related information right from their desktop. For example, if a customer asks a question using a chat widget and the corresponding interaction is routed to an agent, Knowledge Center can execute a pre-populated search based on data attached to the new interaction, as well as displaying the customer's search history and providing the agent with full access to the knowledge base access. And if the customer has not authorized during their search, the agent can link their session history to that customer's ID to access their full history while working with the interaction. To use this plugin complete the procedures below, in order.
Installing the Plugin for Workspace Desktop Edition
Prerequisites
Workspace Desktop Edition must be installed and configured to work with voice or media interactions.
Start
- In your installation package, locate and double-click the setup.exe file. The Install Shield opens the welcome screen.
- Click Next. The Select Installed Application screen appears.
- Select the installed Workspace Desktop Edition Application for which you want to install the plugin. The Application Properties area shows the Type, Host, Working Directory, Command Line executable, and Command Line Arguments information previously entered in the Server Info and Start Info tabs of the selected Application object.
- Click Next. The Ready to Install screen appears.
- Click Install. The Genesys Installation Wizard indicates it is performing the requested operation for Backend Server. When through, the Installation Complete screen appears.
- Click Finish to complete your installation.
- Inspect the directory tree of your system to make sure that the following files have been installed in the location that you intended:
- GWEInstallationFolder\Genesyslab.Desktop.Modules.Knowledge.dll
- GWEInstallationFolder\Genesyslab.Desktop.Modules.Knowledge.module-config
- GWEInstallationFolder\Genesyslab.Desktop.Modules.Knowledge.pdb
- GWEInstallationFolder\Newtonsoft.Json.dll
- GWEInstallationFolder\RestSharp.dll
- GWEInstallationFolder\System.Net.Http.Formatting.dll
- GWEInstallationFolder\Language\Genesyslab.Desktop.Modules.Knowledge.en-US.xml
End
Configuring the WDE Application to work with the WDE Plugin
Add the Knowledge Center Cluster to Your WDE Connections
- If your Workspace Desktop Edition application form is not open in Genesys Administrator, navigate to Provisioning > Environment > Applications. Select the application defined for the Workspace Desktop Edition and click Edit....
- In the Connections section of the Configuration tab, click Add. The Browse for applications panel opens. Select the Knowledge Center Cluster application, then click OK.
Add Knowledge Center Options to Your WDE Application
To use the Knowledge Center Plugin for WDE, you need to add some options to your WDE application so that it can gather knowledge-related information from incoming interactions. You can add these options to the the interaction-workspace section of the WDE application.
Start
- Import the template with the additional options:
- Open Genesys Administrator and navigate to Provisioning > Environment > Application Templates.
- In the Tasks panel, click Upload Template.
- In the Click 'Add' and choose application template (APD) file to import window, click Add.
- Choose the application template (APD) file from the import window and click Add.
- Browse to the Knowledge_Center_WDE_Plugin_852.apd file available in the templates directory of your installation CD. The New Application Template panel opens.
- Click Save and Close
- Open the Options tab of the uploaded application and review the new options.
- Navigate to Provisioning > Environment > Applications. Select the application defined for Workspace Desktop Edition and click Edit....
- Open the Options tab.
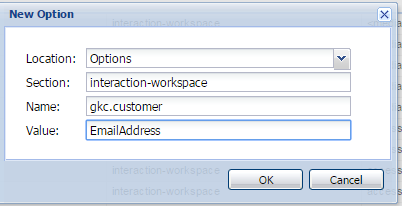
- Add the plugin options to the interaction-workspace section using the New button.
End
The Knowledge Center Plugin for WDE uses the following additional options:
| Section | Option | Default value | Allowed values | Description | Takes effect |
|---|---|---|---|---|---|
| interaction-workspace | gkc.proactive-search | true | true false |
Enables or disables Proactive Knowledge in a Chat feature. For additional details, see the Advanced features page. | Next agent session |
| interaction-workspace | gkc.question | gks_question | any valid user data key | Interaction user data key that contains search query that will be pre-populated in Desktop | Next agent session |
| interaction-workspace | gkc.kbid | gks_kbid | any valid user data key | Interaction user data key containing the knowledge base Id to search knowledge in | Next agent session |
| interaction-workspace | gkc.customer | EmailAddress | any valid user data key | Interaction user data key that contains customer identification (for example email address of the customer) | Next agent session |
| interaction-workspace | gkc.session | gks_session | any valid user data key | User data key that contains knowledge session Id associated with the interaction | Next agent session |
| interaction-workspace | gkc.language | before 8.5.303: Language since 8.5.303: gks_lang, Language |
before 8.5.303: any valid user data key after 8.5.303: comma separated list of valid user data keys |
Interaction user data key that contains language of interaction Note: since 8.5.303 this option can contain comma-separated ordered list of keys. for example "gks_lang, Language"; in case of several keys in attached data - first key in list from option will be used |
Next agent session |
| interaction-workspace | gkc.country | Country | any valid user data key | Interaction user data key that contains region of interaction (used for multi-regional languages, for example en_US, en_UK) | Next agent session |
| interaction-workspace | gkc.spellcheck | false | true false |
Enables or disables spell check correction of the searched query | Next agent session |
| interaction-workspace | gkc.can-upvote-on-copy-content | true | true, false | Enables or disables to vote automatic positive feedback after clicking the copy content button. Important Available from 8.5.304.33 |
Next agent session |
Providing Knowledge Center Access to Agents
Genesys Knowledge Center supports the following privilege in order to restrict Agent access:
- Knowledge.WORKER — Enables access to the Genesys Knowledge Center tab in WDE
- Knowledge.AUTHOR — Enables ability to suggest new knowledge to knowledge bases.
To configure the appropriate role for an agent:
Start
- Go to Provisioning > Environment > Application Templates.
- Select the application template defined for Workspace Desktop Edition and click Edit....
- Click Import Metadata.
- Click Add and select the Knowledge_Center_WDE_Plugin_852.xml file.
- Click Open.
- Information from the metadata file will be added to the template and the appropriate privilege will be added into the framework.
- Save and Close.
- Go to Provisioning > Accounts > Roles.
- In the taskbar click New to create a new object.
- Set the name of the role in the General section.
- Go to the Role Privileges tab, and select the set of roles for Genesys Knowledge Center.
- Open the WDE Knowledge Center Plugin privileges list and select the Genesys Knowledge Center Privileges section.
- Create the appropriate privileges as allowed.
- Go back to the Configuration tab.
- Add the appropriate Agent to the Members section by clicking the Add button.
- Save and Close.
End
Installing the WDE Language Pack
Prerequisites:
- Must have Genesys Knowledge Center 8.5.3 or higher installed
- Must have Workspace Desktop Edition 8.5.1 or higher installed
- Must have Knowledge Center Workspace Desktop Edition Plugin 8.5.3 or higher installed
Start
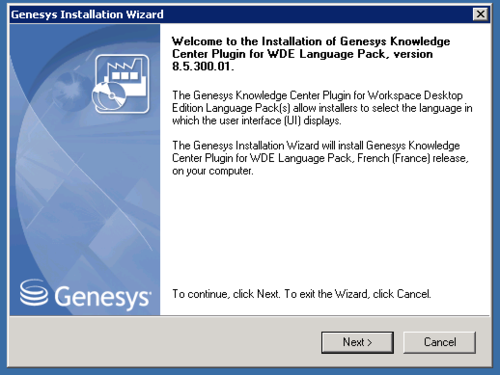
- In your Language Pack installation package, locate and double-click the setup.exe file. The Install Shield opens the welcome screen.
- Click Next. The Select Installed Application screen appears.
- Select the installed Knowledge Center Server Application for which you want to install the plugin. The Application Properties area shows the Type, Host, Working Directory, Command Line executable, and Command Line Arguments information previously entered in the Server Info and Start Info tabs of the selected Application object.
- Click Next. The Ready to Install screen appears.
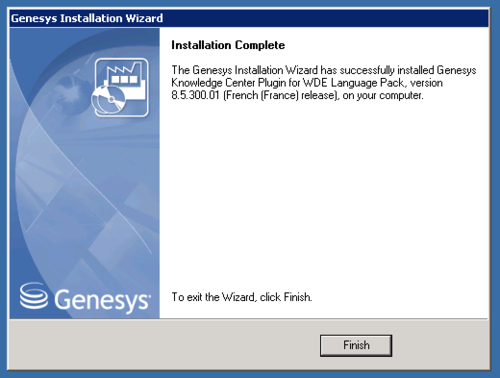
- Click Install. The Genesys Installation Wizard indicates it is performing the requested operation for Backend Server. When through, the Installation Complete screen appears.
- Click Finish to complete your installation.
- Inspect the directory tree of your system to make sure that the following files, based on the language of your language pack, have been installed in the location that you intended:
- <KnowledgeCenterServer_InstallationFolder>\server\resources\wde_de.properties
- <KnowledgeCenterServer_InstallationFolder>\server\resources\wde_fr.properties
- <KnowledgeCenterServer_InstallationFolder>\server\resources\wde_es.properties
- <KnowledgeCenterServer_InstallationFolder>\server\resources\wde_pt.properties
End


