Installing IIS on the Web Server or Interaction Receiver Server
On Windows Server 2008, you can install and configure the Internet Information Services (IIS) in the Server Manager.
To install and configure the IIS component:
- From the Start menu, select All Programs > Administrative Tools > Server Manager. The Server Manager opens.
- On the left side of the window, select Roles.
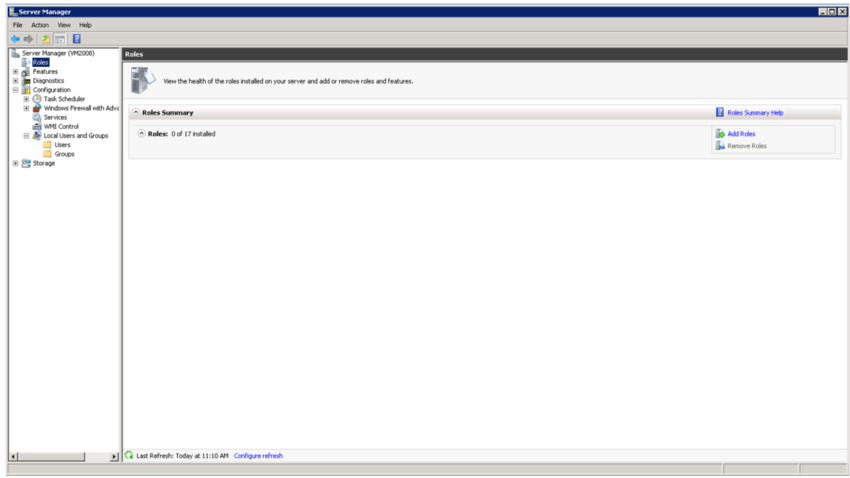
- On the right side of the screen, select Add Roles.
The Add Roles Wizard opens.
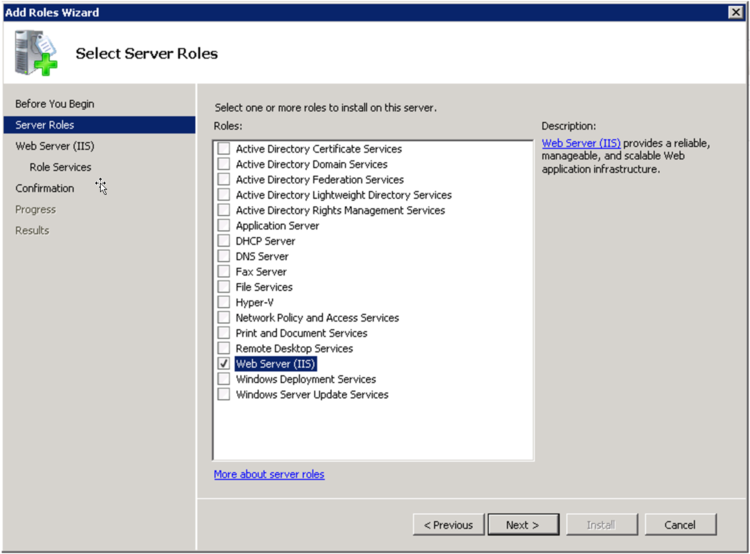
- From the list of roles, select Web Server (IIS), and then select Next. An Introduction to the Web Server is displayed.
- Select Next. The Role Services screen opens.
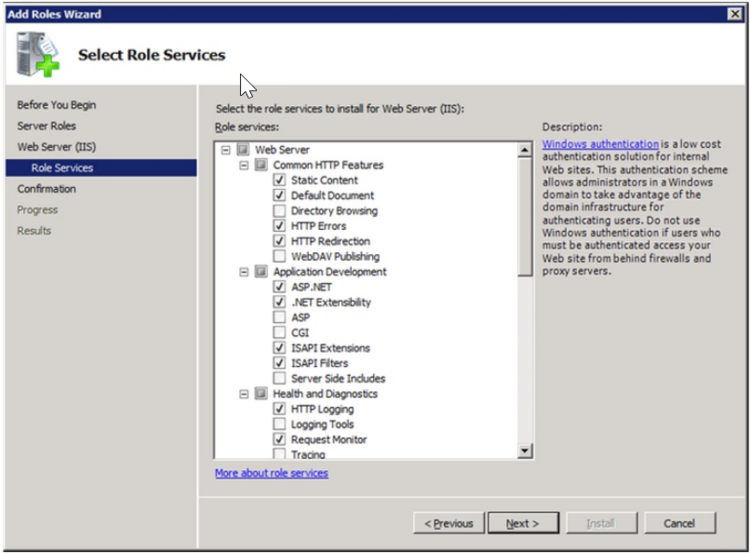
- Under Role Services, make sure the following services are selected:
- Under Common HTTP Features:
- Static Content
- Default Document
- HTTP Errors
- HTTP Redirection
- Under Application Development:
- ASP.NET
- ISAPI Extensions
- ISAPI Filters
ImportantWhen you select ASP.NET, a window pops up, asking you to confirm that you want to "Add role services required for ASP.NET." Select Add required role services. - Under Security:
- Windows Authentication
- Under IIS 6 Management Compatibility:
- IIS 6 WMI Compatibility
- IIS 6 Metabase Compatibility
- Under Common HTTP Features:
- Click Next. A Confirm Installation Selections screen opens.
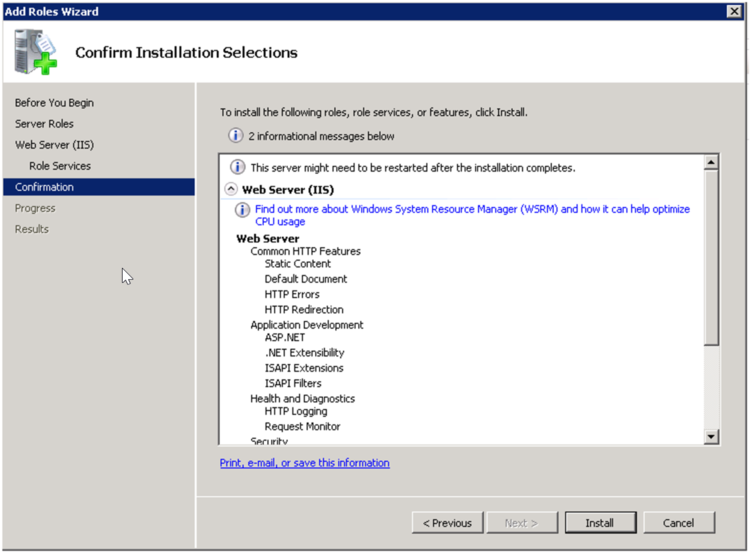
- Select Install. The installation process begins, and the Installation Progress screen is displayed. When the installation is completed, an Installation Results screen is displayed.
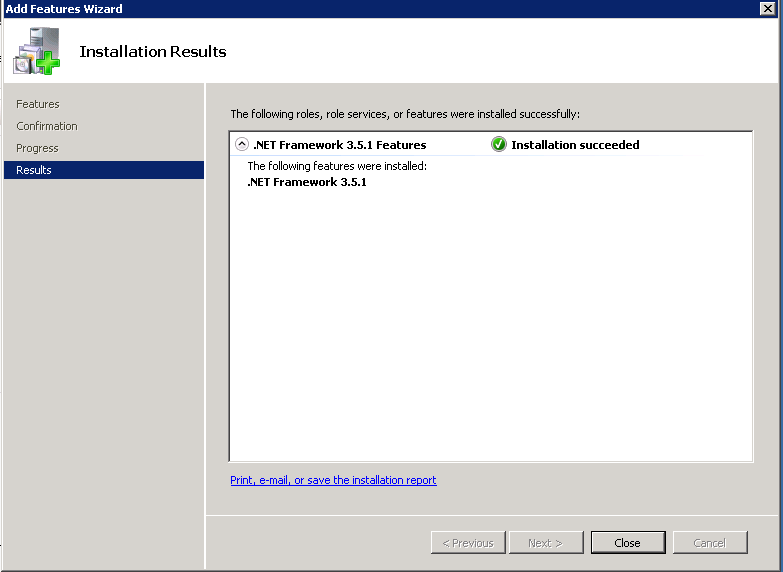
- Click Close. The Add Roles Wizard closes, and the Server Manager lists the Web Server (IIS) role as installed.
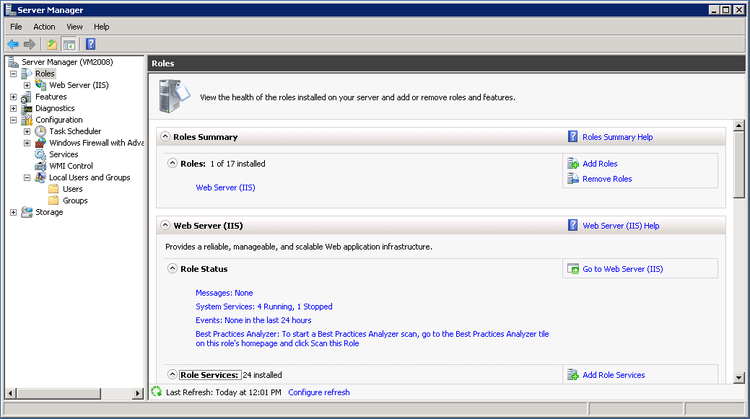
- From the Server Manager, in the left pane, select Features, and then, in the right pane, select Add Features. The Add Features Wizard opens.
- Select Add required role services. The window closes.
- Click Close. The Add Features Wizard closes, and the Server Manager lists the features you selected as installed.
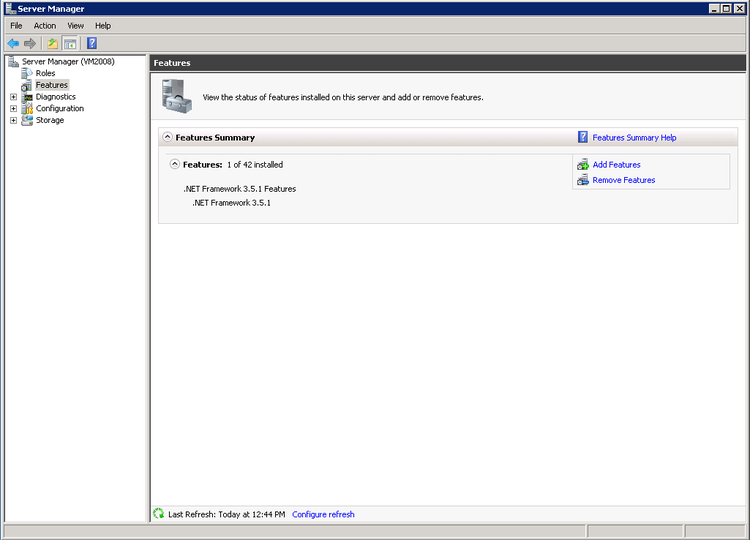
Click Next three times, and then click Install. The installation process begins, and the Installation Progress screen is displayed. When the installation is completed, the Installation Results screen is displayed.

On Windows Server 2012, you can install and configure the Internet Information Services (IIS), version 8, in the Server Manager.
To install and configure the Internet Information Services (IIS) component:
- Open the Server Manager.
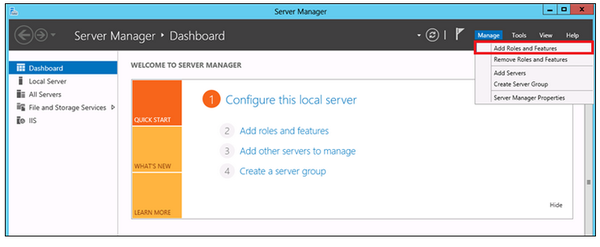
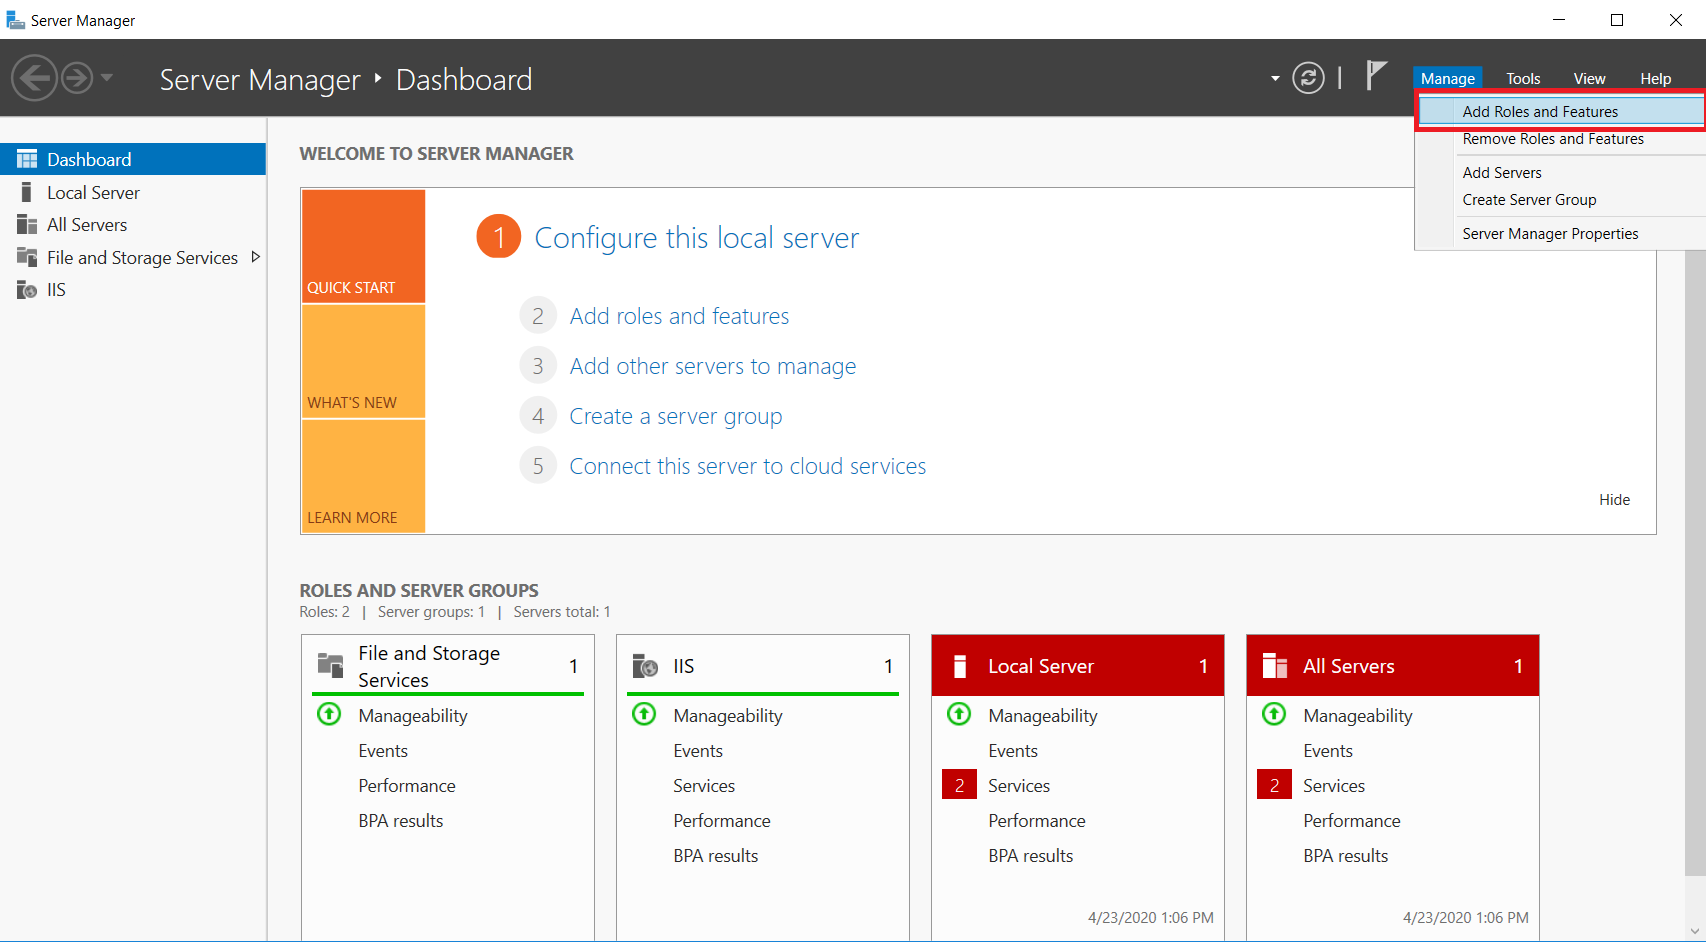
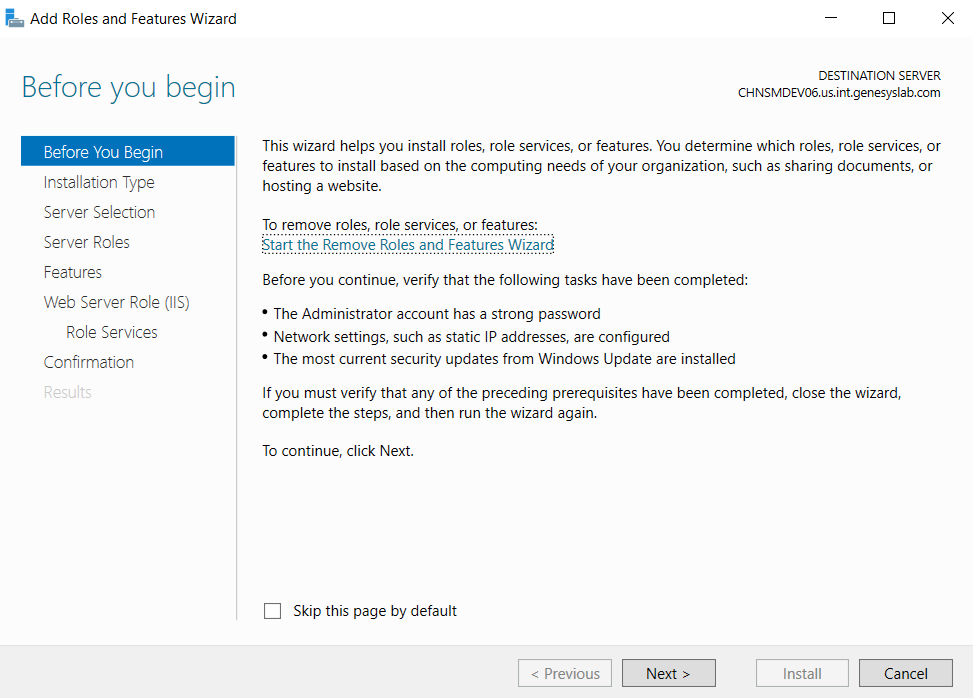
- From the upper-right side of the window, in the Manage menu, select Add Roles and Features. The Add Roles and Features Wizard opens.
- Click Next. The Installation Type screen opens.
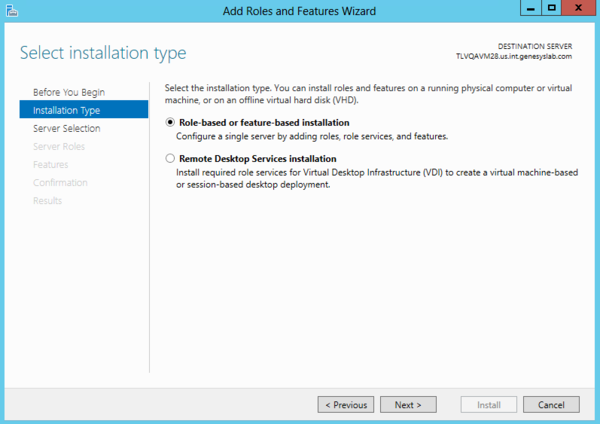
- Select Role-based or feature-based installation, and click Next. The Server Selection screen opens.
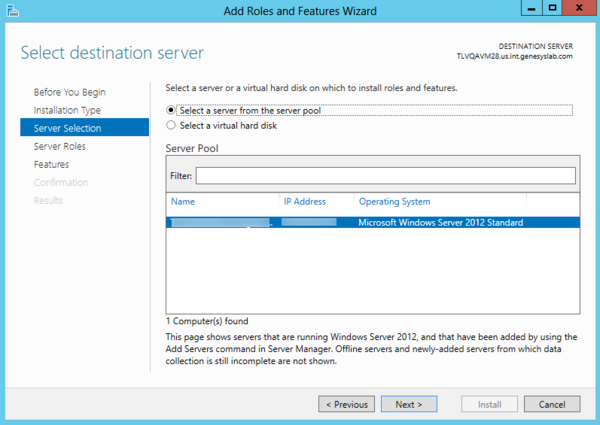
- Verify that the Select a server from the server pool is selected and select the server on which you will be installing the SpeechMiner web server. Click Next. The Server Roles screen opens.
- From the list of roles, select Web Server (IIS). The following window pops up.
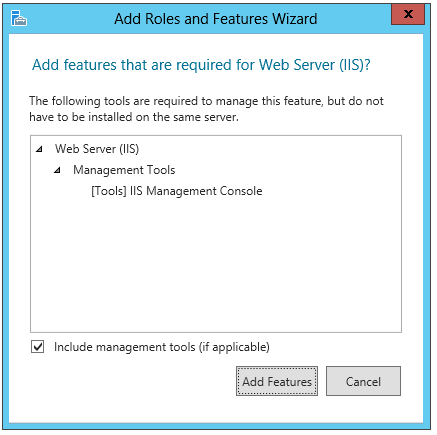
- Select the Include management tools (if applicable) checkbox and click Add Features. The window closes.
- Select Next. The Role Services screen opens.
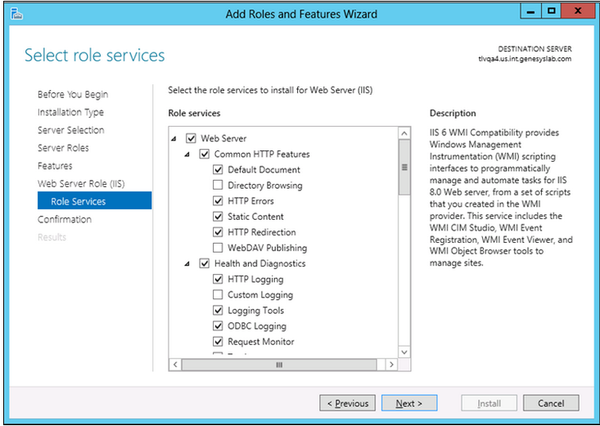
- From the list of Role services, make sure the following services are selected:
- Under Common HTTP Features:
- Static Content
- Default Document
- HTTP Errors
- HTTP Redirection
- Under Application Development:
- Application Initialization
- ASP.NET
- ASP.NET Extensibility
- ISAPI Extensions
- ISAPI Filters
- Under Security:
- Windows Authentication
- Under IIS Management tools:
- IIS 6 Management Compatibility
- IIS Management Console
- Under Common HTTP Features:
- Select Next and then select Install. The IIS server is installed with the roles and features you selected.
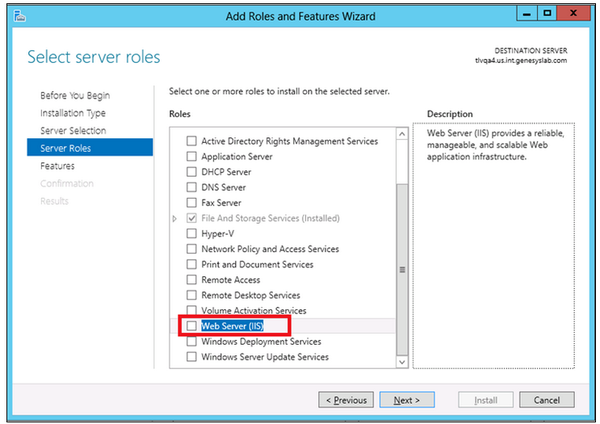
On Windows Server 2016, you can install and configure the Internet Information Services (IIS), version 8, in the Server Manager. To install and configure the Internet Information Services (IIS) component:
- Open the Server Manager.
- From the upper-right side of the window, in the Manage menu, select Add Roles and Features. The Add Roles and Features Wizard opens.
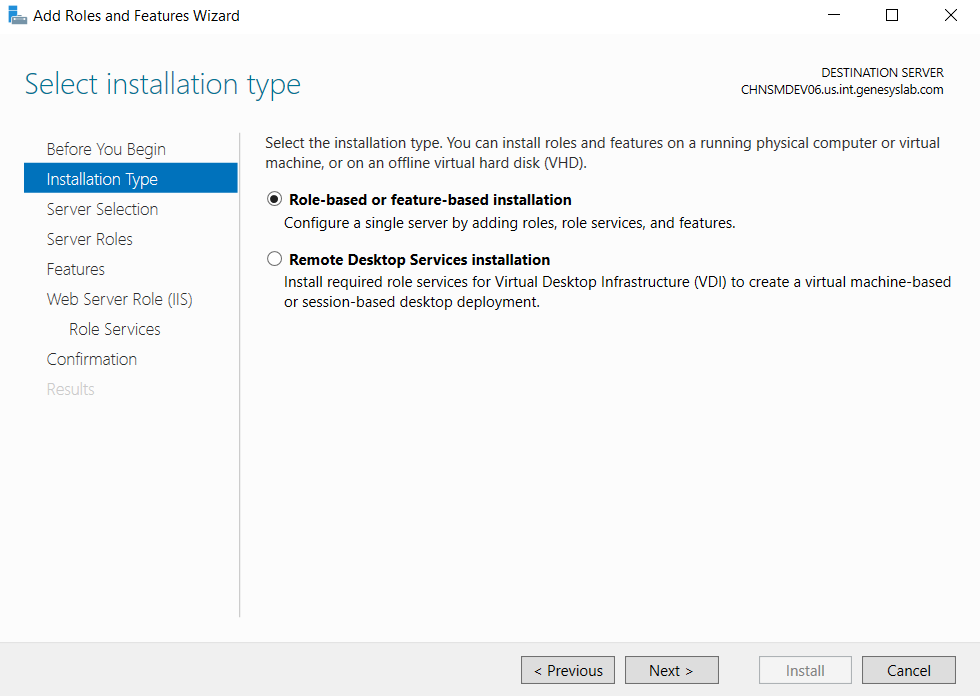
- Click Next. The Installation Type screen opens.
- Select Role-based or feature-based installation, and click Next. The Select destination server screen opens.
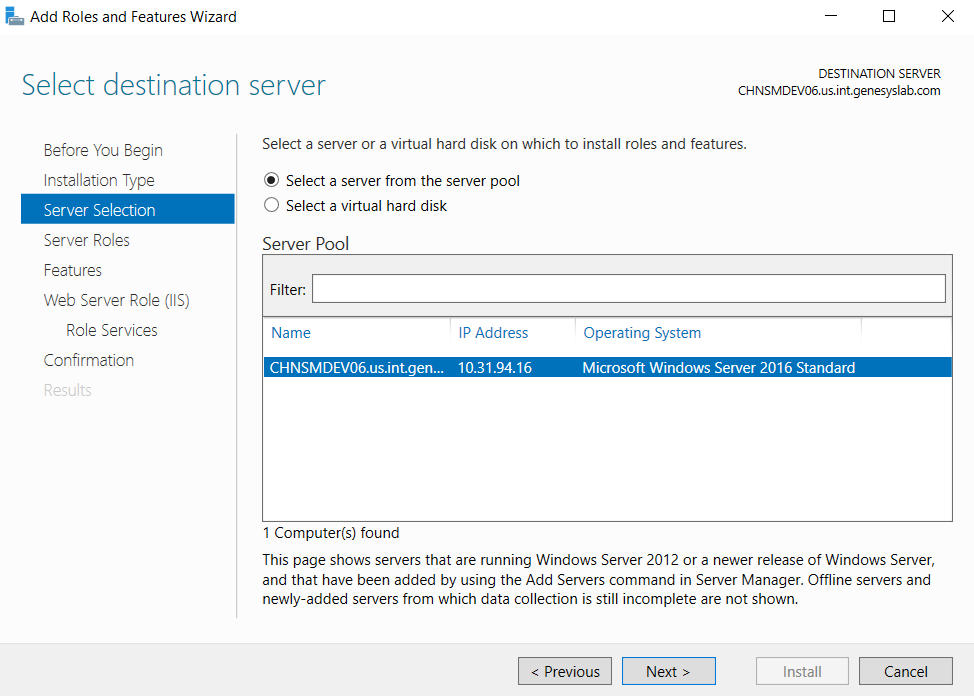
- Select Server Selection, verify that Select a server from the server pool is selecte, and select the server on which you will be installing the SpeechMiner web server. Click Next. The Select server roles screen opens.
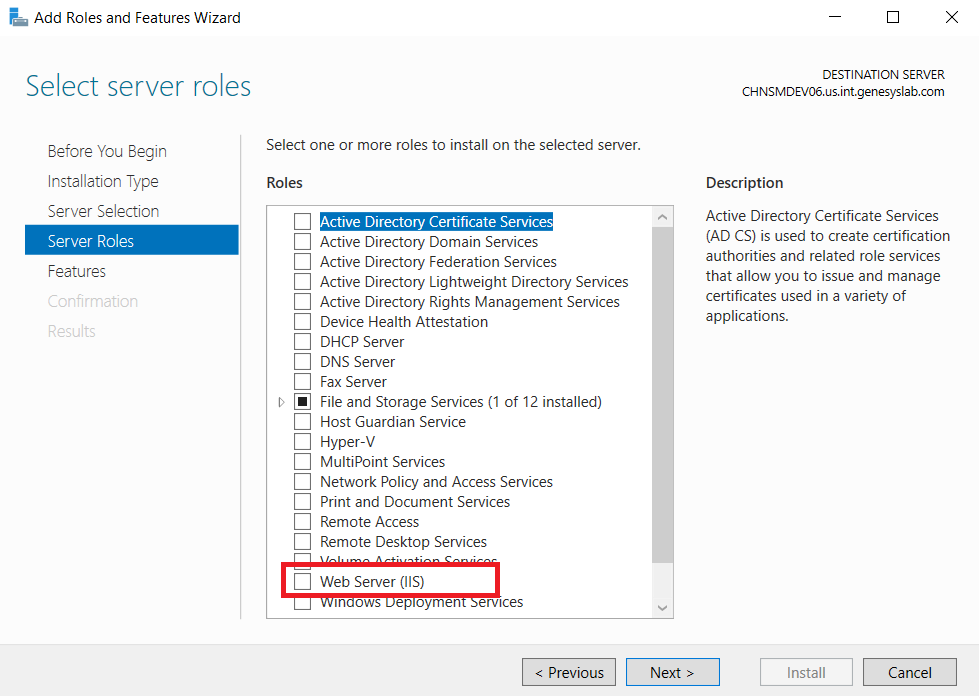
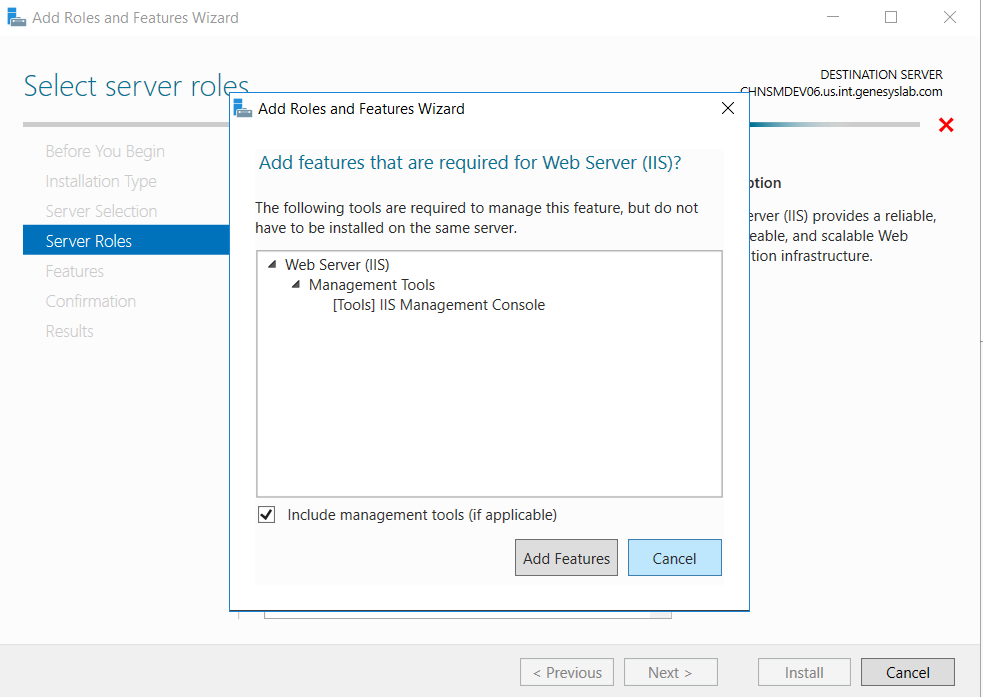
- Select Server Roles and from the list of roles, select Web Server (IIS). The following window pops up.
- Select the Include management tools (if applicable) checkbox and click Add Features. The window closes and you are returned to the following Select Features screen.
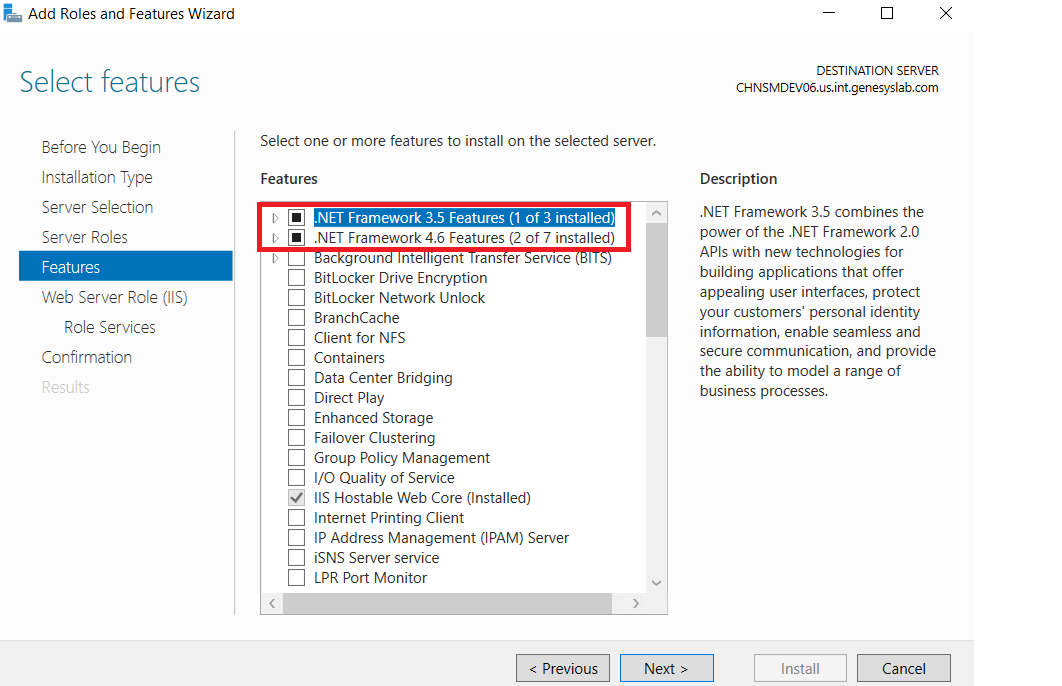
- Select Features.
- Select .NET Framework 3.5 features and .NET Framework 4.6 features.
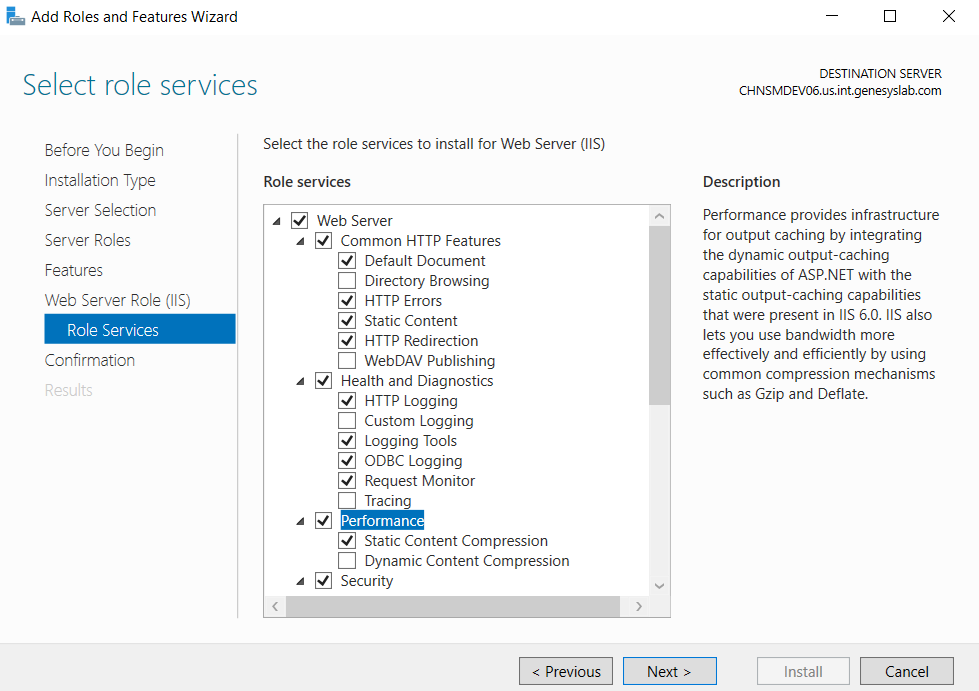
- Click Next. The Select roles services screen appears.
- From the Role services list, select the following services:
- Under Common HTTP Features:
Static Content
Default Document
HTTP Errors
HTTP Redirection - Under Application Development:
Application Initialization
ASP.NET
ASP.NET Extensibility
ISAPI Extensions
ISAPI Filters - Under Security:
Windows Authentication - Under IIS Management tools:
IIS 6 Management Compatibility
IIS Management Console
- Under Common HTTP Features:
- Select Next and then select Install. The IIS server is installed with the roles and features you selected.
On Windows Server 2019, you can install and configure the Internet Information Services (IIS), version 8, in the Server Manager. To install and configure the Internet Information Services (IIS) component:
- Open the Server Manager.
- From the upper-right side of the window, in the Manage menu, select Add Roles and Features. The Add Roles and Features Wizard opens.
- Click Next. The Installation Type screen opens.
- Select Role-based or feature-based installation, and click Next. The Select destination server screen opens.
- Select Server Selection, verify that Select a server from the server pool is selecte, and select the server on which you will be installing the SpeechMiner web server. Click Next. The Select server roles screen opens.
- Select Server Roles and from the list of roles, select Web Server (IIS). The following window pops up.
- Select the Include management tools (if applicable) checkbox and click Add Features. The window closes and you are returned to the following Select Features screen.
- Select Features.
- Select .NET Framework 3.5 features and .NET Framework 4.6 features.
- Click Next. The Select roles services screen appears.
- From the Role services list, select the following services:
- Under Common HTTP Features:
Static Content
Default Document
HTTP Errors
HTTP Redirection - Under Application Development:
Application Initialization
ASP.NET
ASP.NET Extensibility
ISAPI Extensions
ISAPI Filters - Under Security:
Windows Authentication - Under IIS Management tools:
IIS 6 Management Compatibility
IIS Management Console
- Under Common HTTP Features:
- Select Next and then select Install. The IIS server is installed with the roles and features you selected.

