Contents
Creating an Apple Messages for Business Channel
Starting from the 9.0 release, Genesys Hub supports Apple Messages for Business and includes an API connector for Apple Messages for Business. This section describes how to create an Apple Messages for Business channel using Genesys Hub.
Preparing for Hub Integration
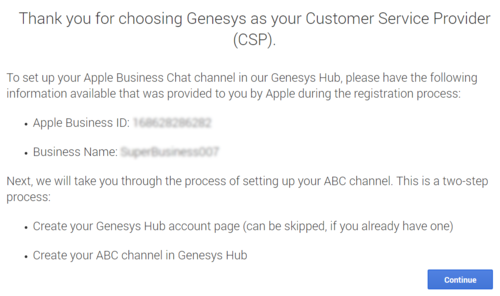
You must contact Apple and get your business ID before proceeding with channel creation in Hub. After registering with Apple and choosing Genesys as your Customer Service Provider, you are greeted with a Genesys welcome message. The welcome page shows your business ID and name.
You must go through a two-step process to set up your Apple Messages for Business channel in Hub. Click Continue to proceed.
- Hub account creation (You can skip this step if you already have a Hub account)
- Apple Messages for Business channel creation
1. Creating a Hub Account
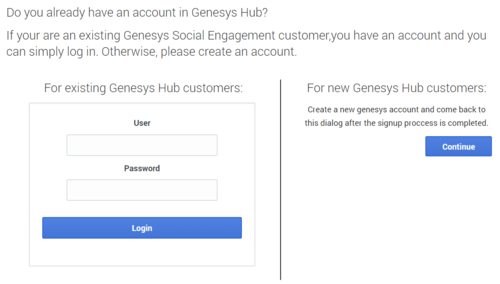
The first step of deploying an Apple Messages for Business channel is to create an account within the Hub component of Social Engagement. Click Continue if you are a new user and you want to create a Hub account. Refer to the Create an Account section for instructions on how to set up an account.
You can also log in with your existing account if you are already a registered Hub user. In this case, enter your user name and password and click Login.
2. Creating an Apple Messages for Business Service Channel
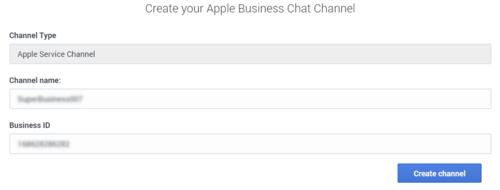
- The Create your Apple Messages for Business Channel screen appears after you log into Hub. By default, the channel type is selected as Apple Service Channel. The channel name and business ID are automatically populated. However, you can modify the values if required.
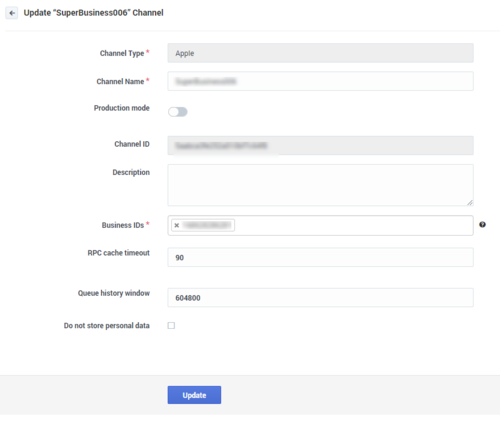
- Click Create channel. The new channel is created and the channel update screen is displayed.
- Enable Production mode.
- Enter your business ID in the Business IDs field.
- Enter a value ranging from 0 to 3600 seconds in the RPC cache timeout field. See RPC cache timeout for detailed explanation on this setting.
- Click Update.
After the channel is created, you can activate or suspend the channel using the Actions in the Channels screen. Inbound messages are fetched and outbound messages are sent as long as the service channel is active.
Configuring Payment Merchants for ApplePay
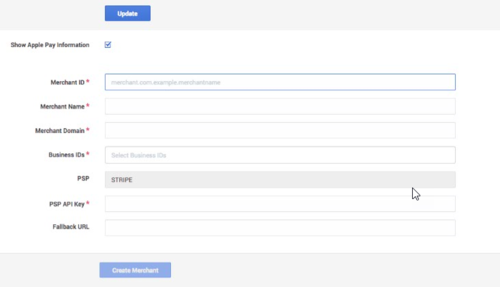
- Select Show Apple Pay Information on the channel update screen.
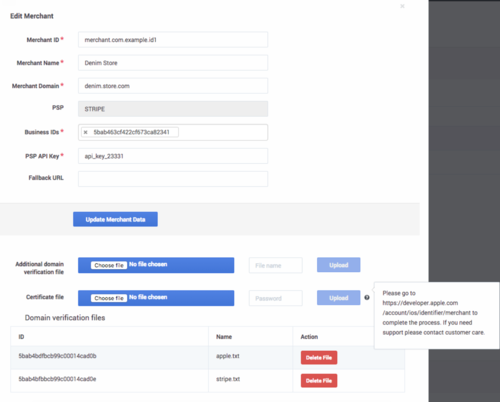
- Enter the merchant ID in the Merchant ID field. This value must be unique.
- Enter a merchant name in the Merchant Name field. This name must be unique.
- Enter the merchant domain in the Merchant Domain field.
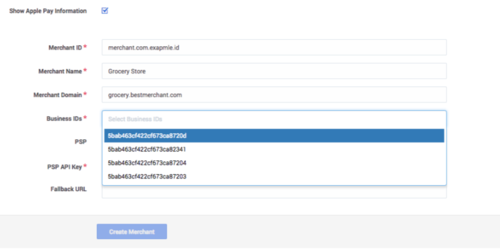
- Select the business IDs that must be associated with this merchant account. You can only select business IDs that are already linked to the channel and you cannot reuse a business ID that is already associated with another merchant account.ImportantA merchant can be associated with multiple business IDs whereas a business ID can only be linked to one merchant.
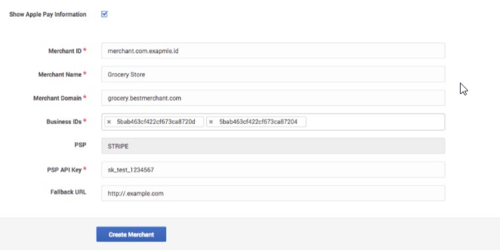
- Provide the PSP API key in the PSP API Key field.
- Enter a valid URL in the Fallback URL field. This URL is used to redirect users when there is an error in payment processing.
- Click Create Merchant to add the merchant account. You can add multiple merchant accounts as long as Merchant ID and Merchant Name are unique to each merchant.
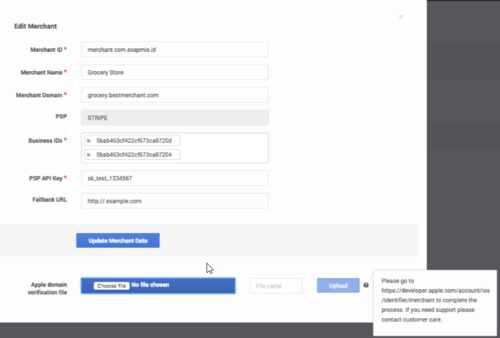
- Click on the merchant ID to add verification and certification files.
- Upload the required certificate files using the Additional verification file and Certificate file fields. You can get the domain verification file and certificate file from https://developer.apple.com.
- Click Update Merchant Data.
You can delete the merchant accounts using the Delete Merchant action in the channel update screen.

