Corinneh/CallbackUI
Contents
Using the Callback interface
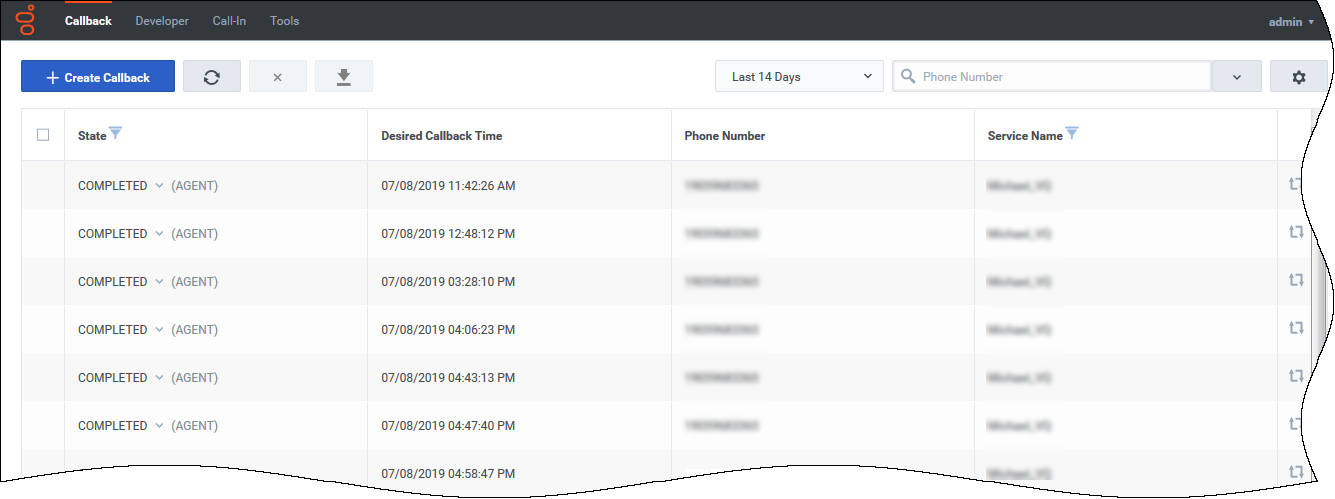
The Callback UI can display, create, or edit Callbacks. After the Desired Callback Time, the Callback record will still appear in the UI depending on your time filter's selection.
- Additional tabs and dialogs may show up according to your Role permissions.
- Callback Monitor is the minimum role required to access this UI.
Callback states
Callback records can have the following states:
- SCHEDULED—Callback Management is handling the request (there are no sessions started in the system). While in this state, the request is available in the Callback UI when the specified desired_time is upcoming.
- QUEUED—Callbacks actively waiting for an agent in ORS/URS; the agent is not assigned yet.
- ROUTING—Agent is reserved but the call is not yet routed to the agent.
- PROCESSING—Callback being handled by assigned agents.
- COMPLETED—Callback was completed with a result, for example, timed-out, cancelled, and so on. See the Result tab of your Callback block in Designer. The completed reason appears beside COMPLETED in the state column of the table.
Callback Administration Overview
The following features are available:
- The drop-down at the top left gives you the option to display Callbacks using a pre-defined range for the past day or week; or for the next day or week.
- Refresh—You can force the interface to refresh the list of Callbacks.
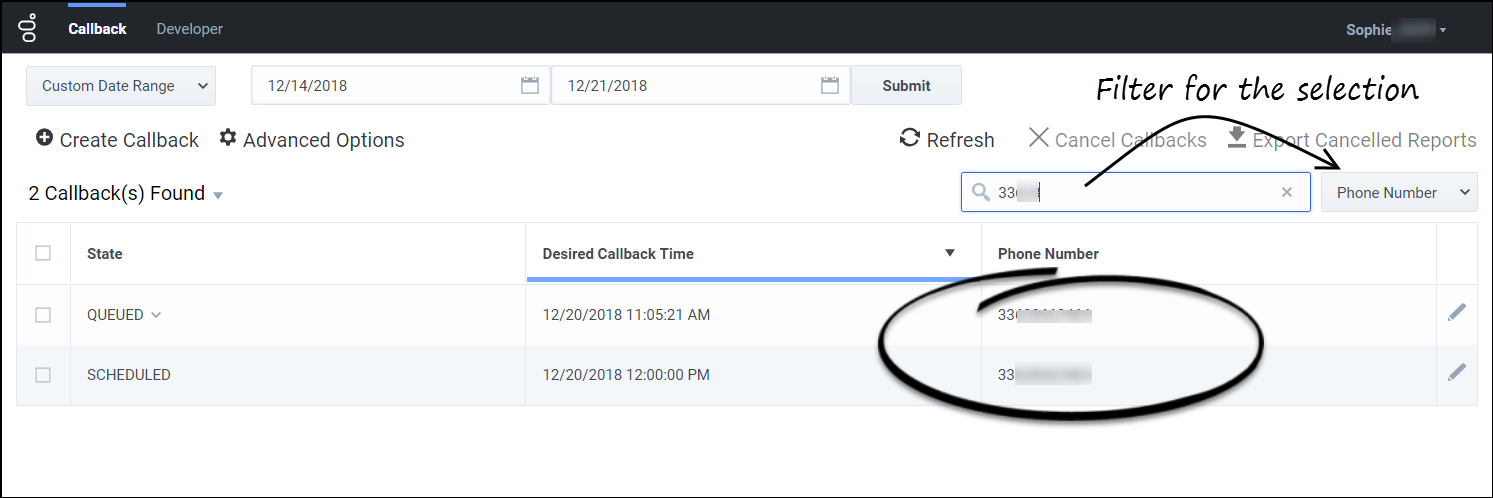
- Search Box—You can select a column field in the drop-down at the right of the Search Box. Then, the interface filters the results dynamically as you type.
Limitations of the Interface
- Only Firefox and Chrome browsers are supported.
- Callbacks are displayed in pages of 250 items.
Advanced Options
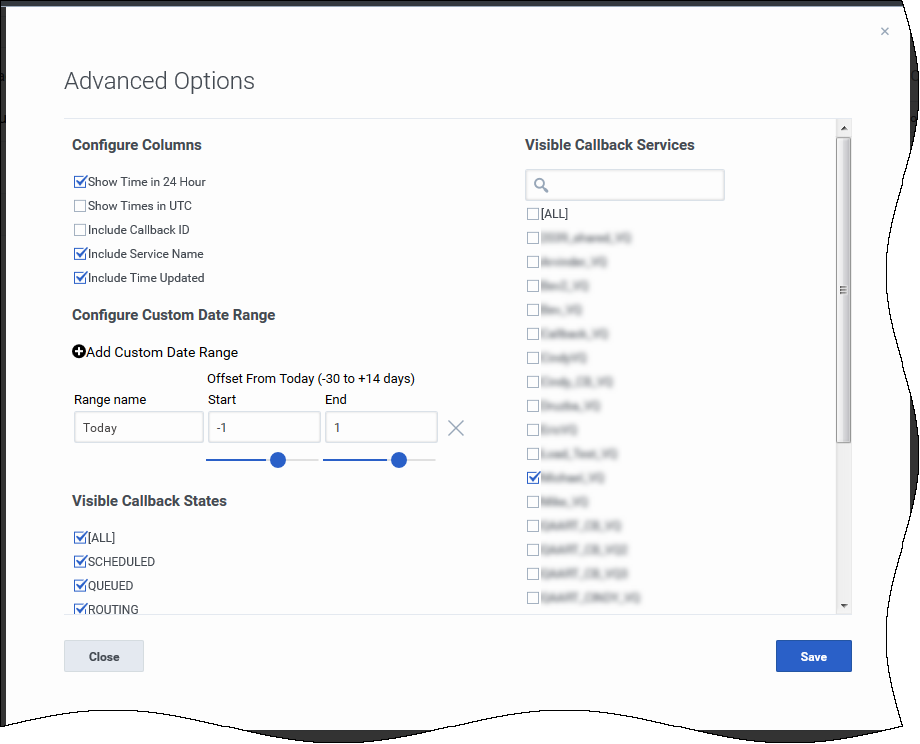
Advanced Options—Opens a new window where you can customize how the Callback Management table displays:
- Configure Columns—Select display properties for columns.
- Show Time in 24 Hour—Show all times in 24 hour time rather than AM/PM format.
- Show Times in UTC—Show all times in table in UTC time rather than local time.
- Configure Custom Date Range—Add a time range filter.
- Filter Table by States and Service—Include one or more states to display in the table, and/or select a service (or Virtual Queue) to display in the table.
Create or Schedule a Callback
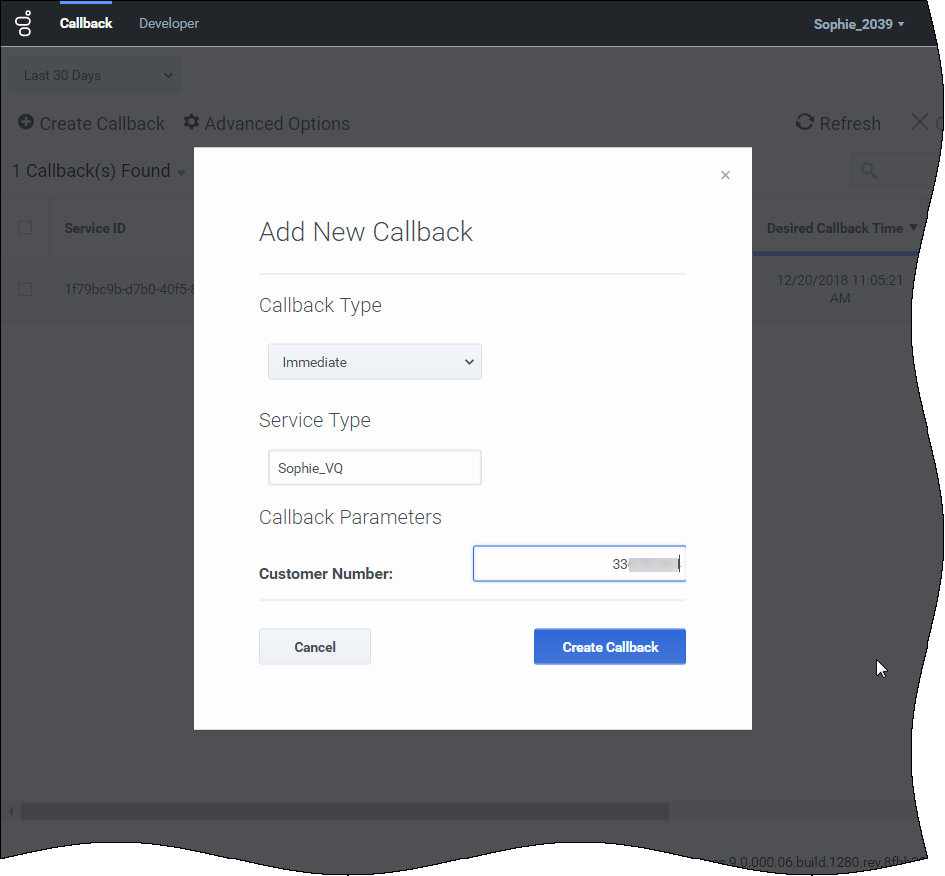
You can submit or schedule a Callback request by clicking Create Callback. A new dialog opens. Select the Callback Type (Immediate or Scheduled), then a Service Type (the name of the Virtual Queue provided in Designer), and enter the number to call for Customer Number. For Scheduled callbacks, select a date and time for the call.
Edit a Callback
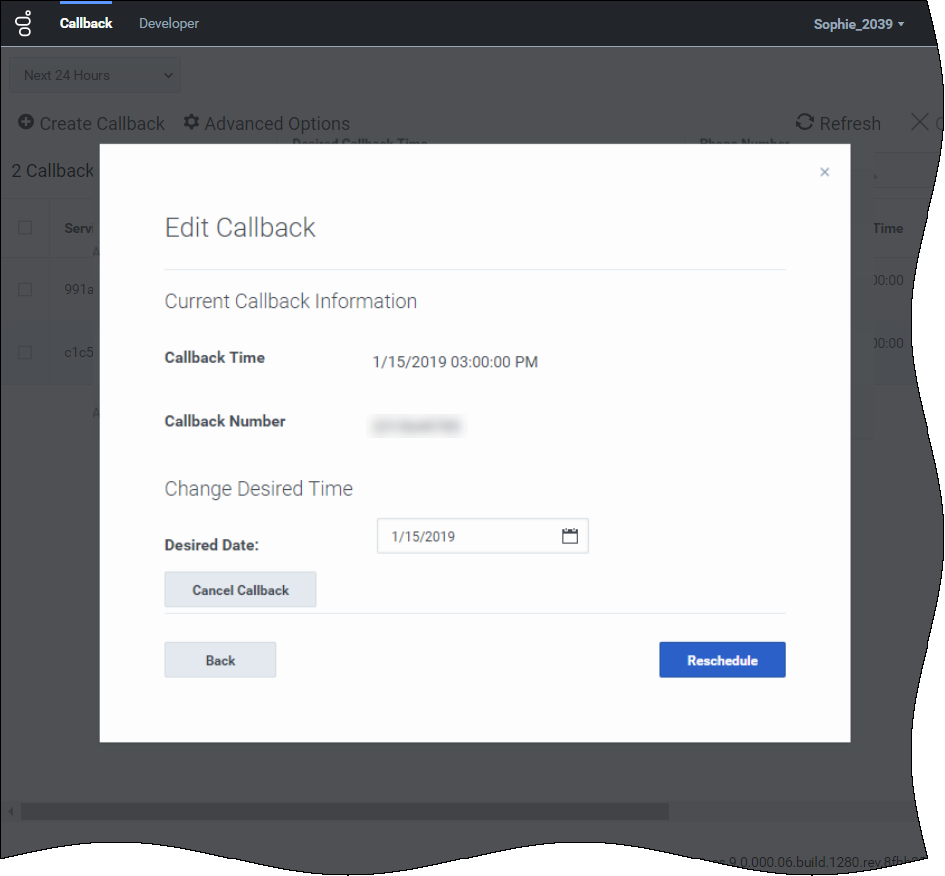
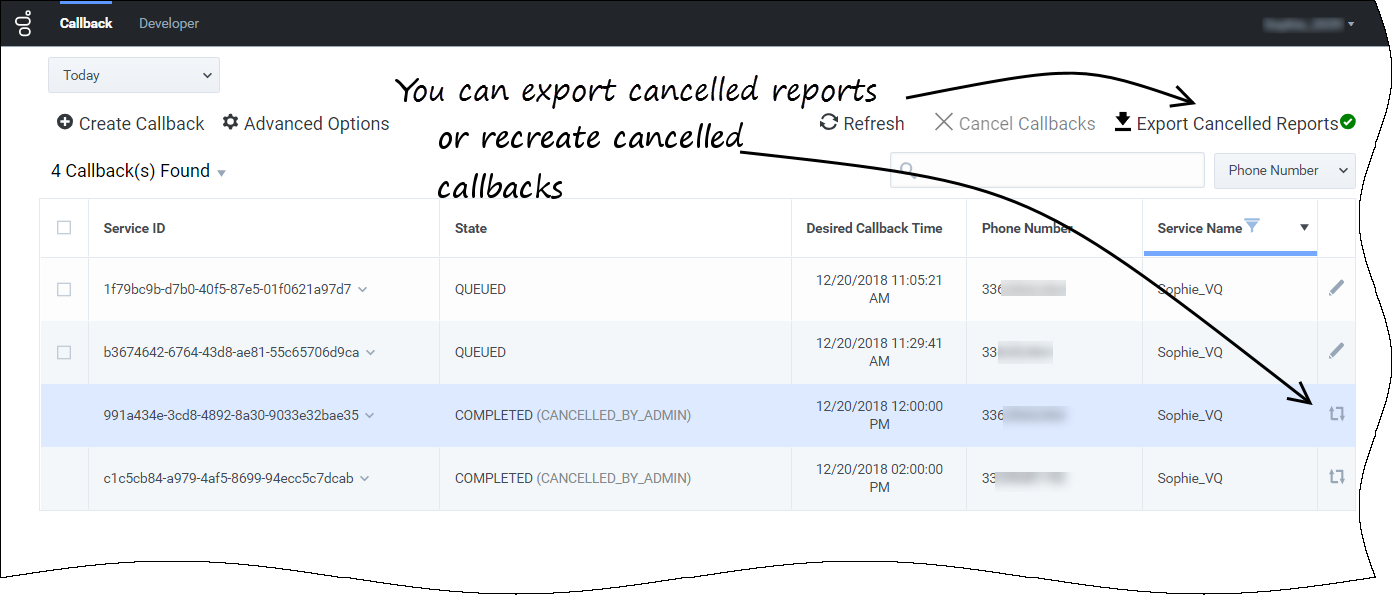
In the Callback table, for Callbacks that can be edited, a blue pencil displays in the last column. Clicking this pencil displays the edit options for that Callback.
- You can choose to reschedule the Callback (only for SCHEDULED Callbacks).
- You can choose to cancel the Callback.
Recreate a Callback
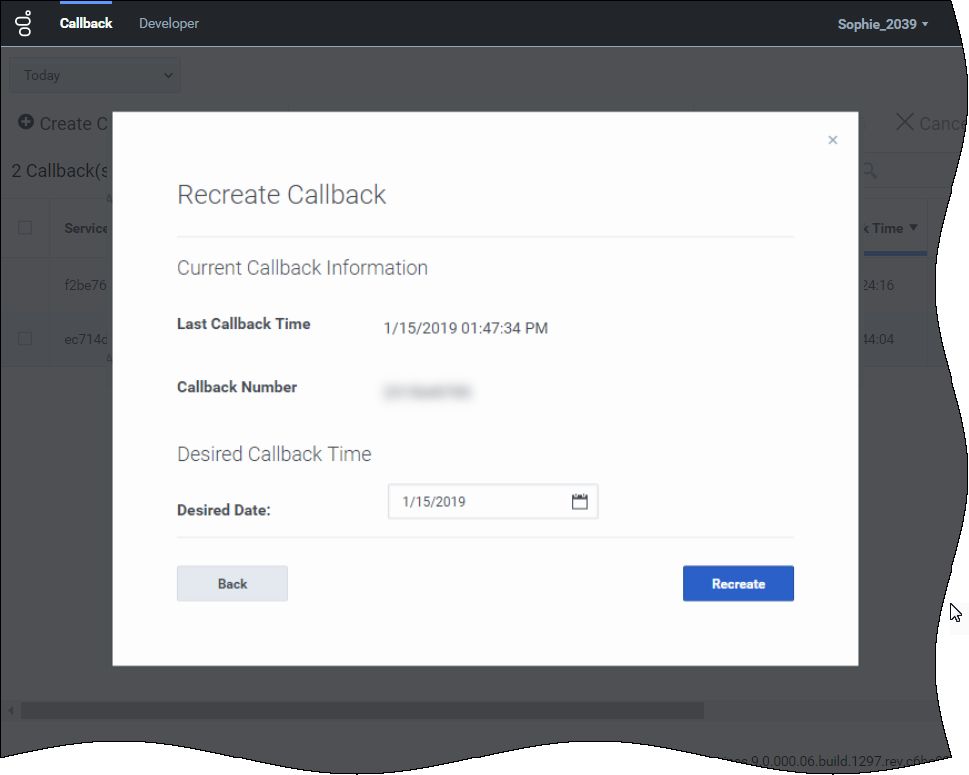
For completed callbacks which can be recreated, ![]() displays in the last column. Clicking this icon opens the Reschedule Completed Callback dialog for that Callback.
displays in the last column. Clicking this icon opens the Reschedule Completed Callback dialog for that Callback.
Name recordings will be preserved if a Callback is rescheduled within four days of the completion of the original Callback.
Bulk Cancel and Export of Callback Records
Make sure to select an appropriate Time Range to filter callbacks, then make a Callback selection to activate the Cancel Callbacks button. When you click this button, the Cancel Callbacks Confirmation dialog opens, displaying the selected Callback cancellations.
You can either:
- Continue with the selections you have made and click confirm to cancel them.
- Check Cancel All Callbacks In Current Time Range, to override your previous Callback selections and delete all callbacks in the current time range. In that case, the list of displayed callbacks disappears from the dialog window.
Confirm to cancel the records.
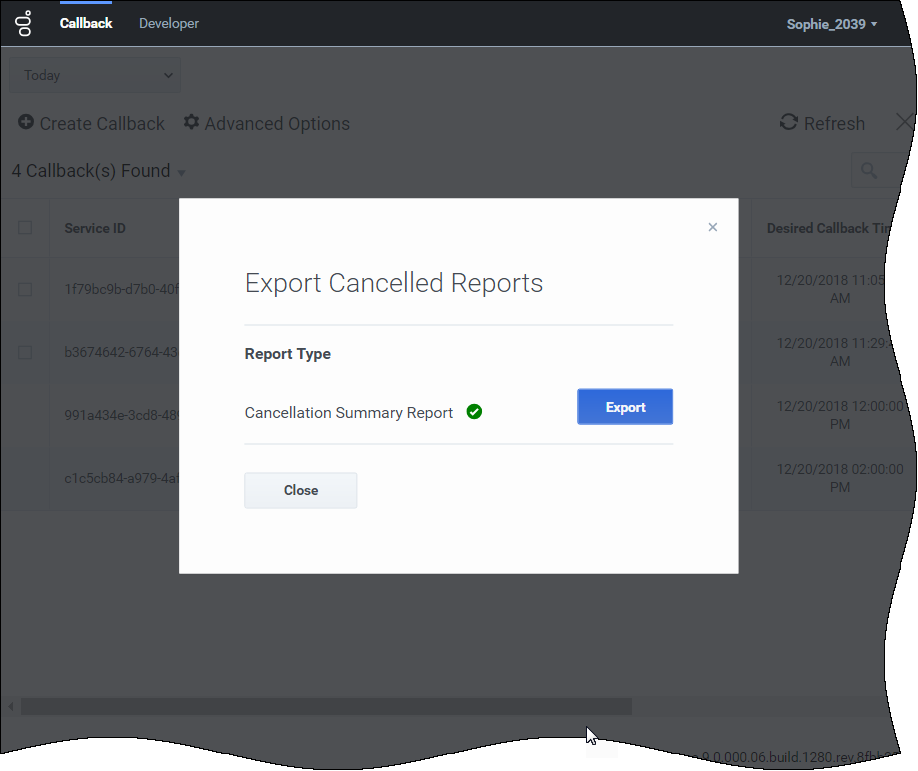
The resulting display shows all the callbacks that you have selected to cancel and that are now in COMPLETED (CANCELLED_BY_ADMIN) state.

