How to set up your agents
Important
This content may not be the latest Genesys Engage cloud content. To find the latest content, go to Genesys Engage cloud for Administrators.
Before your contact-center agents can begin interacting with customers, you must set up their account.
The Basics
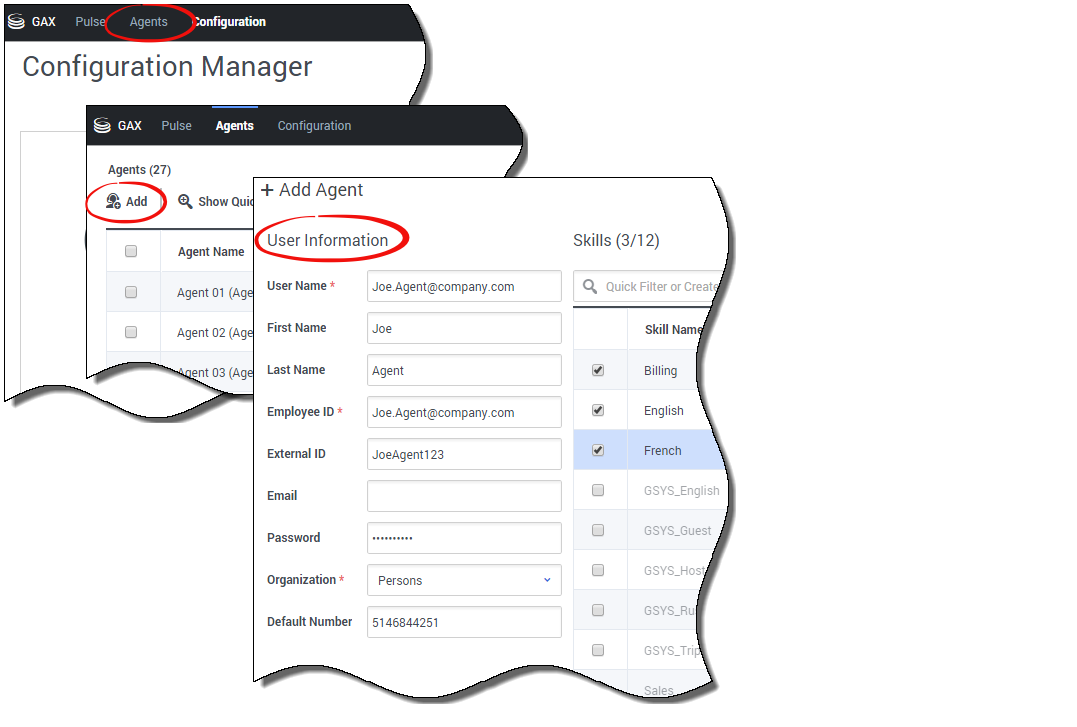
From the Agents screen in Platform Administration you are going to:
- Create the Agent account.
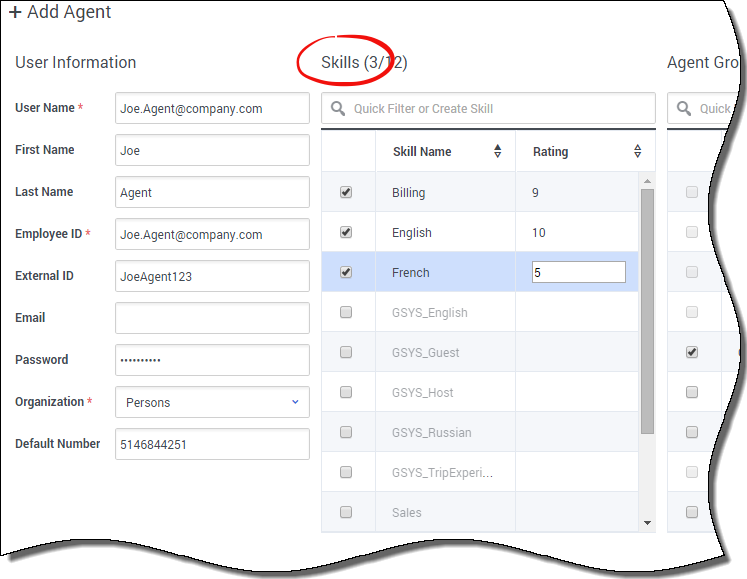
- Assign one or more Skills to the Agent.
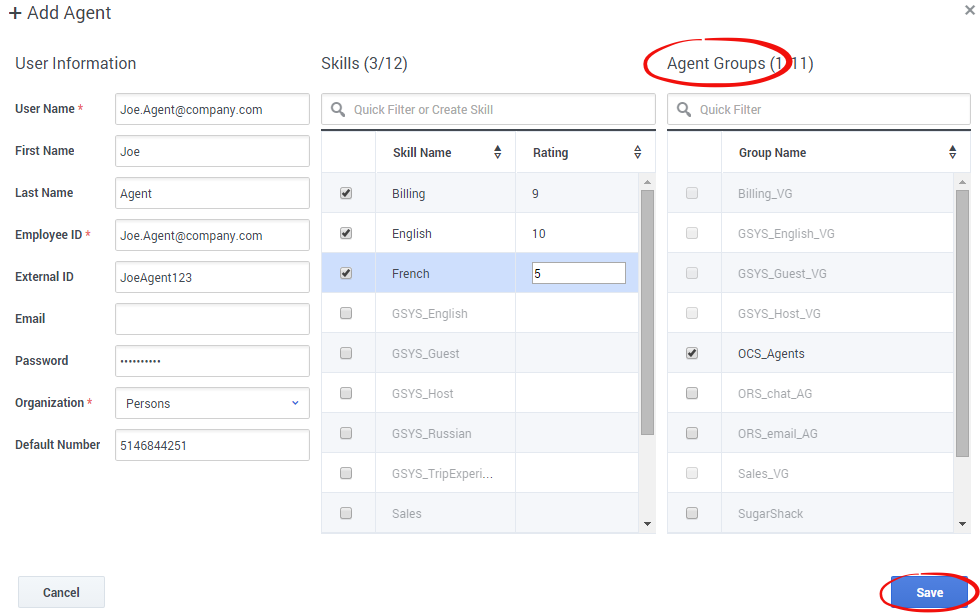
- Assign the new Agent to an Agent Group.
Create an Agent Account
Select Add and enter the agent's personal information. Mandatory fields are indicated by a red star (*).
To help you fill in these fields, remember:
- User Name is normally the agent’s email address or login_name@company_domain.
- Employee ID is a unique corporate ID.
- Password might be required (even though it is not indicated as mandatory) depending on the corporate password policy and rules.
- Default Number is the agent's telephone number, either a regular directory number or an international number (preceded by + and the country code).
Assign Skills to Agents
Select the Skills that the Agent possesses, and then assign a Rating, or proficiency level, for each assigned skill. Inactive skills are grayed out and unavailable.
A Rating is a numerical representation of the proficiency of the Agent in a skill. Values are 1 to 10, with 10 being the most proficient.
Assign Agents to Agent Groups
This page was last edited on October 2, 2020, at 12:32.
Comments or questions about this documentation? Contact us for support!


