Create a Standard Response
A Standard Response is an item in the Standard Response Library, which stores prewritten responses for use as suggestions to agents, acknowledgments, and/or autoresponses. Each standard response is assigned to exactly one category in the system; however, a category may have zero or many standard responses assigned to it.
You can use Standard Responses for any of the eServices channels: eMail, Chat, Social Engagement, or SMS.
It takes just a few steps to create a Standard Response. The Process Overview below lists the main steps. We'll take each one in sequence, or you can skip to the information you need right now.
Process Overview
- Create a Standard Response
- Configure the properties for your Standard Response
- Enter the HTML version or Structured Message version
- Create additional versions and retrieve prior versions
- Create and add Field Codes
To create a Standard Response:
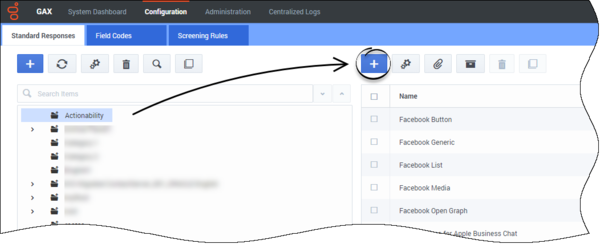
- Select the correct Category Tree node, then click the New (plus sign) icon.
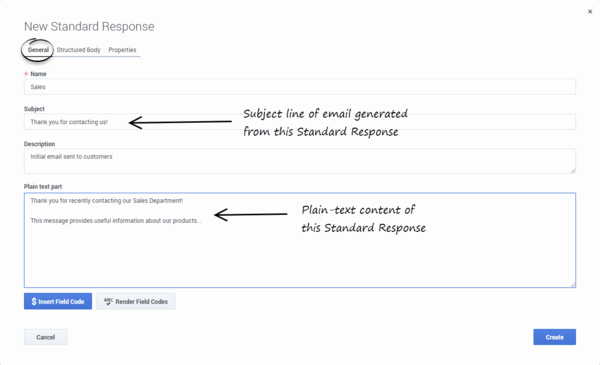
- The New Standard Response window has three tabs. The first is General.
- Name—The name of the Standard Response must conform to the requirements for the names of eServices Manager objects.
- Subject—You can also specify a Subject line in any IRD strategy object that has a Format tab (see the Universal Routing 8.1 Reference Manual). If you do, this overrides the Subject line that is specified for the Standard Response here in eServices Manager.
- Plain text part—You also have the option of including an HTML version.
- Field Codes—You will probably want to use Field Codes to personalize your Standard Responses. We'll be creating Field Codes after creating some Standard Responses, and then insert the Field Codes into them.
- After clicking Create, you can add an attachment by clicking the paper clip icon. In the resulting Edit Attachments window,
- Click the Attach (paper clip) icon to browse to an file to attach.
- Click the Download (down arrow) icon to download the selected file to your local machine.
- Click the Delete (trashcan) icon to delete the selected attachment.

Important
This page was last edited on December 11, 2018, at 18:37.
Comments or questions about this documentation? Contact us for support!

