Working with Widgets
It's easy to add a new report widget to your Genesys Pulse dashboard or wallboard. Genesys Pulse provides a basic set of predefined report templates, complete with statistics that are typical for reporting activities handled by Genesys solutions. Any users with the appropriate privileges can create or modify widgets and report templates.
Contents
Add Reports
There are two ways you can add a report to your dashboard or wallboard:
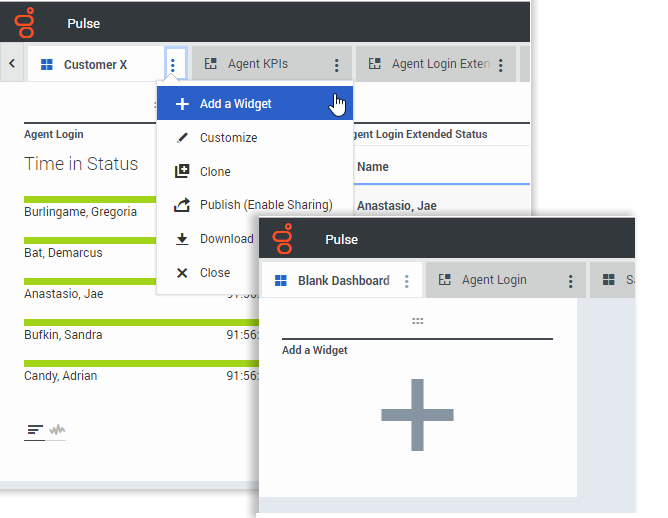
- Click the more icon in the right corner and click Add a Widget.
- On empty dashboards and wallboards, click Add a Widget.
Genesys Pulse opens a report builder to guide you.
Video: Add a widget to a wallboard or dashboard
This video describes how to add a widget to a wallboard or dashboard.
Build a Report
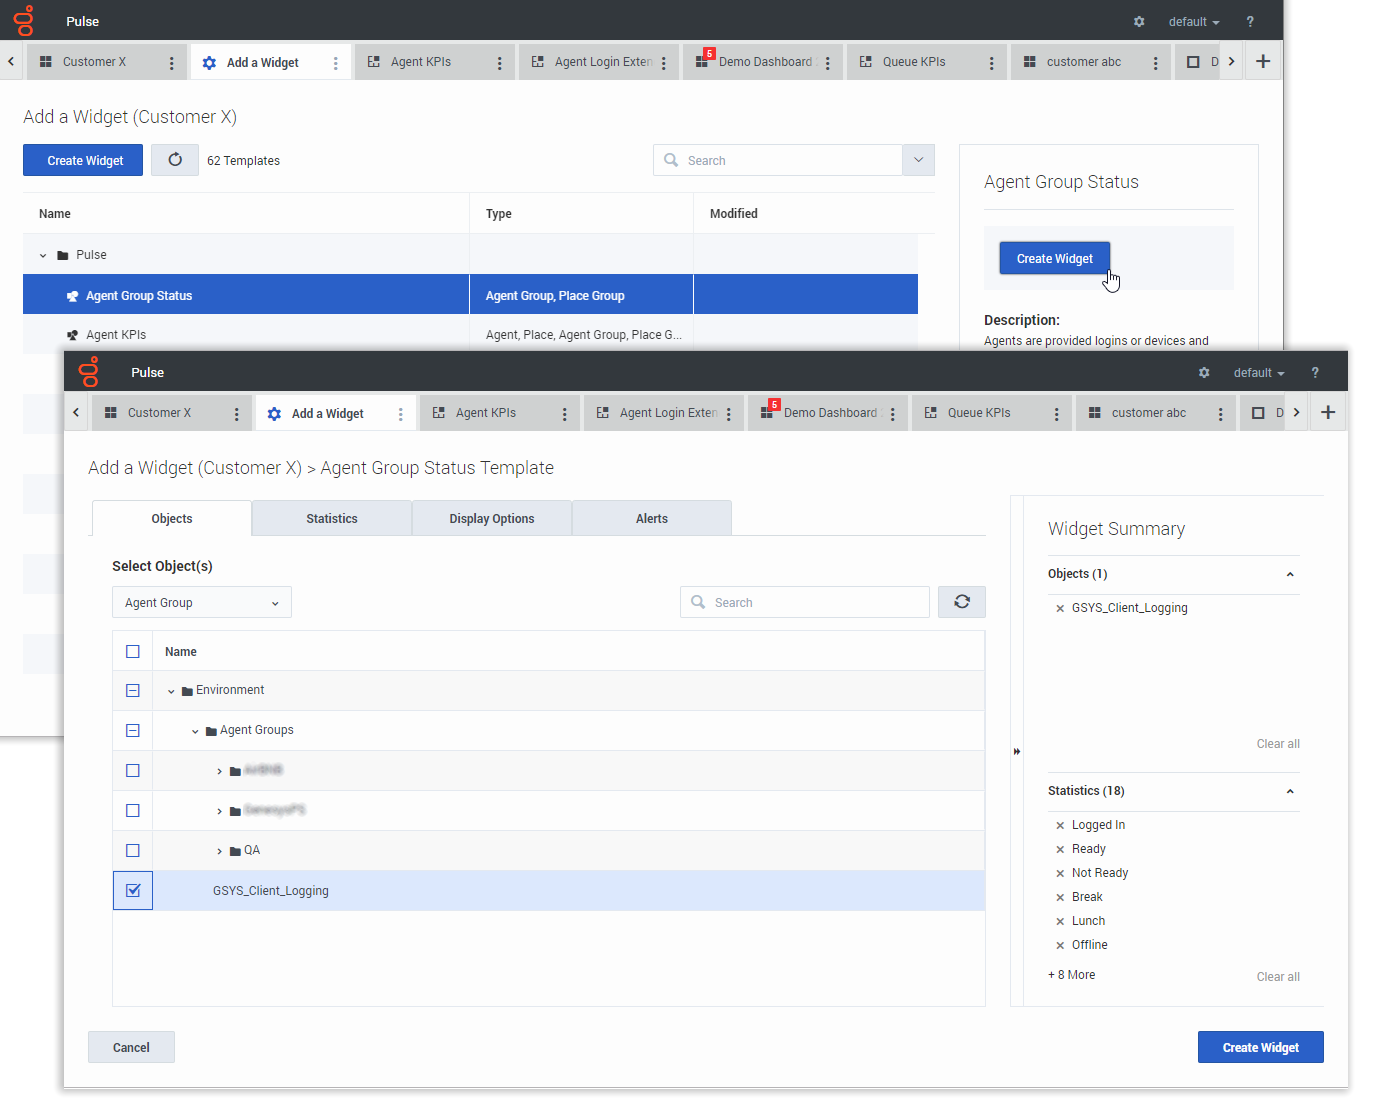
Genesys Pulse guides you through the process of creating or changing report widgets. Click the standard report template you want to use and then click Create Widget.
Select the Objects and Statistics that you want to see in your report.
Your report widget must have:
- One or more objects to measure. Your widgets must contain fewer than 100 objects.
- Add at least one non-string statistic.
- One widget type with specific display options.
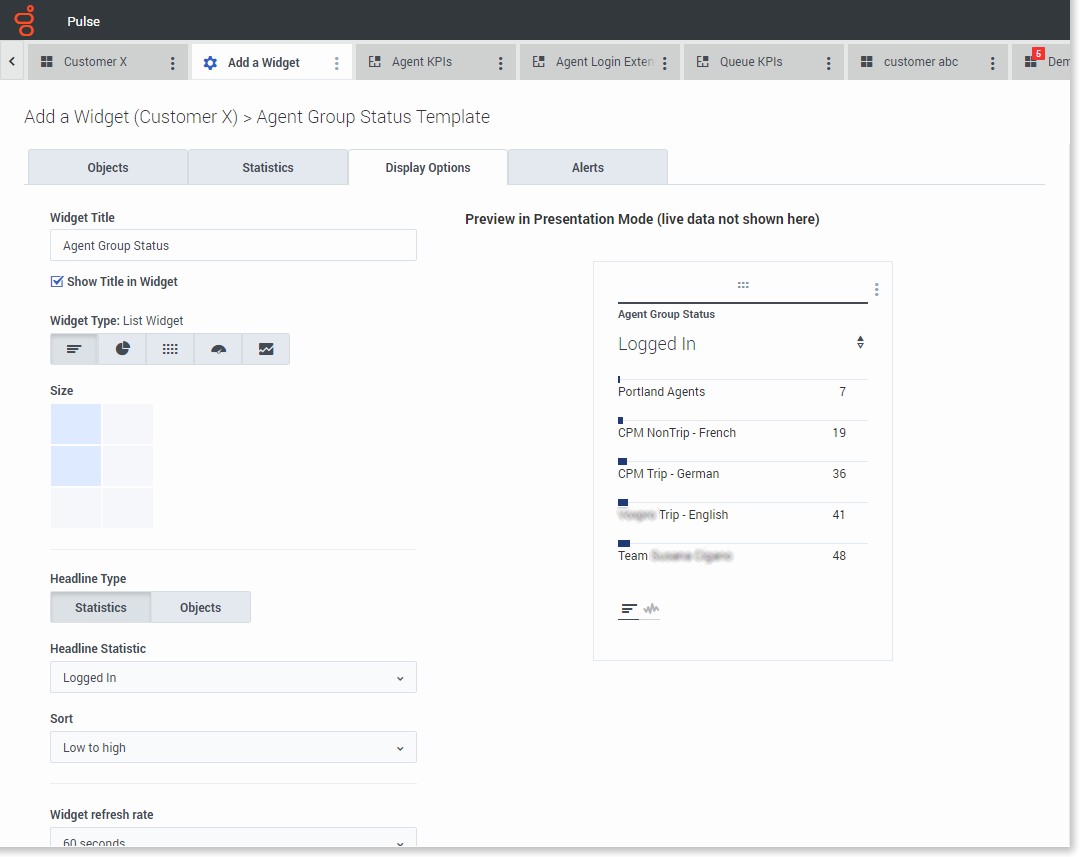
Click the Display Options tab to define how you want to display your report.
Display Options
You need to define the default display settings for your widget. Users can change these options on their own dashboard.
- Provide a name for report title.
- Select from the available Widget Types to display.
- Select the Widget refresh rate.
- Select options associated with the visualization (for example, size).
- Optional: For templates configured to use changes-based statistics (CurrentStatus and ExtendedCurrentStatus), set enable quick updates. See Deploying RabbitMQ for Quick Widget Updates.
Alerts
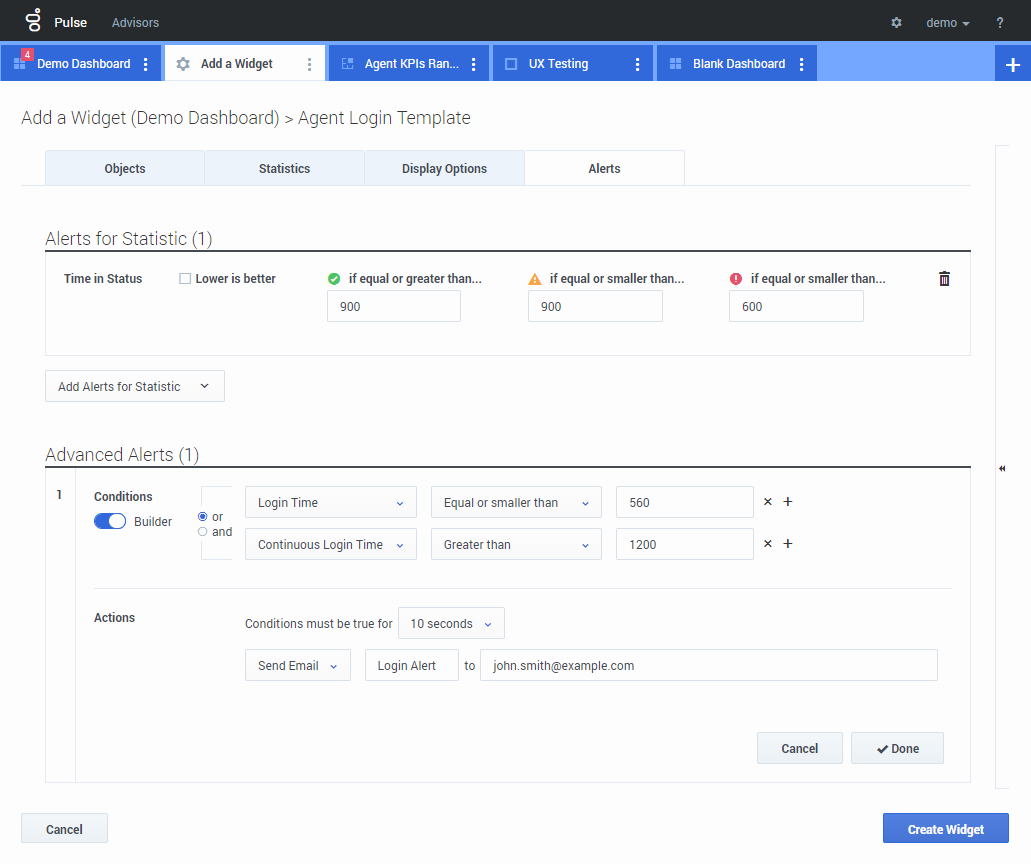
Starting with release 9.0.000, Alerts can be used to specify thresholds (red, orange, and green) for each numerical statistic (Time, Integer, Percentage, or Number format) in the Alerts for Statistic. Decimal values can be specified as threshold values for Number/Percentage statistics, and integer values for other statistics.
Specify the complex condition in the Advanced Alerts section when you need to use more than one statistic or send email notifications. The Advanced Alerts section has the following two modes:
- Builder. Simplifies building basic conditions.
- Advanced. Allows to build complex condition by assigning the boolean, number or string value to the Result variable using any valid JavaScript expressions.
The Advanced Alerts section might be unavailable in certain Genesys Pulse configurations. See Advanced Alerting Capabilities for more information.
- Advanced Alerts do not affect the widget view, only email notifications are sent.
- Email addresses and subjects that you configure in the Advanced Alerts section are not preserved when you share or export the dashboard that contains the widget.
- Queue
- Route Point
- Campaign Calling List
- Campaign Group
Select Collectors
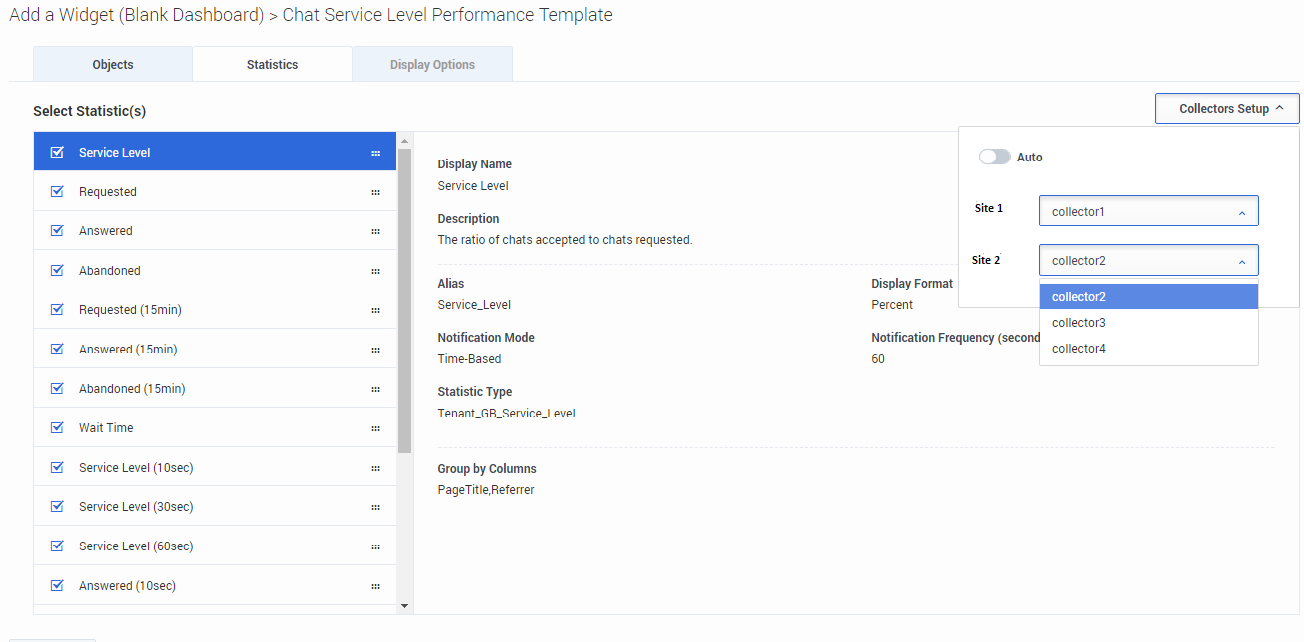
Starting with release 8.5.108, Genesys Pulse allows users to assign specific Pulse Collectors for a particular widget. To enable this functionality, you need to set the enable_manual_collector_binding option to true in Genesys Pulse configuration and assign the role with the Pulse Manually Bind Collectors privilege to selected users.
On the screenshot you can see Site 1 and Site 2 as it is a multisite configuration. For a singlesite configuration there will be only one site.
What do I do next?
You might want to learn more about:

