Testing the Playground Application
To give you a better idea of how to use the Playground application, let's walk through an example of building a "keyword search" scenario.
Test Scenario Steps
Here are the steps in our scenario:
- An anonymous user visits the site.
- The user enters a search term, "contract", in the search box.
- The user browses the search results.
- A chat invitation window appears.
- The user accepts the invitation.
- The user fills out the registration form and submits it.
- The user chats with an agent.
- The agent sees pages the user visited.
- The agent sends the user a link to a page of interest.
- The user exits the chat session.
Test Scenario Preparation
Here are the steps to complete before we can walk through our test scenario. Note that for steps 1 through 6, you do not need to take any action if you are using the Playground application, as these items are covered out of the box.
-
Customize the DSL file with the InTool application.
Complete the steps below to add the events to the DSL file for our test scenario.
Start
- Open the Playground application in InTools. You can launch InTools by navigating to GWE_installation_directory\tools\intools\. Take the intools.crx file and drop it into the Extensions page of your Google Chrome or Chromium browser.
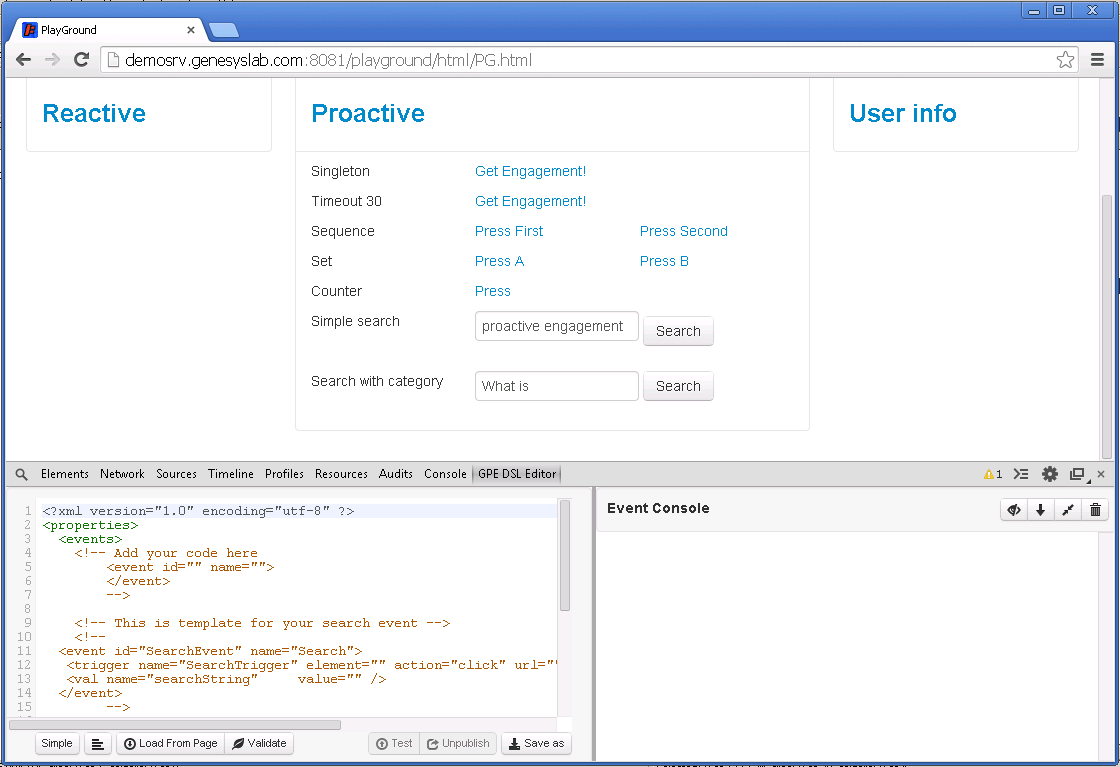
- Press F12 to open the developer tools and select GPE DSL Editor.
The left window shows the DSL for Playground application, while the left window shows the events on the page.
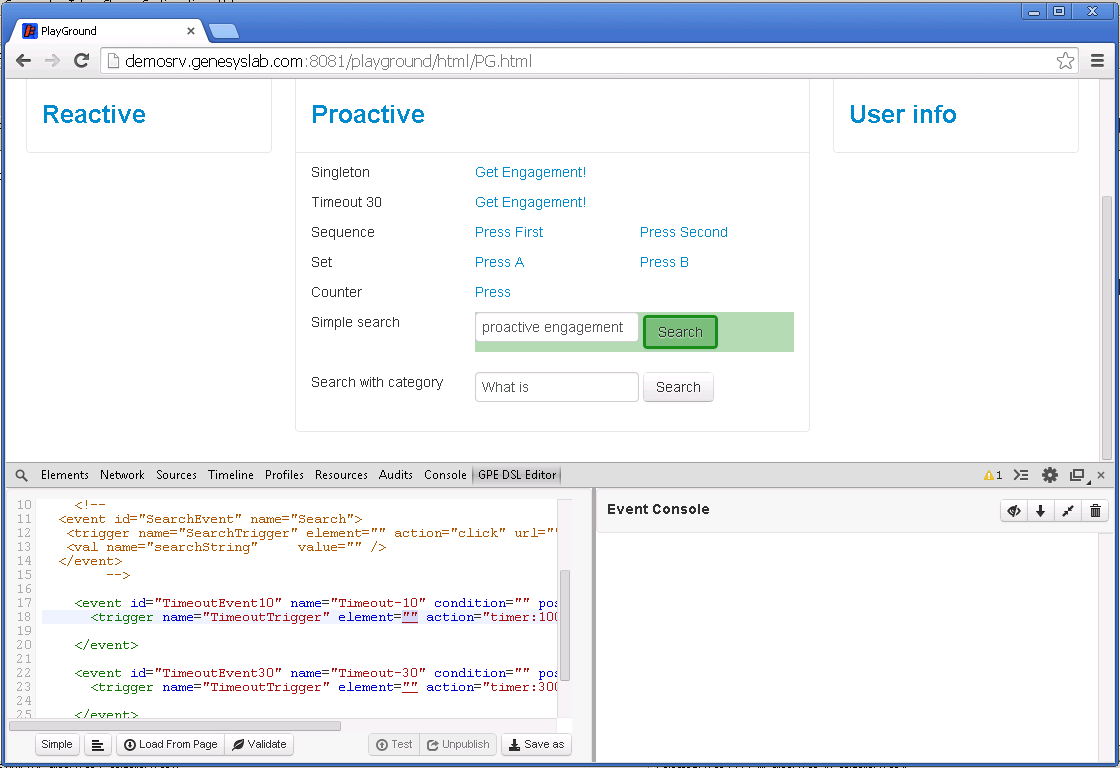
- Find the "TimeoutEvent10" <event> in the DSL and select the "element" attribute on its <trigger>. InTool goes into search mode.
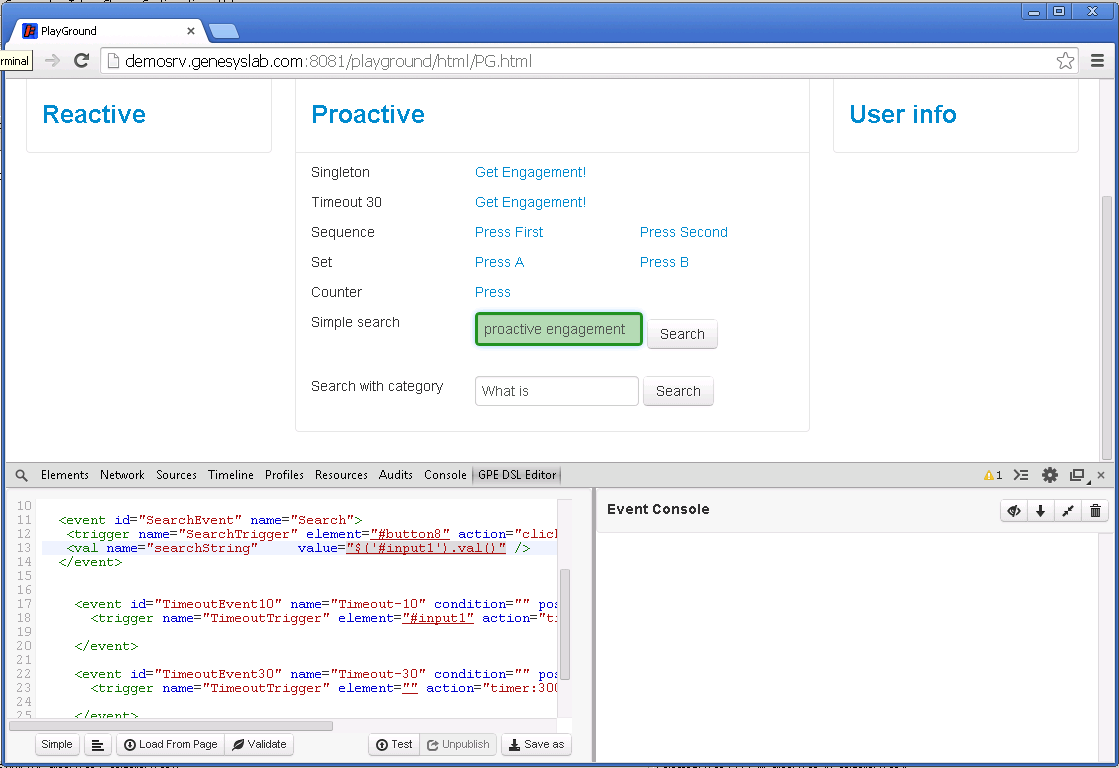
- Select Search. The selector for Search replaces the "element" attribute value. We now have a trigger for the event in Step 5 of our test scenario: 10 seconds after loading the search results appears chat invitation window.
- If you select a "value" attribute in the DSL, InTool goes into search mode. Now you can select an item on the page and the selector for that item will replace the "value" attribute in the DSL.
- Click Test to confirm your event works.
End
-
Create categories with the GAX plug-in.
In the steps below we create a category that matches the "contract" search term, Step 2 in our Test Scenario.
Start
- In Genesys Administrator Extension, navigate to Configuration > Web Engagement > Categories.
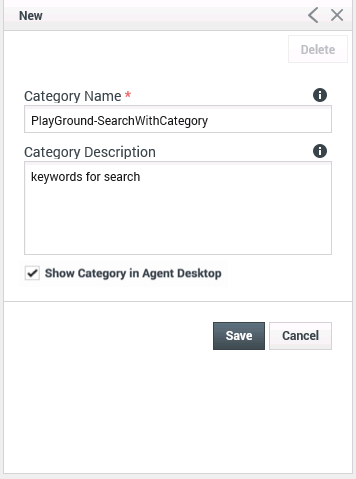
- Click + to create a new category.
- Enter the following information:
- Category Name — Playground-SearchWithCategory
- Category Description — Keywords for search
- Check Show category in Interaction Workspace to make the category available for agents.
- Click Save. The new category is added to the list of categories
- Select the Playground-SearchWithCategory category.
- In the Category Matching Tags section, click +.
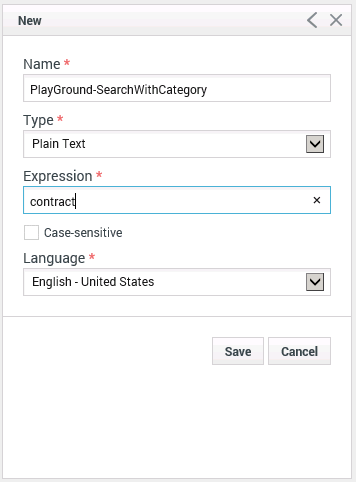
- Enter the following information:
- Name — PlayGround-SearchWithCategory
- Type — Plain Text
- Expression — contact
- Language — Select a language from the list.
- Click Save. The tag is added to the Category Matching Tags section.
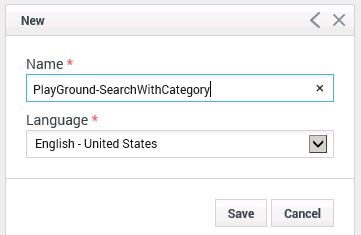
- In the Language section, click +.
- Enter the following information:
- Name — PlayGround-SearchWithCategory
- Language — Select a language from the list.
- Click Save. The language is added to the Language section.
End
-
Configure Genesys Rules System
Complete the following procedures Genesys Rules System to work with Web Engagement.
Configuring Genesys Rules Development Tool
Prerequisites
Start
- Open Genesys Rules Development Tool by starting Composer.
- Navigate to Window > Preferences. The Preferences window opens.
- Navigate to Genesys Rules System > Configuration Server. Edit the settings.
- Enter the Configuration Server host name. For instance, localhost.
- Enter the Configuration Server port. For instance, 2020.
- Enter the application name for the Rules Authoring Client application. For instance, RulesAuthoringClient.
- In the Authentication section, enter the name and password for a user who can connect to Configuration Server and click Apply.

GRDT settings for Configuration Server.
- Navigate to Genesys Rules System > Repository Server. Edit the settings.
- Enter the Repository Server host name. This is the name of the host specified for the GRS application (application with type Business Rules Execution Server) in Genesys CME. For instance, localhost.
- Enter the Repository Server port. This is the port with the ID genesys-rules-engine that is specified for the GRS application (with type Business Rules Execution Server) in Genesys CME. For instance, 8020.
- Enter the Servlet path as genesys-rules-authoring.
- In the Authentication section, enter a name and password for a user who:
- Has Read and Execute permissions for the Genesys Rules Authoring client application (set up in Configuration Server); this user must have explicit Read and Execute permissions or must belong to an access group with those permissions.
- Belongs to a Role with the following privileges: Template - Create, Template - Modify, Template - Delete.
- Click Apply.

GRDT settings for the Repository Server.
- Navigate to Genesys Rules System > Template Types. If it is not present, add the web_engagement template type and set Event Support to true. Click Apply.

Template types in Composer
- Click OK.
End
Configuring Genesys Rules Authoring Tool
Prerequisites
Start
- In Genesys Administrator, navigate to Provisioning > Environment > Applications, select the GRAT application (the application with type Business Rules Execution Server), and click Edit.
- In the Connections section, click Add....
- Select the Genesys Web Engagement Cluster and click OK.
- Select the Web Engagement Cluster in the list of connections and click Edit.
- In the Connection Info window, select default for the ID field. Click OK.

ID is set to the default port.
- Select the Options tab.
- In the [settings] section, set verify-deploy-address to false. You must set this option because in Genesys Web Engagement, rule packages are deployed to the Web Engagement Server, not to Genesys Rules Engine. When set to false, this option prevents GRS from trying to verify that the server deploying the rules is Genesys Rules Engine.

verify-deploy-address is set to false.
- In the Security tab, set a user who has Read, Create, Change rights for the Scripts folder in Log On As. This user should also have: Read access to all tenants which are supposed to be used; Role with sufficient permissions (as detailed in Genesys Rules System Deployment Guide); Read access to Business Structure folder and associated nodes that are supposed to be used; Read access to Scripts folder and Scripts objects (which are representations of the rule templates).
- Click Save & Close.
End
(Optional) Configuring Roles Settings for Rules Management
You should complete this procedure if you need to import permissions to enable a user to create rules for Genesys Web Engagement. Once roles are imported, you can assigned them to the user who publishes the rule templates and creates rules for GWE.
You should not complete this procedure if you have already created a user who has permissions to create rules packages in Genesys Rules Authoring (as described in the "Role-based Access Control" chapter of the Genesys Rules System Deployment Guide).
Start
- In Genesys Administrator, navigate to Provisioning > Accounts > Roles and click New....
- Enter a name for the new role. For example, GWE_Rules_Administrator.
- In the Memebers section, you can specify who should have this role. Click Add to add as many access groups or users as you need.
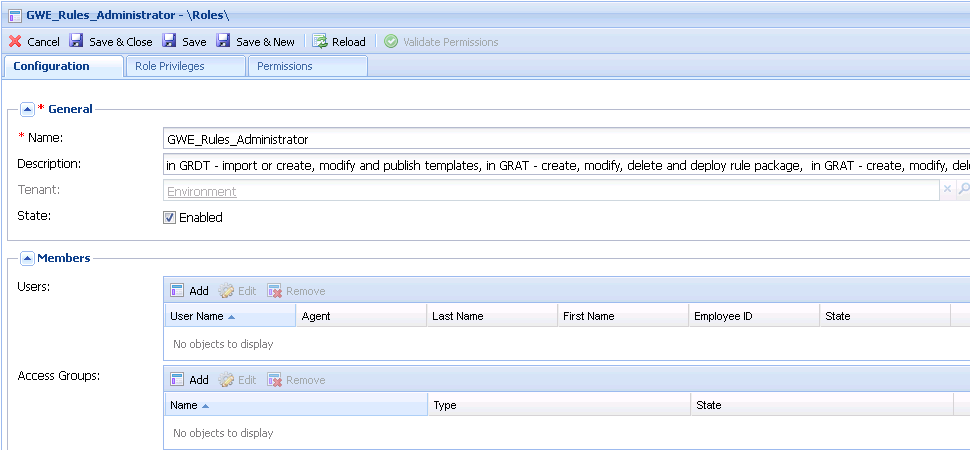
New Role
- Select the Role Privileges tab and select Genesys Rules Authoring Tool. The privileges for GRAT are added to the GWE_Rules_Administrator role.

Imported Role Privileges
- Click Save & Close.
End
Members of the GWE_Rules_Administrator role can now do the following:
- Create, modify, and delete rules
- Create, modify, delete, and deploy rule packages
- Create, modify, and publish CEP rule templates
-
Prepare the CEP Rule Templates.
Complete the following procedures to import, configure, and publish the CEP Rule Templates.
Importing the CEP Rule Templates in Genesys Rules Development Tool
Complete this procedure to import the CEP rule templates in the Genesys Rules Development Tool. Even if you do not plan to customize the templates, your rule template must be published in the Rules System Repository before you try to create rules.
Prerequisites
Start
- Navigate to Window > Open Perspective > Other > Template Development to switch to the Template Development perspective of the Genesys Rules Development Tool.
- Select File > Import....
- In the Import dialog window, navigate to General > Existing Projects into Workspace. Click Next.
- Select Select Root Directory:, then click Browse.
- Import your project, located in the folder at Web Engagement installation directory\apps\playground\resources\_composer-projects\WebEngagement_CEPRule_Templates. Select the rules template project to import:
- Browse to the \apps\playground\resources\_composer-projects folder in the Genesys Web Engagement installation directory and select a project.
- Click OK. WebEngagement_CEPRule_Templates_playground is added to the Projects list.
- Select the WebEngagement_CEPRule_Templates_playground project.
- Warning: Do not enable the option Copy projects into workspace.
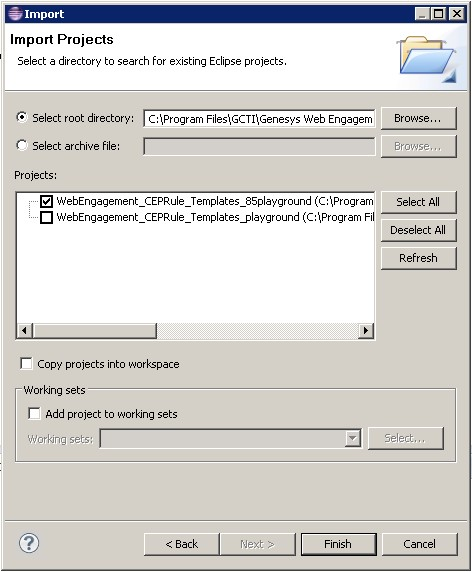
Import the default templates by clicking Finish.
- Click Finish to import the project. WebEngagement_CEP_Rule_Templates_playground is added to the Project Explorer.

WebEngagement_CEP_Rule_Templates_playground is added to the Project Explorer.
End
Configuring the CEP Rule Templates
Prerequisites
- The Web Engagement Categories business attribute is defined in Genesys Administrator.
Start
- In the GRDT Project Explorer, right-click on the WebEngagement_CEPRule_Templates project. Click Properties.
- In the Properties dialog window, navigate to Template Properties. In Publishing Data, set Type to web_engagement.
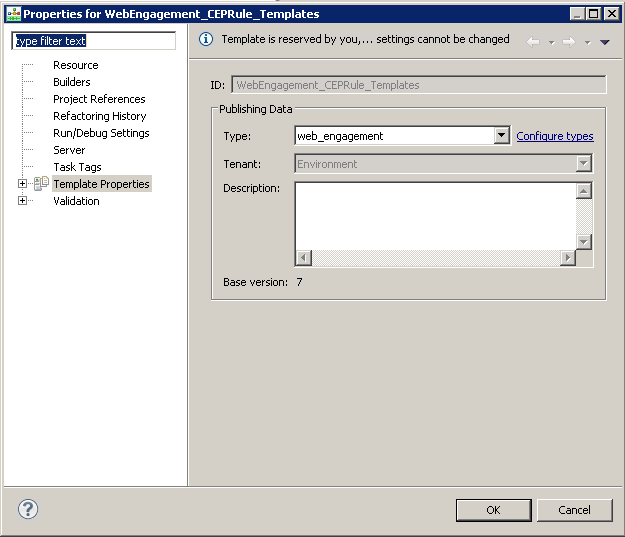
Set the type to web_engagement.
- Navigate to Template Properties > Imports. The Imports panel opens.
- Select the Enable global imports option.

Enabling global imports.
Note: The com.genesyslab.wme.cep.api.Event and com.genesyslab.wme.cep.drools.EventDispatcher packages must be present.
- Click OK.
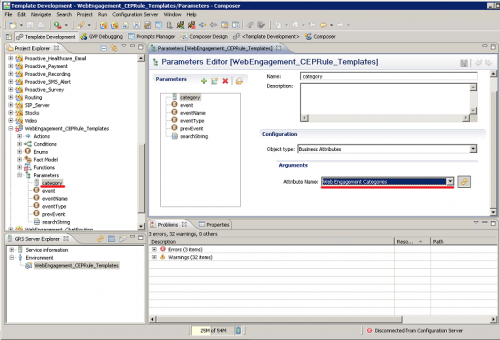
- In the Project Explorer, navigate to WebEngagement_CEPRule_Templates > Parameters > category.
- In the Parameters Editor panel, set Attribute Name to Web Engagement Categories.
- Click Save.
End
Publishing the CEP Rule Templates in the Rules Repository
Prerequisites
Start
- In Project Explorer, right click WebEngagement_CEPRule_Templates.
- Select Publish. The Publish Template Wizard opens.
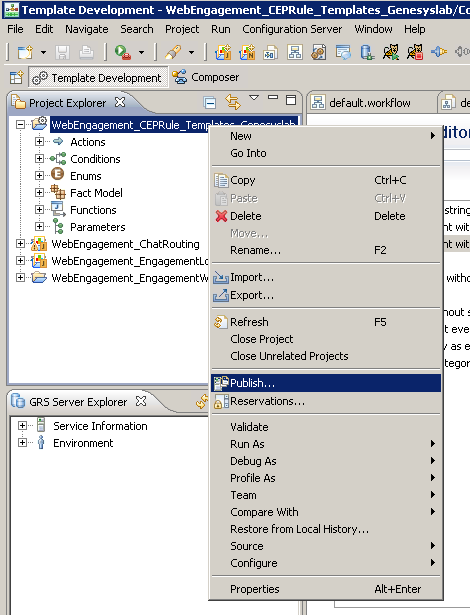
The Publish Template Wizard.
- Select WebEngagement_CEP_Rule_Templates.

Select WebEngagement_CEP_Rule_Templates.
- Click Finish.
End
-
Create business rules in Genesys Rules Authoring Tool.
Complete the steps below to create business rules in GRAT to use in our Test Scenario.
Start
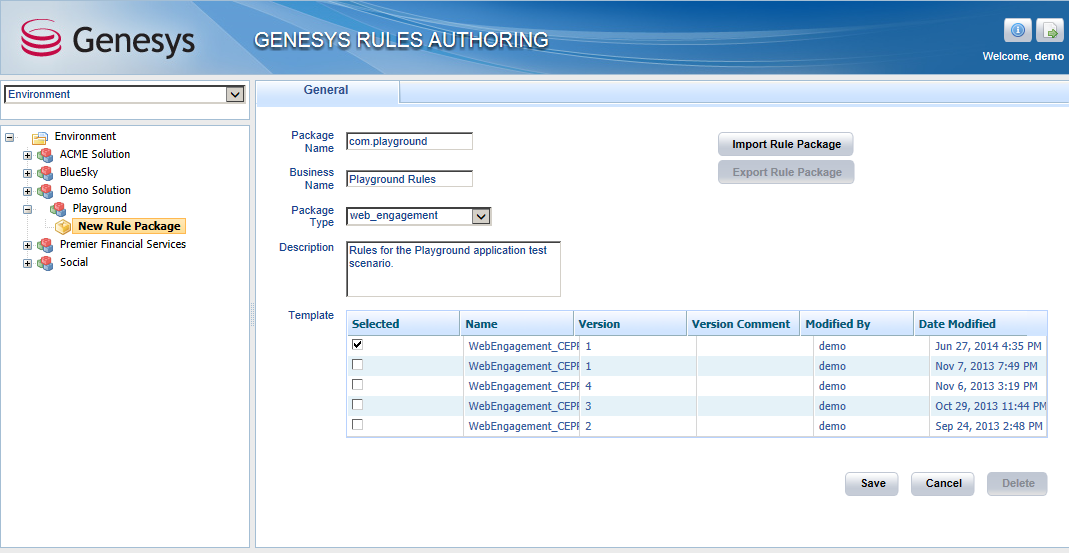
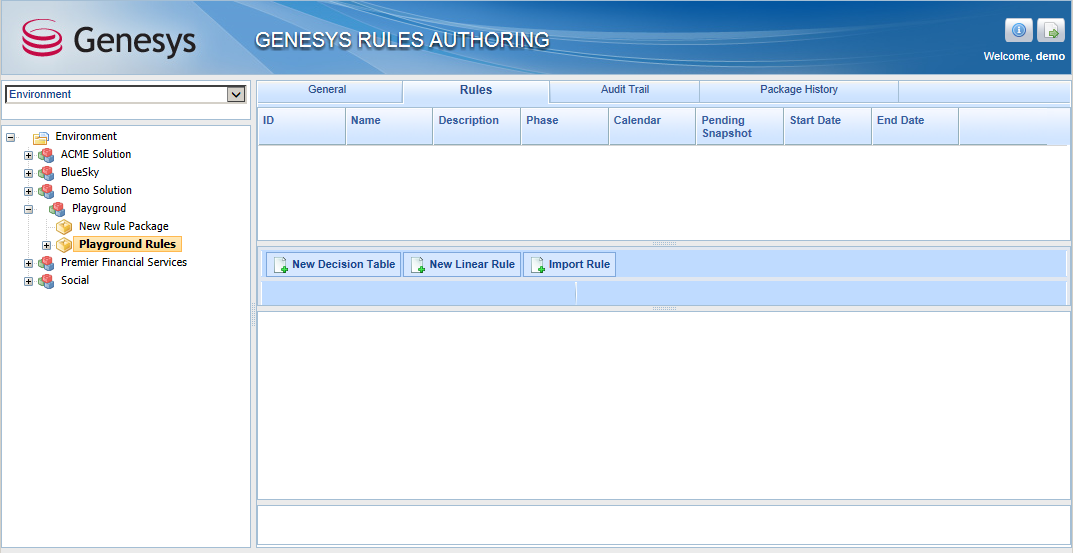
- In GRAT, navigate to your site and select New Rule Package
- Enter the following information:
- Package Name — com.playground
- Business Name — Playground Rules
- Package Type — Select web_engagement
- Description — Rules for the Playground application test scenario.
- Template — Select the Web Engagement CEP template from the list.
- Click Save.
- Select the package you just created and select the Rules tab.
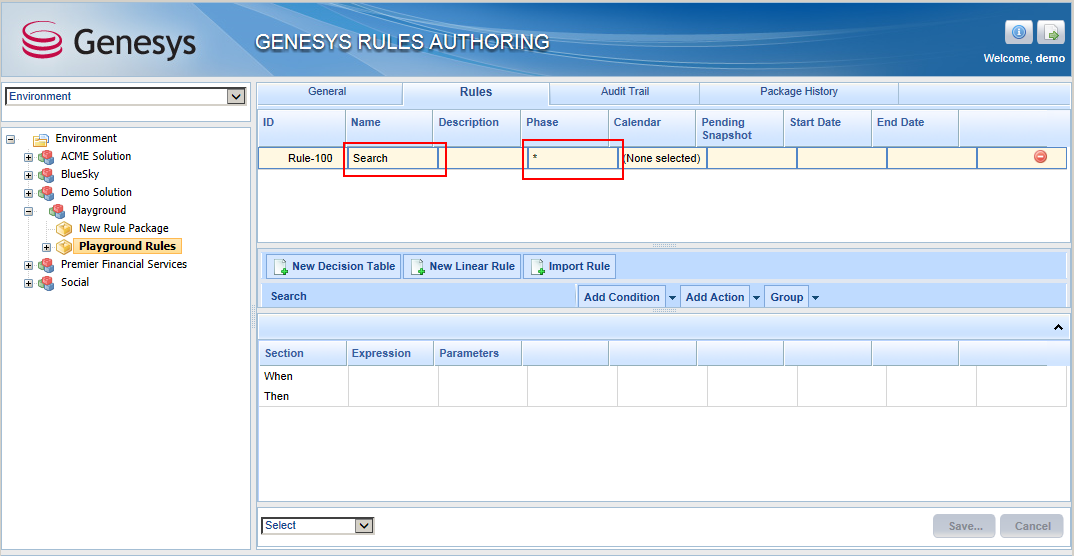
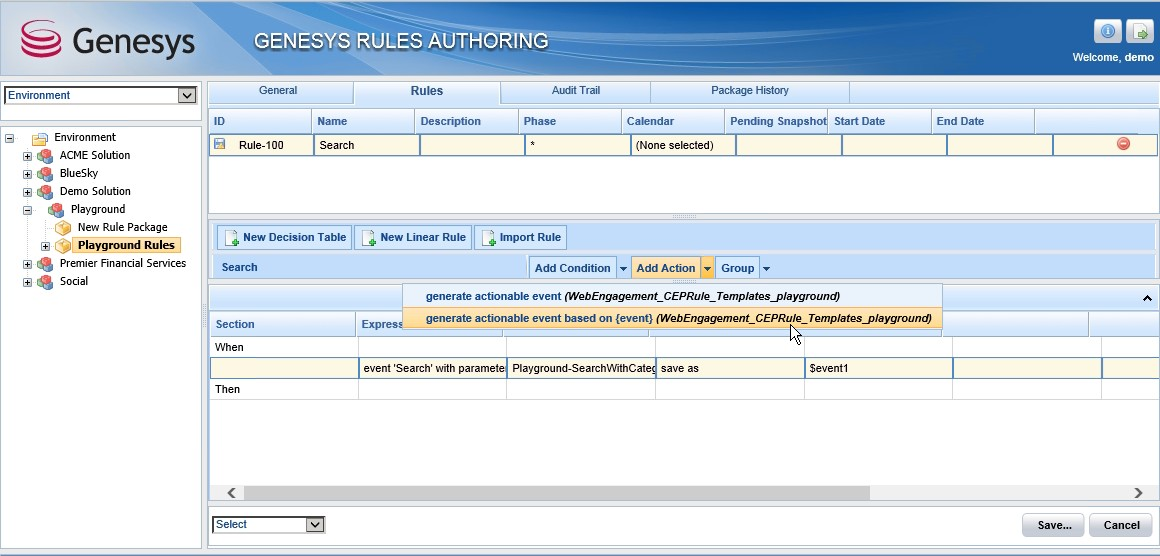
- Click New Linear Rule and enter the following information:
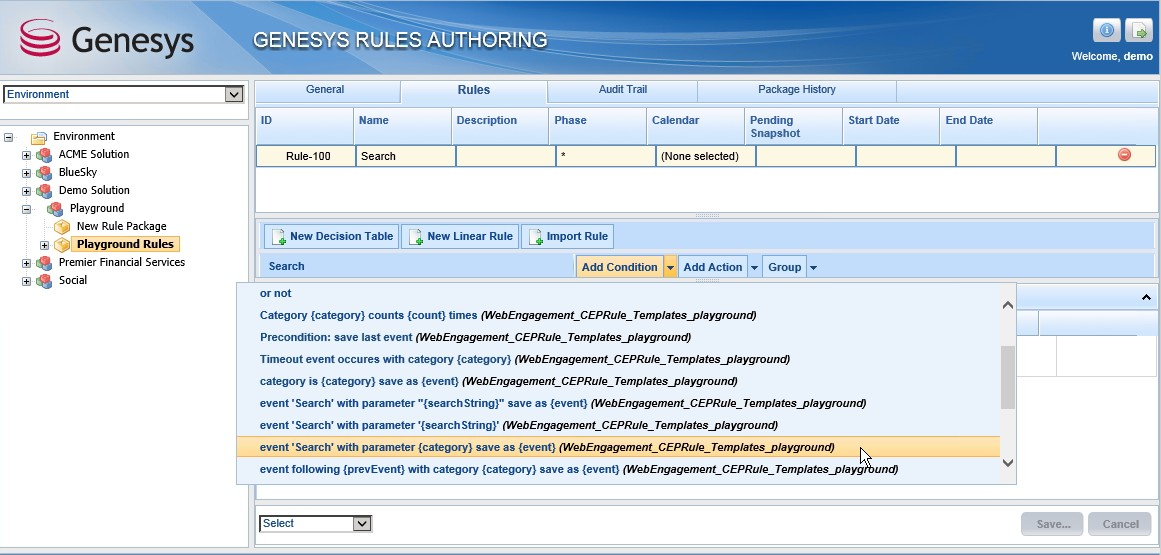
- Click Add Condition and select "event 'Search' with parameter {category} save as {event}".
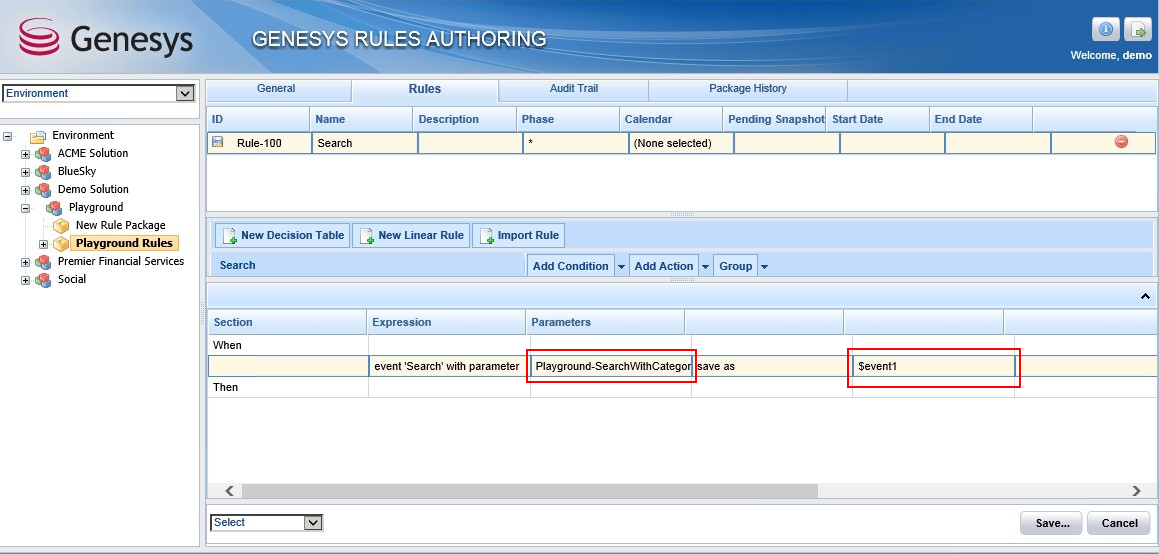
- Select "PlayGround-SearchWithCategory" and "$event1".
- Click Add Action and select "generate actionable event based on {event}".
- Select "$event1" from the list.
- Click Save. We now have a business rule for our search with category scenario.
End
-
Deploy rules to the Genesys Web Engagement Environment.
Complete the steps below to deploy your rules to the GWE environment.
Prerequisites
Start
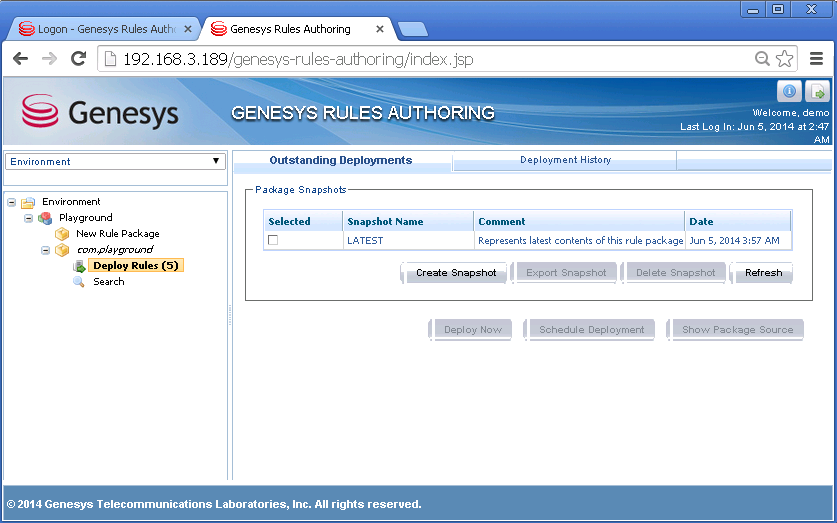
- In Genesys Rules Authoring Tool, navigate to Solution > your rules package > Deploy Rules.
- Select the checkbox next to your rules package in the Package Snapshots section.
- Click Deploy Now. The Deploy window opens.
- Select your Genesys Web Engagement Server for the Location.
- Click Deploy. The rules package is deployed to the Web Engagement system.
End
-
Deploy the Playground application.
Warning
Make sure to
stop your GWE servers before deploying an application.
Deploying your Application
Start
- Navigate to the installation directory for Genesys Web Engagement and open a new console window.
- Type:
deploy playground
End
-
Make sure the components in your Genesys environment are running.
-
Start the Web Engagement servers.
Start
To start your servers from Genesys Administrator:
- Navigate to Provisioning > Environment > Applications.
- Select the Web Engagement Server.
- Click Start applications in the Runtime panel.
To start your servers using the provided start script (start.bat on Windows and start.sh on Linux):
- Navigate to the Web Engagement installation directory and launch a console window.
- For Windows, type: start.bat
- For Linux, type: start.sh
End
The Web Engagement Server is started.
-
Confirm that the test scenario is a success by walking through the Test Scenario Steps.
Other Test Scenarios
You can use the Playground application to complete the following test scenarios:
- Entrance to a specific page (Singleton)
- Inactivity timeout for the user (Singleton)
- Select an element on the page (Singleton)
- Search
- Get information about user
- Successful completion of the wizard (Sequence)
- Go to the previous page of the wizard (Sequence)
- Repeated input on the same page (Counter)
- Send custom event
- Changing the type of invitation depending on the status of the user (gold, platinum)
- Filling out the form (Sequence)
- Display advertisement (Sequence)

