WFM Overtime Functionality
Workforce Management (WFM) provides Overtime planning and tracking views for Supervisors, into which they can enter overtime hours for a single agent or multiple agents by specifying the time interval and activity.
This topic includes the following sections:
- Overview
- Overtime Requirements View
- Assigning Secondary Skill Sets for Overtime
- Tracking Scheduled Overtime Results
Overview
WFM automates the overtime insertion process in the following ways:
- Finds the appropriate shift definition for the extended shift
- Schedules break/meals on the overtime part of the shift
- Designates overtime by specifying a marked type
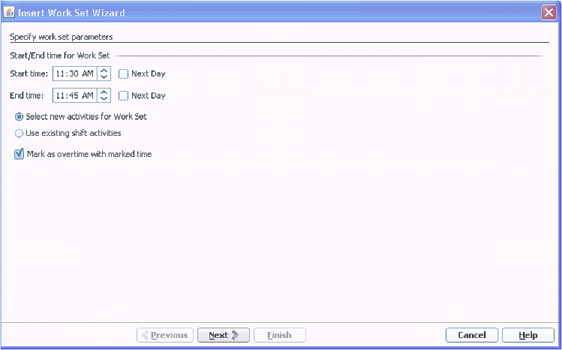
You can also enter overtime in the Intra-Day, Agent Extended, and Weekly views by inserting a work set with Marked Time. Secondary shifts and activities can be used to plan overtime.
Overtime Requirements View
In WFM Web, you can plan, set, and track how overtime requirements are met in the Master Schedule > Overtime view. To use this view, set the user security rights in Configuration Utility > User Security > Module > Access Overtime Requirement.
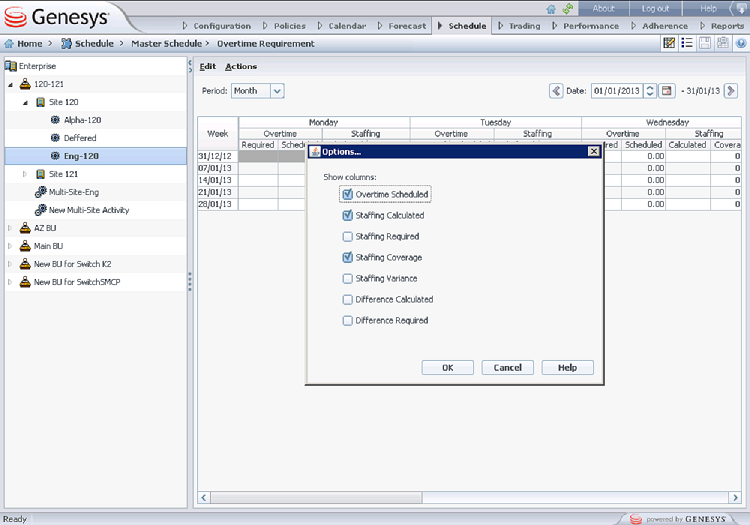
Overtime data is displayed in a grid, which has an editable Overtime Requirement column and a read-only Overtime Scheduled column. The Overtime Scheduled column is calculated according to the scheduled Marked Time (ensure the Overtime option is checked). The following optional columns contain information that justifies the need for overtime hours (see the figure below):
- Staffing—Calculated and required staffing.
- Difference—Schedule coverage showing the difference between calculated and required.
- Variance—Equals the coverage minus the calculated, and is the anticipated unplanned overhead.

Figure: Overtime Requirement View with Monthly Granularity
Assigning Secondary Skill Sets for Overtime
Shifts are assigned to contacts in Web > Policies > Contracts view (see the figure below) as either Primary or Secondary. Secondary assignments are used for overtime only and represent a broader set of constraints, while Primary assignments are used for other functionality.

Figure: Web for Supervisors—Policies > Contracts > Shift Assignment
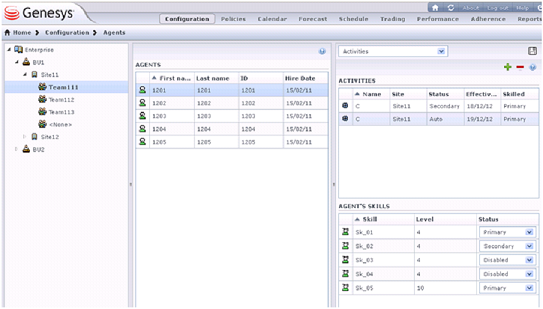
Secondary activities can be defined in one of two ways in the Web > Configuration > Agents > Activities view (see the figure below):
- Assigning skills to the agent as Secondary
- Assigning activities as Secondary with an effective date.
During overtime, agents can work on activities for which they are not normally scheduled. Therefore, entering overtime for an agent can change the agent’s work day so that the usual shift definition no longer fits.

Figure: Web for Supervisors—Configuration > Agents > Activities View
Configuring Overtime for Individual Agents
The Overtime view is available in the Master Schedule only. However, you must publish a scenario with the inserted work sets before the information can be seen in the Overtime view.
You can schedule overtime for an agent by inserting a work set and using Marked Time to mark it as overtime. Use one the wizards in the following views:
- Insert Wizard—Schedule > Intra-Day, Agent-Extended views (Master and Scenarios)
- Insert Multiple Wizard—Schedule > Intra-Day, Agent-Extended, and Weekly views (Master and Scenarios)
Tracking Scheduled Overtime Results
You can use the following views to track scheduled overtime results:
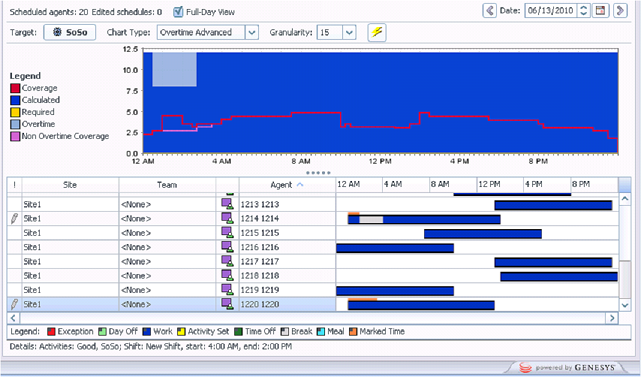
- Schedule > Schedule Scenarios Intra-Day view in the Performance Data pane
- Schedule > Master Schedule Intra-Day view in the Performance Data pane
- Schedule > Master Schedule view > Overtime view
The Performance Data pane separates the scheduled overtime part of the coverage within the calculated staffing graph and distinguishes it from the overtime requirement. See the figure below.


