Installing the GRAT Component
Purpose
To run the the installation package for the GRAT after the applications are configured in Configuration Manager.
Prerequisites
- Configuring the Rules Repository Database
- Creating the GRAT Application Objects in Configuration Manager
Procedure
- From the host on which the GRAT is to be installed, locate and double-click Setup.exe in the rulesauthoring folder of the Genesys Rules System CD.
- Click Next on the Welcome screen of the installation wizard.
- Enter the connection parameters to connect to Configuration Server (Host, Port, User name, and Password).
- On the Client Side Port Configuration screen, if you do not want to configure client-side port parameters, leave the checkbox empty and click Next. If you do want to configure these settings, select the checkbox to display to additional options: Port and IP Address. Enter values for these options and click Next.
- Select the GRAT application that you created in Creating the GRAT Application Objects in Configuration Manager. Click Next.
- Specify the destination directory for the installation, or accept the default location, and click Next.
- Enter the host and port of the optional backup Configuration Server and click Next.
- Enter the number of times that the GRAT Server application should attempt to reconnect to Configuration Server (Attempts) and the amount of time (Delay) between attempts. Click Next.
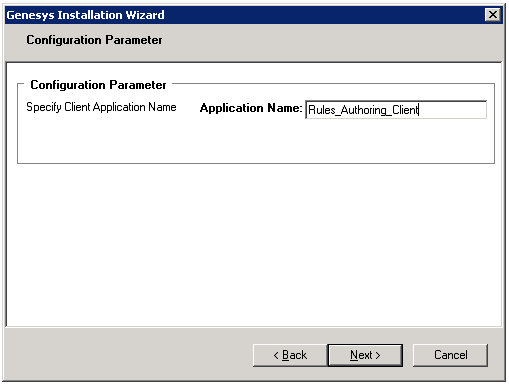
- On the screen that is shown in Creating the GRAT Application Objects in Configuration Manager, specify the name of the rules authoring client application and click Next.
- Select Application Server Type. Click Next.
- Click Install.
- Click Finish.
Next Steps
- Before using GRAT, you will need to set up users and roles. See Role Task Permissions and Configuring a User for more information.
This page was last edited on September 17, 2014, at 11:03.
Comments or questions about this documentation? Contact us for support!

