Contents
Apple Messages for Business Interaction
Interaction Workspace enables you to handle Apple Messages for Business interactions. This topic is also covered in the Workspace Desktop Edition User's Guide.
Pending response indicator
When you receive an Apple Messages for Business message from a contact, a timer starts and a pending response indicator appears next to the interaction-type icon in the Apple Messages for Business interaction window (![]() ). The timer indicates that you have a response to the contact pending.
). The timer indicates that you have a response to the contact pending.
The color of the pending response indicator begins as green. If you have not responded by a specific time interval, the indicator changes to yellow. If you still have not responded by a second time interval, the indicator changes to red and begins to flash. The indicator disappears after you send a message to the contact.
If you have a pending response but the Apple Messages for Business interaction window is not the active window, the Workspace Windows taskbar icon flashes, regardless of the condition of the pending response indicator. The flashing stops when you navigate to the interaction by clicking the Interaction control bar.
Using workbins
Your organization might use workbins to manage Apple Messages for Business interactions. A workbin is like a queue in which you can store interactions that are to be handled later. Additionally, when you log out, open Apple Messages for Business interactions are transferred to a workbin for later access. If a contact resumes one of these interactions, it is automatically removed from the workbin and transferred to an available agent.
Click ![]() to transfer the interaction to a workbin. The interaction closes in Workspace but the session remains active in the background (server-side) and for the contact.
to transfer the interaction to a workbin. The interaction closes in Workspace but the session remains active in the background (server-side) and for the contact.
To retrieve the interaction from the workbin, select the interaction and click Open, as shown below:

Standard Response Library
Use the Workspace Standard Response Library to insert prepared replies into your conversation. Text is sent first in a separate message, followed by attachments (if any). Click X to remove an attachment file from the response.
You can also use standard responses to insert structured messages that use Apple Messages for Business-specific features, such as:
These features are described in more detail below.
Apple Pay
The Apple Pay structured response enables contacts to pay for a purchase using Apple Pay.
You use this feature in the same way you would use a standard response. In the Responses tab, select the structured response that uses the Apple Pay feature.
The contact receives the message and provides a response.
Customizing the Apple Pay message
Select the Apple Pay message to access the following tabs and settings:
- Payment Request tab
- Label: This column contains one or more line items for which the contact must pay.
- Amount: This column specifies the price for each line item.
- Subtotal: The total amount of the line items for which the contact must pay.
- Tax Rate: The tax rate to use to calculate Total Amount price.
- Total Label: The text label for the Total Amount value.
- Total Amount: The total price, including tax.
- Tax Shipping: If selected, tax is also applied to the shipping cost (refer to Shipping Methods, below).
- Click Add or Remove to manually add or delete line items before sending tes Apple Pay request to the contact.
- Shipping Methods tab
- Label: This column contains one or more shipping methods that the contact may choose.
- Detail: This column provides more information about each shipping method.
- Amount:The cost for each shipping method.
- Tax: If you selected Tax Shipping in the Payment Request tab, this column shows the tax to be charged for the shipping method.
- Click Add or Remove to manually add or delete shipping methods before sending this Apple Pay request to the contact. The contact can select one of the provided shipping methods before he or she pays. If the contact does not make a selection, the default shipping method (the first item in the Shipping Methods list) is automatically applied.
- Extra Information tab
- Information in this tab varies depending on the configuration set up by your organization. Ask your administrator for additional information.
- Received Message tab
- These settings are typically pre-configured in the standard response. Only change these settings if directed to do so by a supervisor or manager.
Custom Extensions
Custom extensions are custom-built iMessage or iOS apps that provide extended functionality. For example, your organization might have an app that helps contacts to access additional information on your server, such as account information.
Use this feature in the same way you use a standard response. In the Responses tab, select the standard response that uses the Custom Extension.
The contact receives the message and selects a response.
Configuring the Custom Extension
Select the Custom Extension to access the following tabs and settings:
- Custom Extension tab: The information on this tab is specific to your custom extension. The information specifies the parameters and values used by the custom extension. Do not modify this information unless directed to do so by a manager or supervisor.
- Received Message tab: This tab shows a preview of the message to be sent to the contact.
Date Picker
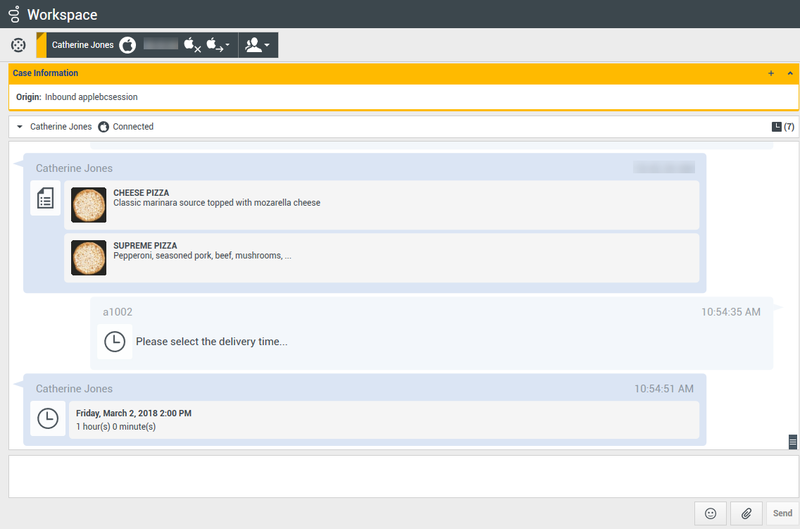
The Date Picker feature enables you to provide your contact with a list of dates from which to make a selection. For example, you might provide a list that prompts the contact to choose a date for scheduling a service call.
Use this feature in the same way you use a standard response. In the Responses tab, select the standard response that uses the Date Picker feature.
The contact receives the message and selects a response.
Customizing the Date Picker
Select the Date Picker to access the following tabs and settings:
- Event tab
- Title: Provide a title for the Date Picker message.
- Location: (Optional) Describe a location for the Date Picker event.
- Latitude: (Optional) Provide a latitude for the location.
- Longitude: (Optional) Provide a longitude for the location.
- Radius: (Optional) The location radius, in meters. If the latitude and longitude fields are missing or empty, this field is ignored.
- Timeslots tab
- Click Add to add a timeslot. In the StartTime field, select a date and time for the timeslot. In the Duration section, specify the length of the timeslot.
- Click Add or Remove to add or delete a timeslot.
- Received Message tab
- These settings are typically pre-configured in the standard response. Only change these settings if directed to do so by a supervisor or manager.
- Reply Message tab
- These settings are typically pre-configured in the standard response. Only change these settings if directed to do so by a supervisor or manager.
List Picker
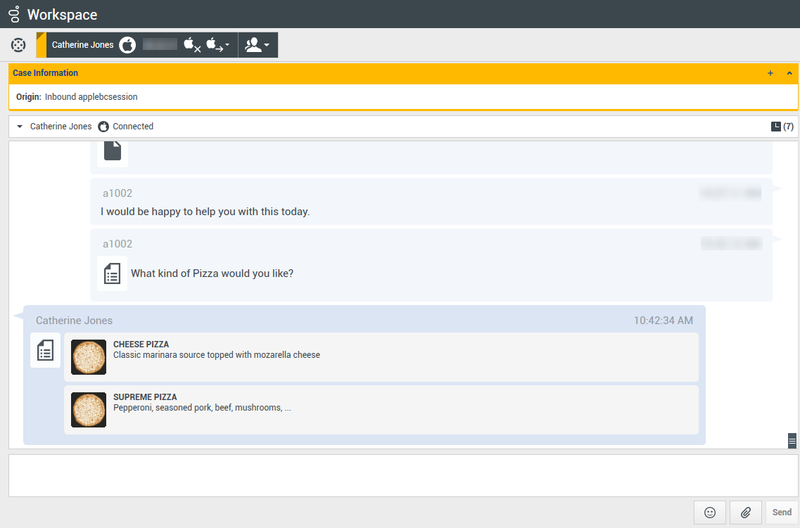
The List Picker feature enables you to provide your contact with a list of selectable options. For example, you might provide a list prompting the contact to choose a reward or a particular type of credit card.
Use this feature in the same way you use a standard response. In the Responses tab, select the standard response that uses the List Picker feature.
The contact receives the message and selects a response.
Customizing the List Picker
Select the List Picker to access the following tabs and settings:
- List Picker tab
- Multiple Selection: Select this option to enable the contact to choose more than one item from the list.
- Right-click an object in the list section to access a contextual menu with the following options:
- Add Section: Add a new section to the list.
- Add Item: Add a new item to the selected section.
- Remove Section or Remove Item: Remove the selected section or item.
- Move Up: Move the selected object higher in the list.
- Move Down: Move the selected object lower in the list.
- Title: Provide a title for the List Picker message.
- Received Message tab
- These settings are typically pre-configured in the standard response. Only change these settings if directed to do so by a supervisor or manager.
- Reply Message tab
- These settings are typically pre-configured in the standard response. Only change these settings if directed to do so by a supervisor or manager.
Rich Links
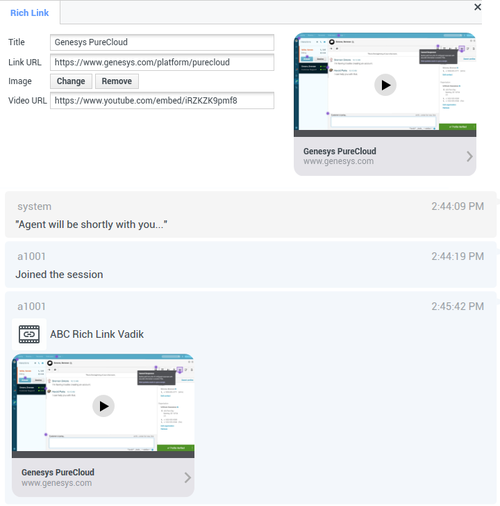
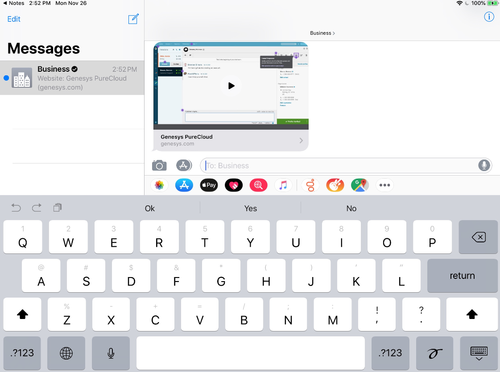
Use Rich Links to show contacts an in-line preview of an image or video within the chat. Unlike regular messages, a contact can access the media immediately without clicking a "Tap to Load Preview" message.
Use this feature in the same way you use a standard response. In the Responses tab, select the standard response that uses the Rich Link feature. An example standard response that uses a Rich Link is shown below:
The contact receives the message and can access the media directly in the chat, as shown below:
Supported file types
The following image formats are supported (file size must be less than 25 MB):
- PNG
- JPG/JPEG
- GIF
- BMP
Support for streaming video is dependent on Apple. Video format support is not limited by this plugin.
Attachments
Click Attach file ![]() to attach a file. You can also receive attachments.
to attach a file. You can also receive attachments.
- Click the corresponding icon in the transcript area to display or play the attachment.
- Right-click the icon and select Save as... to save the attachment.
- The file size of an attached file must be smaller than 100 MB.
- The size and type of file that you can attach or receive might be further limited by your configuration.
The following attachment types are supported:
- Non-multimedia files: Non-multimedia files are opened by the default application for that file type.
![]()
- Audio: An audio attachment icon appears in the message area. Select the icon to open the audio file.
![]()
- Images: A preview of the image appears in the message area. Select the image to open the image.

- Videos: A video attachment icon appears in the message area. Select the icon to open the video.
![]()
Emojis
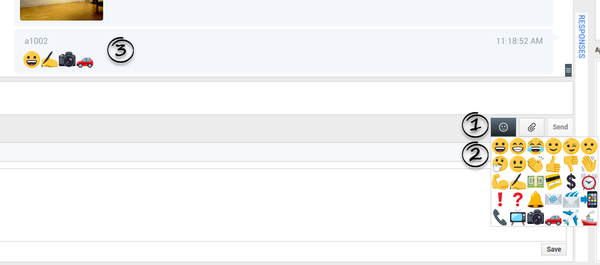
Apple Messages for Business provides a set of emojis that you can use in chat interactions.
- Click Insert Imoji (smiley-face) to open the emoji drop-down menu.
- Select an emoji.
- When you select an emoji, it appears in the message area.
Web links
All URL links are shown as hyperlinks in the chat window. Click a link to open it in the system default web browser.
Sending outbound messages
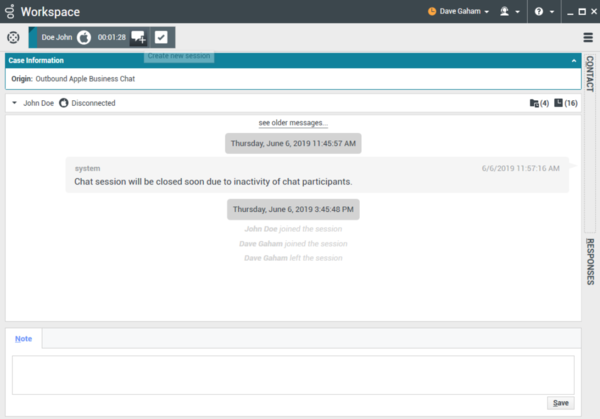
You can initiate a conversation with a past contact using the My History view or by accessing the history for a particular contact in the Contact Directory. Select a past interaction with the contact and click Create new chat (![]() .
.
The interaction opens and you can use the same functionality as an inbound interaction to converse with the contact.
Alternatively, if you have not yet marked an interaction as Done, you can click Create new session (![]() ) in the interaction control bar to create a new outbound session.
) in the interaction control bar to create a new outbound session.
Related Resources
The Workspace Desktop Edition User's Guide (English only) provides detailed lessons for using all the features of Workspace. You might find the following lessons useful:
- Handle An Apple Messages for Business Interaction
- Blend Different Media Into A Single Conversation
- Main Window Basics
- Workspace Windows and Views
- Basic Use-Case Summary


