Contents
Viewing your schedule details
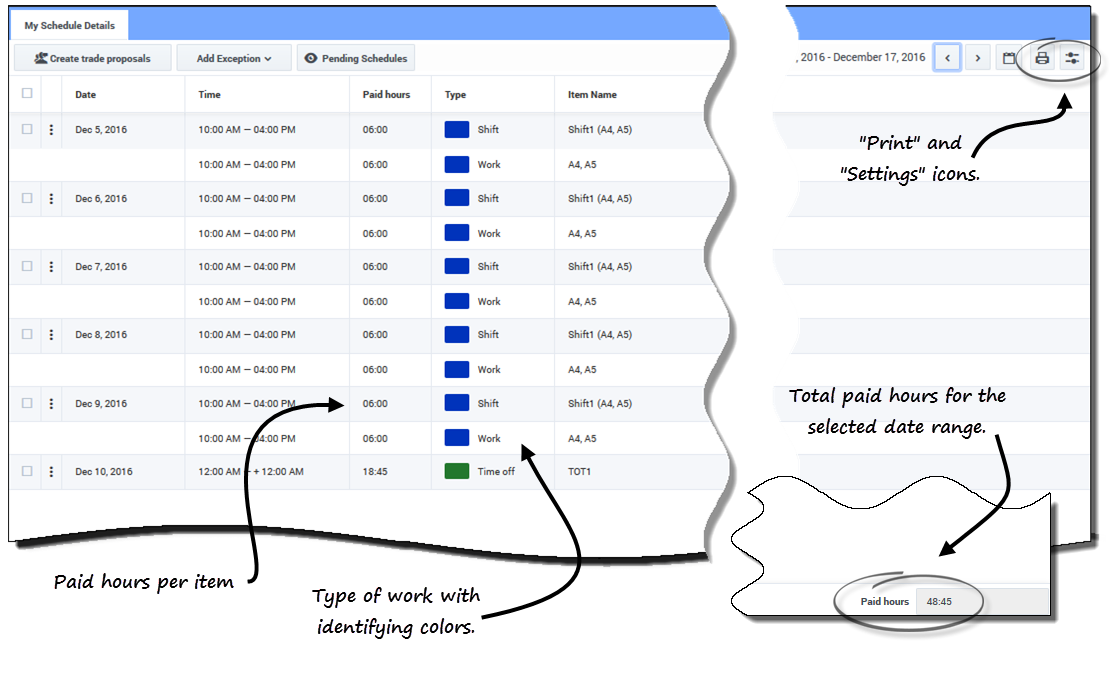
The My Schedule Details view displays the same information as the My Schedule view, but in a different format. It shows what activities you are scheduled to perform each day and displays information about meals and breaks, your time off, exceptions, and days off.
Columns and controls
In addition to the common controls described in My Schedule, this view has these additional columns and controls:
- Print icon—Opens a separate window, displaying your schedule details in a printer-friendly format. See Printing Your Schedule Details.
- Settings icon—Opens a dialog box that enables you to select the information you want to see in the schedule details grid. See Changing Settings in the Schedule Details View.
- Date column—Shows each date in your schedule for the selected date range.
- Time column—Shows when you are scheduled to start and end your shift and the start and end time for each schedule item during your workday.
- Paid hours column—Shows the total paid hours for each workday item. Items that are not paid are shown as 00:00. (The total paid hours for the period are displayed in the bottom-right corner of this view.)
- Type column—Shows the type of each item (with its identifying color) in the workday.
- Item Name column—Shows the name of each item in the workday.
Changing the view settings
To change the information that is displayed in the My Schedule Details view:
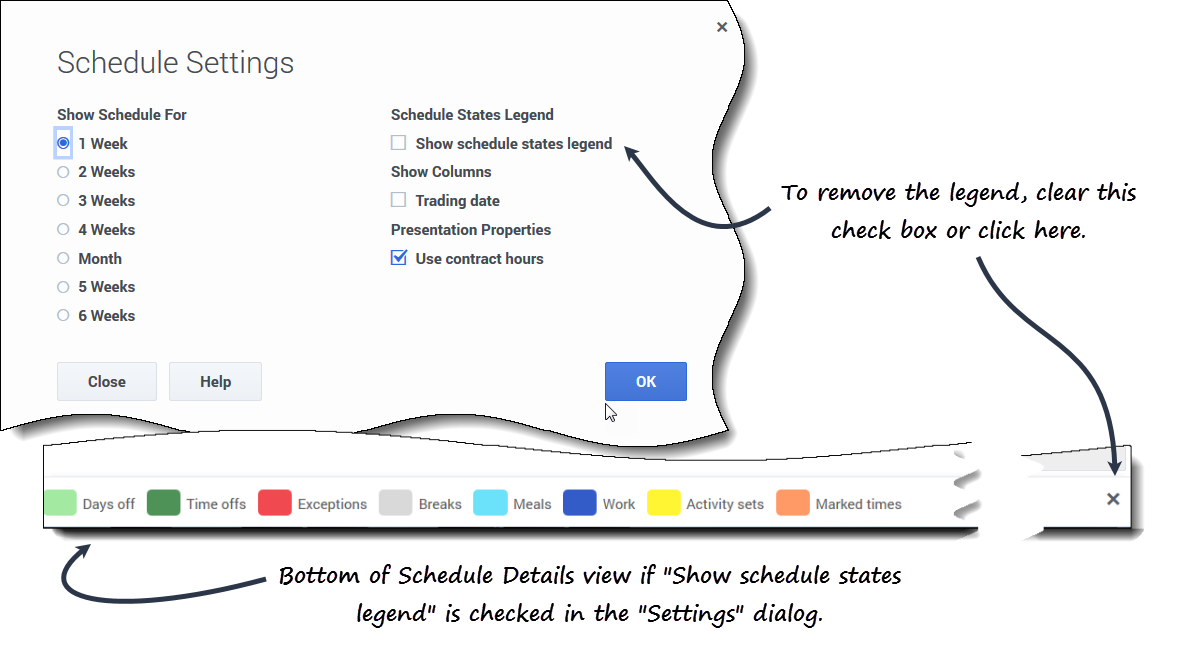
- In the upper-right corner of this view, click the Settings icon.
- The Schedule Details Settings dialog box opens.
- In the Show Schedule For list, choose the time period by clicking one of the six radio buttons (shown in the graphic).
- Check the Show Schedule States Legend check box to see the legend at the bottom of this view.
- Check the Trading Date check box if you want to see that column in the schedule grid.
- Check the Use contract hours check box if you want to see only the range of hours in your contract.
- Click OK to display your selections, or Close to discard them.
Rolling back schedules
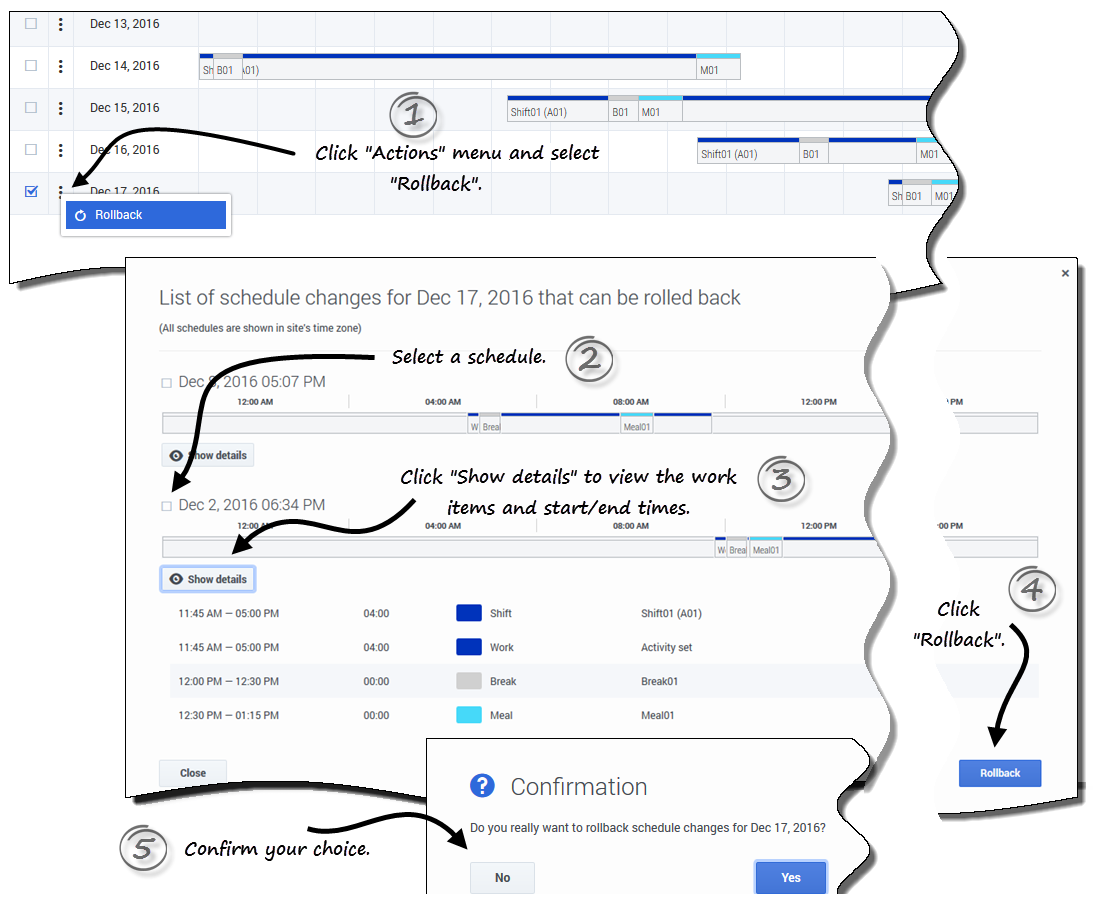
In this view, you can click Actions ![]() to open a drop-down list, enabling you to roll back a published schedule. Selecting Rollback in the list rolls back any schedule changes you've made (for example, if an exception was auto-committed immediately) and reverts your schedule to the previous state.
to open a drop-down list, enabling you to roll back a published schedule. Selecting Rollback in the list rolls back any schedule changes you've made (for example, if an exception was auto-committed immediately) and reverts your schedule to the previous state.
To roll back a schedule:
- In the row that contains the schedule you want to roll back, click Actions
 .
. - Select Rollback.
- A dialog opens containing a list of schedules that can be rolled back.
- (Optional) Click Show details to view all of the work items in this schedule and their start/end times.
- Select the schedule you want to roll back, and click Rollback.
- When the Confirmation dialog opens:
- Click Yes to roll back the changes.
- The schedule is restored to its previous state and appears in the Schedule views.
- Click No to discard the changes and close the dialog.
- Click Yes to roll back the changes.
Deleting pending schedule changes
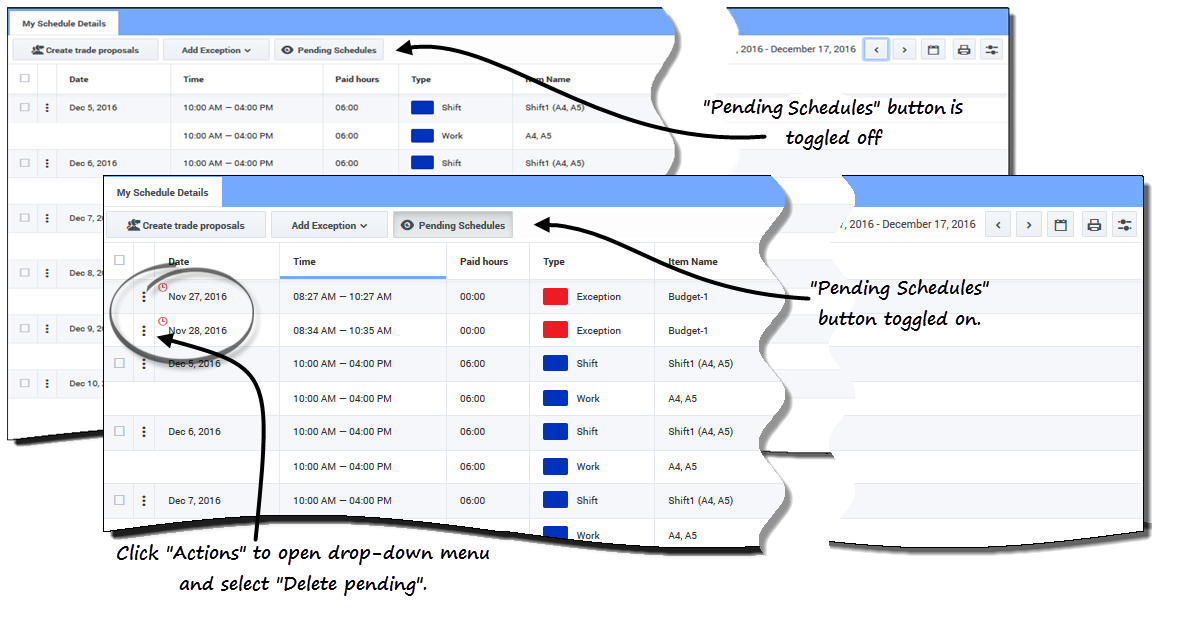
At the top of this view, toggling on the Pending Schedules button displays changes that are requested but not yet approved. Clicking Actions ![]() opens a drop-down list, enabling you to delete pending changes in your schedule that are not yet approved by your supervisor.
opens a drop-down list, enabling you to delete pending changes in your schedule that are not yet approved by your supervisor.
To delete pending changes in your schedule:
- In the row that contains the schedule you want to change, click Actions
 .
. - Select Delete pending.
- When the Confirmation dialog opens, click Yes to delete pending changes or No to cancel the action and close the dialog.
- The pending changes are deleted.
Viewing trade requests
If your site allows schedule trading, there might be a Trade Requests button at the top of this view. This button indicates that there are open trade proposals or responses and shows the number of unanswered requests in brackets. The button displays only if there are open proposals awaiting your response.
See Viewing Trade Requests in the Schedule topic for more information about the dialog that opens when you click this button.
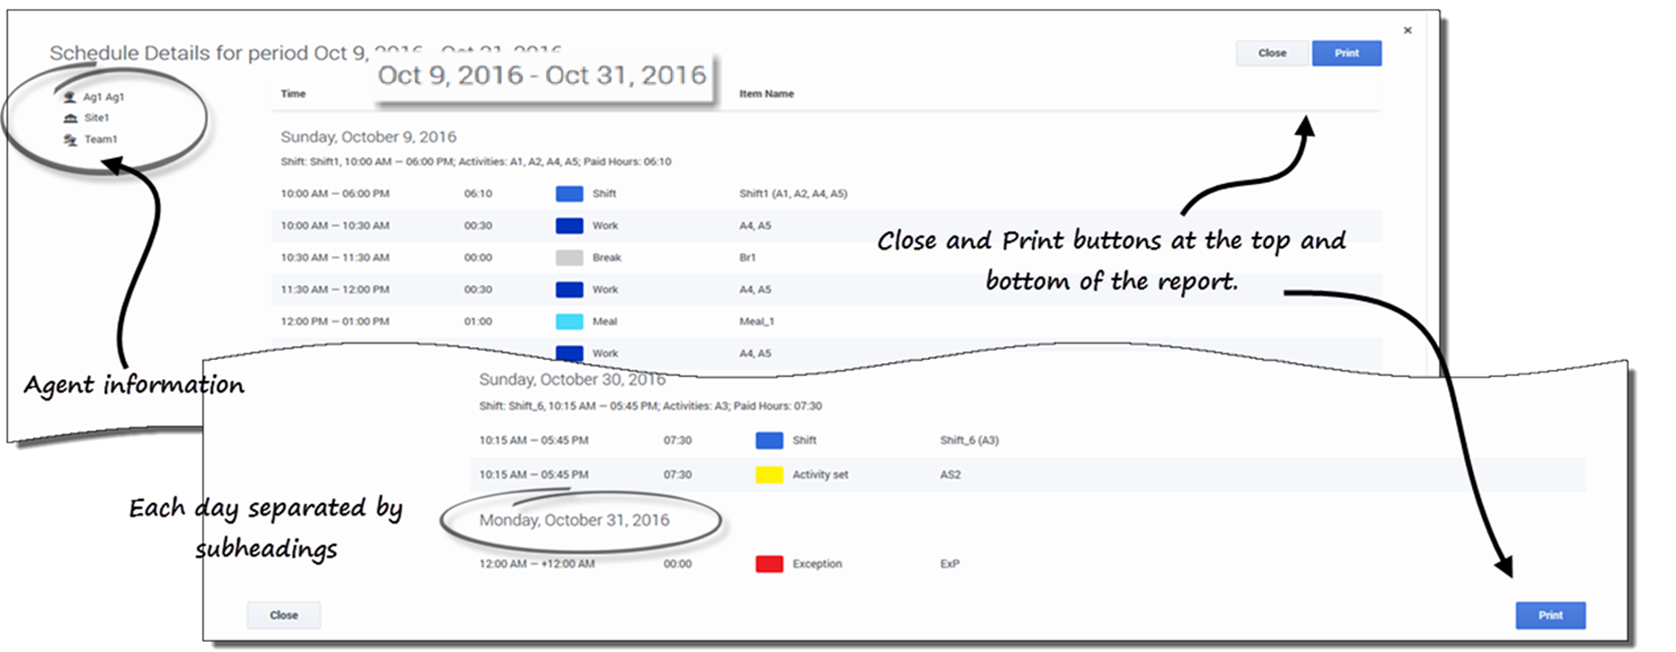
Printing your schedule details
To print your schedule details:
- In the upper-right corner of this view, click the Printer icon.
- A separate window opens with your schedule details formatted in a printer-friendly format. (See figure.)
- Click Print.
- When printing is finished, click Close.

