Custom Blocks
Contents
A custom block can also be thought of as a pre-filled template for a block. To create a custom block:
- Add the block to use as the pre-filled template.
- Fill out the properties to be the basis of the template.
- Right-click the block to bring up a shortcut menu.
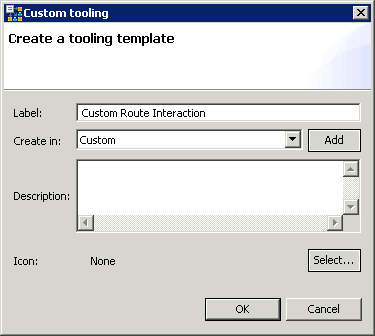
- From the shortcut menu, select Add as custom tool. Note this option is not available for the IPD blocks. The Custom Tooling dialog box opens. A sample is shown below.
- Opposite Create in:, Leave Custom to place the block in the Custom category on the palette. Or click the down arrow and select another palette drawer.
- If you wish to upload an icon or graphic for the custom block, click Select to open the Custom Icon Library dialog box. Select an icon, and click OK. The selected icon appears in the dialog box.
- Click OK in the Custom Tooling dialog box. Composer adds the block to the palette in the selected category.
Note: Custom Entry and Exit icons do not appear on the palette. It still shows the default Entry/Exit icons.
Using a Custom Block
Use the block as you would any others. Fields defined as relevant in the Block Data Map are automatically populated in the Properties tab based on the state of the original block when you made the tooling.
- Note: When you create a new block, you must add a mapping to define which fields should be template-aware.
Changing Existing Custom Blocks To change an existing custom block:
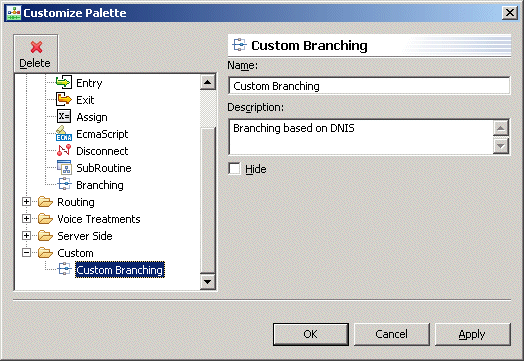
- Within the palette, right-click a custom block and select Customize… from the context menu. This opens the Customize Palette dialog box.
- Navigate to/select the block you want to change.
- You can:
- Change the label.
- Edit the description.
- Delete the block entirely.
Deleting a Custom Block
To delete a custom block:
- Within the palette, right-click a custom block and select Customize… from the context menu. This opens the Customize Palette dialog box shown above.
- Navigate to/select the block you want to delete.
- Click the Delete button at the top of the Customize Palette dialog box.
- Click OK.
Hiding the Custom Category
To hide the Custom category on the palette:
- In the Customize Palette dialog box (see above steps), select the Custom folder.
- Click the Hide checkbox. Later, if you need the Custom category back on the palette, select the Custom folder and un-click Hide.
- Click OK.
Import/Export of Custom Blocks
To import or export a custom block so that it can be shared across multiple users/Composer installations:
- Select the custom block in the palette.
- From the Diagram menu, select:
- Import Custom Blocks… to open the Select Custom Tooling Definition dialog box. Browse to the location for the previously exported custom block file, which will have a *.ctooling extension, select the file, and click OK.
- Export Custom Blocks... to open the Create Custom Tooling Definition dialog box. Name the file, keep the file type as custom tooling, and click OK. The custom block is saved as file with a *.ctooling extension.
This page was last edited on July 2, 2013, at 13:07.
Comments or questions about this documentation? Contact us for support!


