Deploying The ClickOnce Application On Your Web Server
Contents
- 1 Deploying The ClickOnce Application On Your Web Server
- 1.1 Procedure: Deploying the Interaction Workspace downloadable ClickOnce package on your web server
- 1.2 Procedure: Configuring Apache to enable the ClickOnce package
- 1.3 Procedure: Configuring Microsoft IIS6 to enable the ClickOnce package
- 1.4 Procedure: Configuration verification: Testing the client
Use the Interaction Workspace Deployment Manager wizard to generate the file hierarchy that is required by the ClickOnce application on your web server. During the deployment of the ClickOnce application, you are required to enter the following information in the Deployment Manager:
- The deployment URL
- The deployment version
- The deployment certificate:
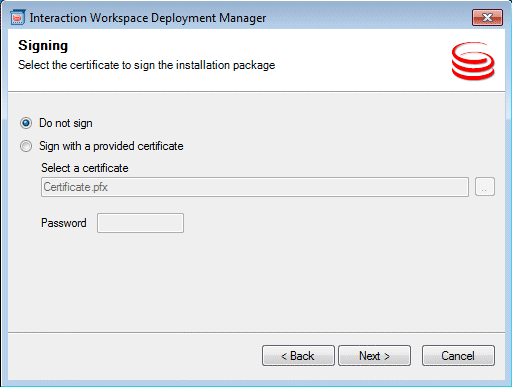
- If you do have a deployment certificate, select the Sign with a provided certificate option, and then browse to select the certificate. You must also input the password in the dedicated text box.
- If you do not have a deployment certificate, do not select the Sign with a provided certificate option. Without a signed package, a security warning is displayed whenever the client downloads the package.
Be sure to have this information ready before you begin. Procedure: Deploying the Interaction Workspace downloadable ClickOnce package on your web server contains the deployment steps for deploying Interaction Workspace on your web server.
|
|
Procedure: Deploying the Interaction Workspace downloadable ClickOnce package on your web server
Purpose: Deploy the Interaction Workspace downloadable package on your web server by using the Interaction Workspace Deployment Manager Wizard
Prerequisites
- Install the Deployment Manager and associated files from the Genesys Interaction Workspace disc or download image. See Procedure: Installing Interaction Workspace Deployment Package on the Windows operating system.
- Create an Application object of type Interaction Workspace from the Interaction Workspace Application template.
- Microsoft .NET Framework 2.0 installed on the computer on which you run the wizard. This can be the computer on which you run your web server.
Start
- Open the InteractionWorkspaceDeploymentManager folder. This folder contains the application files required for deployment, including: InteractionWorkspaceDesktop.exe.
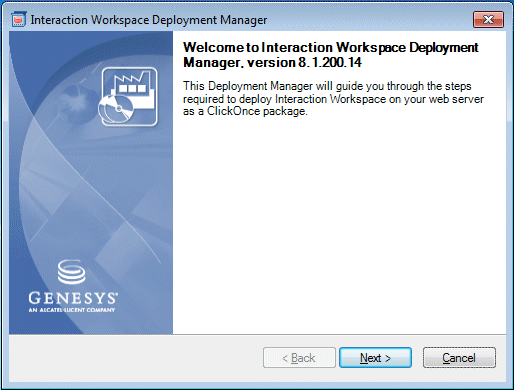
- Launch the InteractionWorkspaceDeploymentManager.exe application by double-clicking the file or selecting it from the Start menu. The Deployment Manager installs the ClickOnce files on your web server. The Welcome pane of the Deployment Manager is displayed (refer to Figure - The Interaction Workspace Deployment Manager splash page).
- Click Next to proceed with the installation. Click Cancel to cancel the deployment.
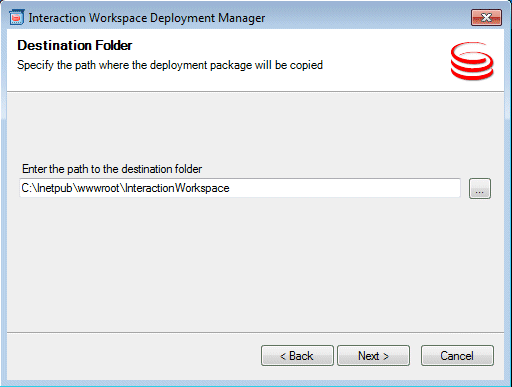
- If you clicked Next, the Deployment Folder pane is displayed (refer to Figure - Interaction Workspace Deployment Manager Deployment Folder pane). Specify the location on your server in which you want the ClickOnce files to be deployed. If you are deploying to a Solaris server or a Linux server, specify a local folder on the Windows-based computer on which you are running the Deployment Wizard. From this location, you will build the deployment package that you must manually copy to your Solaris or Linux HTTP server.
- Click Next to proceed with the installation. Click Cancel to cancel the deployment. Click Back to return to the previous panel.
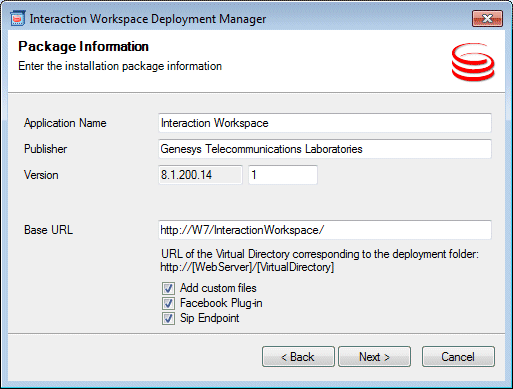
- If you clicked Next, the Package Information pane is displayed (refer to Figure - Interaction Workspace Deployment Manager Package Information pane). This pane is filled-in automatically. Modify these parameters only if necessary. You can change the application name, the publisher (which is displayed in the publish.htm page), and the base URL, which is the URL that corresponds with the virtual directory that is linked to the deployment folder.
There are one or more optional check boxes that you can use to add plug-ins to the Interaction Workspace application:
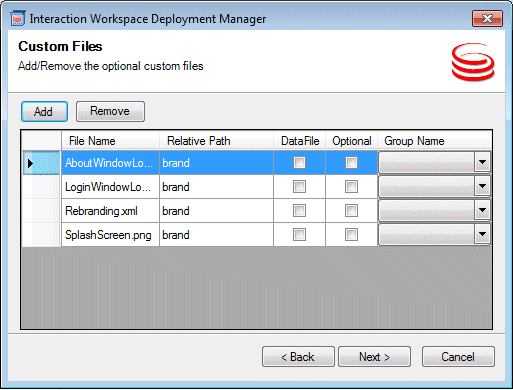
- Add custom files -- Select to add custom content such as simple data files, including rebranding icons or sound files, or file assemblies that implement your Interaction Workspace Customization API.
- <plug-in name> -- Select this option to use your installed plug-in, such as Interaction Workspace SIP Endpoint, Social Engagement plug-in, Localization Packs, and so on.
Click Next to proceed with the installation. Click Cancel to cancel the deployment. Click Back to return to the previous panel.
- The address and port number of your local Genesys Configuration Server
- The name of the Interaction Workspace (client) application that you created in the Configuration Layer by using Genesys Administrator
Enabling Client-side Port Definition
To define the client-side port functionality, check Use Client-side Port by specifying the port number and/or the IP address. Checking this option enables the following two text fields:
- Port Number -- The port number that a client will use to make a TCP/IP connection to Configuration Server. If the value is empty, this parameter is not used.
- IP Address -- The IP address or the host name that a client will use to make a TCP/IP connection to Configuration Server. If the value is empty, this parameter is not used.
If you specify one or both values, they will be set in the InteractionWorkspace.exe.config file.
There are two additional options in this dialog box:
- Allow the end-user to change connection parameters on the login prompt -- Enables agents to change their connection parameters when they log in.
- Allow the end-user to install the .NET Framework if it is not already installed -- Enables an agent to download and install .NET Framework to their workstation if you have not already installed it on the workstation.
http://msdn.microsoft.com/en-us/library/ms172240.aspx
- Click Do not Sign. If you do not provide a certificate, a security warning is displayed whenever the client downloads the package.
- Click Sign with a provided certificate to enable the Selects a certificate field.
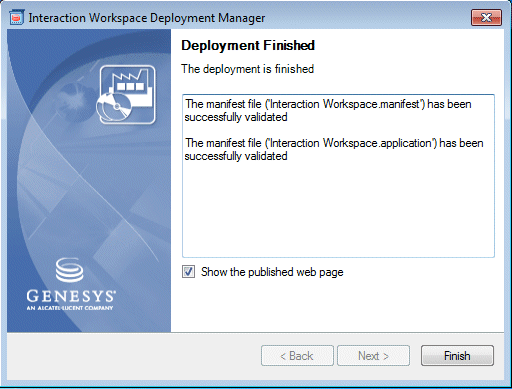
When the deployment is complete, the Deployment Finished pane is displayed (refer to Figure - Interaction Workspace Deployment Manager Deployment Finished pane). This pane contains messages that relate to the success of the deployment.
Deployment proceeds. When deployment is complete, the publish.htm web page is opened in your default browser automatically (refer to Figure - Interaction Workspace pubish.htm web page viewed through Microsoft Internet Explorer).
The publish.htm web page confirms that the Interaction Workspace package is published and provides you with the version number.
If you have not installed the prerequisites, the page contains a link to the prerequisite installers.
End
Next Steps
- If you have not installed the prerequisites, in the publish.htm web page, click Install to launch setup.exe to install the prerequisite installers.
- If you already have installed the prerequisites, the application bootstrap either installs a new version automatically, upgrades your existing version, if necessary, or starts the application, if it is installed and up to date.
Procedure: Configuring Apache to enable the ClickOnce package
Purpose: By default, the Apache web server does not permit the download of documents of specific MIME types. Apache must be configured to enable the ClickOnce package. Prerequisites
- Windows Server 2003 or Windows Server 2008 server or Solaris Server or RHEL (Linux) server
- Apache Server 2.2
Start
- In the conf/mime.types file (in the Apache install folder), add the following lines:
application/x-ms-application application
application/x-ms-application manifest
application/octet-stream deploy - Save the file.
End
Next Steps
Procedure: Configuring Microsoft IIS6 to enable the ClickOnce package
Purpose: By default, the Microsoft IIS6 web server on Windows 2003 does not permit the downloading of documents of specific MIME types. IIS6 must be configured to enable the ClickOnce package. Prerequisites
- Windows Server 2003
- Microsoft IIS6
Start
- From Administrative Tools, start Internet Information Services Manager.
- Right click the tree leaf that represents your server.
- Select Properties from the contextual menu.
- In the Properties dialog box, click Mime Types.
- Click New to add each of the following configuration pairs:
.application => application/x-ms-application
.manifest => application/x-ms-application
.deploy => application/octet-stream - Click OK.
- Click OK to validate the new MIME types list.
End
Next Steps
Procedure: Configuration verification: Testing the client
Purpose: To ensure that the Interaction Workspace application was correctly deployed on your web server and client workstation. Prerequisites
- Procedure: Deploying the Interaction Workspace downloadable ClickOnce package on your web server
- Procedure: Configuring Apache to enable the ClickOnce package
Start
- On a client workstation, open a new Internet browser window.
- In the Address field, enter the URL of the Interaction Workspace web application:
http://<host>/<application name>/publish.htm
For example:
http://SUITE80/InteractionWorkspace/publish.htm - Press Enter on your keyboard. The Interaction Workspace ClickOnce publish window opens (see the Figure - Interaction Workspace publish window).
- If all prerequisites are installed, setup is started automatically. If all prerequisites are not installed, a warning is displayed with the list of missing prerequisites. Click Install to install the Interaction Workspace application prerequisites.
- If a security-warning dialog box appears, click Install.
When installation is complete, a shortcut is placed on the desktop, after which the application launches. The Interaction Workspace agent-login window is displayed. - Enter the following information into the agent-login panel and the connection-parameters panel:
- User Name -- A valid user name that is configured in the Configuration Layer
- Password -- The valid password for the specified user name
- Click Login to continue logging in to Interaction Workspace; click Cancel to close the agent-login window without logging in.
Refer to Interaction Workspace User's Guide for more information on how to log in to Interaction Workspace and use the application.
End
Next Steps
- Installation is complete. You can now provision Interaction Workspace functionality:

