Contents
Add a Callback Service
After Callback is configured, you must create a Callback Service for each Callback scenario that you want to implement. Then, you can manage Callback interactions in the Callback UI.
- To create a Callback service, you need Administrator permissions.
- You must set up Office Hours if you want to implement Scheduled Callback.
Load the Callback Service Template
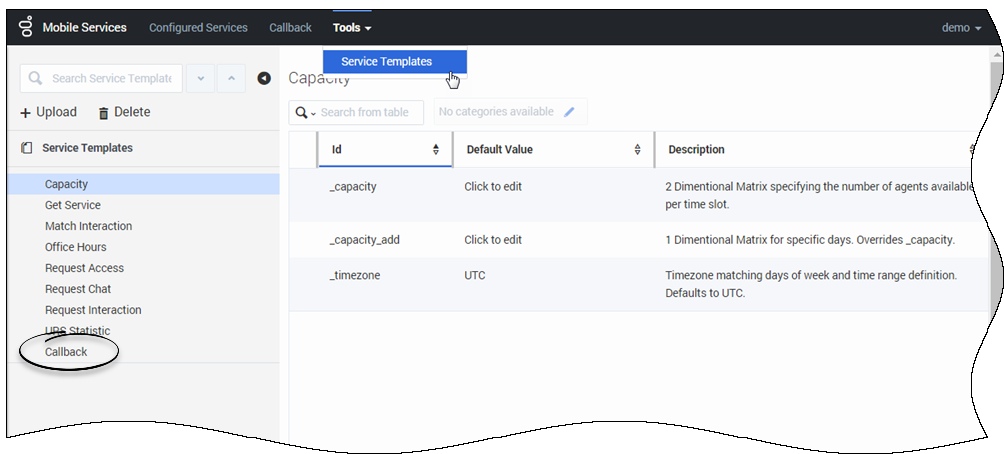
Open the Service Management UI, and navigate to Callback and Mobile Engagement > Service Templates. By default, callback should be part of the Service Templates list.
If not, you must load the Callback service template before you can create a Callback service. The callback.zip template is located in the <GMS installation directory>/service_templates directory.
Once the callback template has been loaded, it is available in the filter drop-down list of the Services tab.
Create a Callback Service
Navigate to the Services > Configured Services tab. There, you can manage your services based on the templates. The services and categories can be collapsed or expanded for easier viewing.
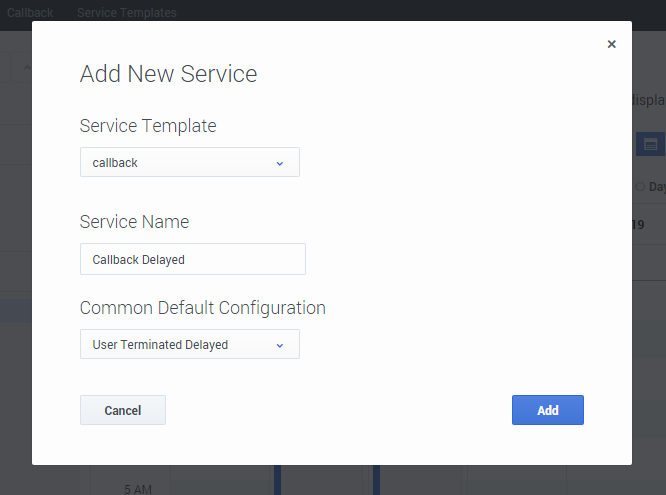
- Click Create.
- Enter a Service Name: This name will be used as the {callback-execution-name} parameter in your Callback queries.
- Select your Common Default Configuration. These configuration scenarios are detailed in the Callback Scenarios section of this guide.
- Click Add. An information message confirms the service creation.

The new Callback service appears in the Configured Services list.
Configured Callback Services
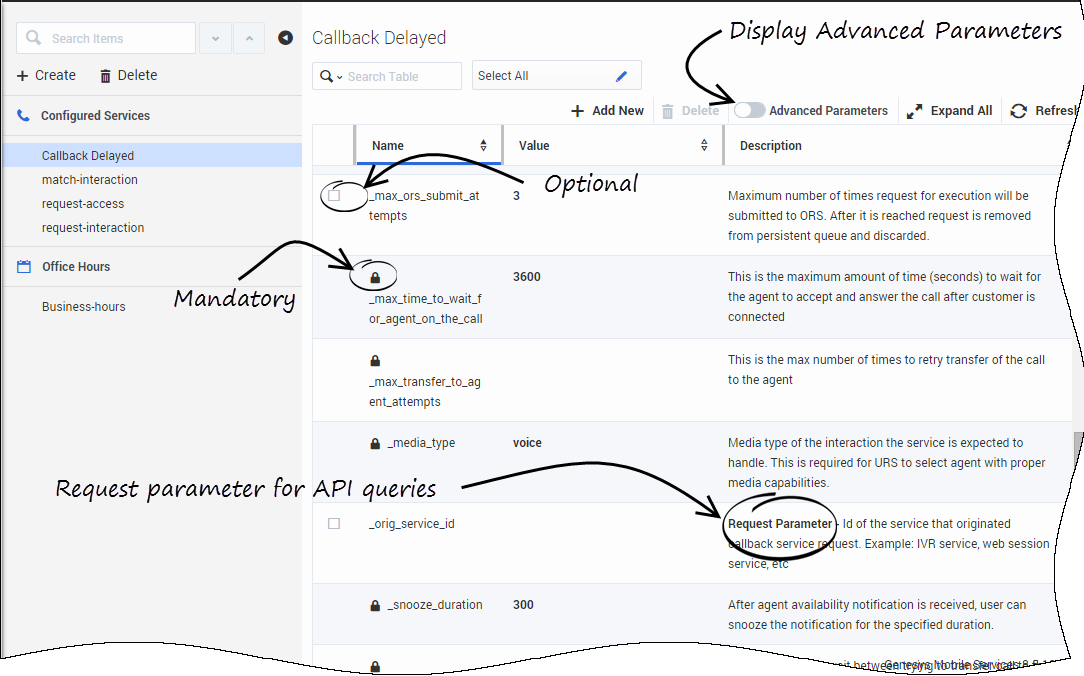
Key parameters for the service are automatically populated with the appropriate default values. For cluster configurations, all changes made in a service will be replicated into the entire GMS cluster.
The parameters have the following characteristics:
- Mandatory parameters - are identified with a lock icon; you cannot rename them or remove them.
- Optional parameters - you can rename them by hovering your cursor over the value field (you will see a pencil icon), click, and then enter the new value. You can delete optional parameters by clicking the Delete button.
- Advanced parameters - can be displayed by selecting the Advanced button in the upper right.
- Request parameters - are identified with an Request Parameter label in the Description.
Accessing Callback Services and Records with the Callback API
The URLs used by the Callback API are dependent on the name of the Callback service that you have just created. Callback services are available at the following URL:
http://<host>:<port>/{base-web-application}/service/callback/{callback-execution-name}For instance, if you create a callback service named callback-for-mobile, then {callback-execution-name} is callback-for-mobile and the callback service is available at:
http://<host>:<port>/{base-web-application}/service/callback/callback-for-mobileFor further details, see Callback API.


