Genesys Knowledge Center Quick Start Guide
Welcome to the Genesys Knowledge Center Quick Start Guide. This guide will help you get Genesys Knowledge Center up and running quickly by installing and working with the sample knowledge base.
Overview
The fastest way to get started with Knowledge Center is to create a sample knowledge base and try it out. After you install Knowledge Center Server, you can find the sample knowledge base in the <Knowledge Center Server Installation Folder>\server\tools\indexer folder. At that point, you can create a new knowledge base in Genesys Administrator and import documents into it using the tool shipped with the Knowledge Center Server. After these steps, you are ready to work with the basic features of Knowledge Center .
For a more in-depth overview of Knowledge Center, you can read the Knowledge Center Components topic in the Deployment Guide.
Setting up your Knowledge Center
Start
- Review the prerequisites and make sure your Genesys environment meets the requirements.
- Configure Knowledge Center Cluster.
ImportantPlease specify the planned host and port for the Knowledge Center Server as the host and default port of the Knowledge Center Cluster. This allows the system to work without the load-balancer.
- Configure the Knowledge Center Server applications and install the server nodes (first 4 steps of that procedure).
- Install the Knowledge Center Plugin for Administrator.
- Create agent that will be used to work with the knowledge:
- In Genesys Administrator go to Provisioning > Accounts > Users
- Press the New button
- On the General tab enter knowledge as the user name and employee ID of the agent
- Press the Save and Close button
- In Genesys Administrator go to Provisioning > Accounts > Roles
- Press the New button in menu to create new role
- On the General tab enter Knowledge Workers in the Name field
- Go to the Assigned Privileges tab
- On the Role Privileges tab, check “Genesys Knowledge” product and add the following privileges:
- Allows agent to change data in a knowledge base
- Allows agent to manage knowledge bases
- Allows agent to use reporting capabilities
- Go to the Configuration tab
- Add agent knowledge to the role
- Press the Save and Close button
- Create your first knowledge base by following these steps:
- Login into Genesys Administrator with the newly created agent
- Go to Administration > Knowledge Center
- Follow the steps of Selecting Knowledge Center Cluster Application and select the cluster application created in step 2.
- Follow the steps of Creating a Knowledge Base instruction procedure. On step 1, enter the following information:
- ID: knowledgefaq
- Name: Knowledge Center FAQ
- Description: Most common question regarding Genesys Knowledge Center
- Ensure that Knowledge base is active and Knowledge base is public are checked
- Start your knowledge Center server instance:
- To start your servers from Genesys Administrator:
- Navigate to Provisioning > Environment > Applications.
- Select the Genesys Knowledge Center Server application.
- Click Start applications in the Runtime panel.
- To start your servers using the provided start script (server.bat on Windows and server.sh on Linux):
- Navigate to <Knowledge Center Server Installation Folder>\server and launch a console window.
- For Windows, type: server.bat
- For Linux, type: server.sh
- To start your servers from Genesys Administrator:
- Import first knowledge into your knowledge base.
- In Windows Explorer, navigate to <Knowledge Center Server Installation Path>\server\tools\indexer folder
- Run importFAQ.bat
ImportantThe example below imports knowledgeFAQ.xml that is shipped with Knowledge Center Server into the knowledge base named knowledgefaq on behalf of the agent named knowledge. The most recent version of the frequently asked questions is downloadable from here.
End
Using the Sample UI
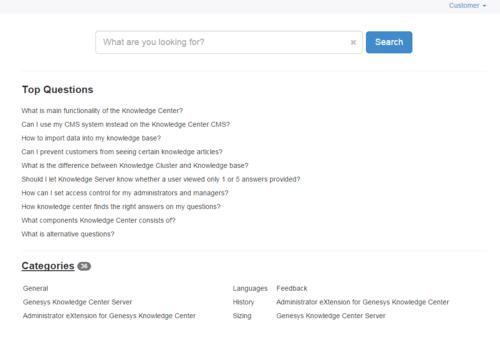
Congratulations! You are ready to use Genesys Knowledge Center. For sandbox testing, try using the Sample UI web application, whose components are available at:
- http://host:port/gks-server—The Knowledge Center Server
- http://host:port/gks-sample-ui—The Sample UI sandbox
For more information on using the Sample UI, consult the Deployment Guide.

