CM - Uploading Media Files
Channel Monitoring Media Files are uploaded via the Channel Monitoring - Media Files page.
The uploaded media is used for the Receive Media and Send Media Call Stages of a Call Flow.
Please ensure you upload .WAV audio files with the following supported audio codecs:
- G.711 Mu Law - pcmu/8000
- G.711 A Law - pcma/8000
Important
Channel Monitoring only accepts G.711 Mu Law - pcmu/8000 and G.711 A Law - pcma/8000.Important
Channel Monitoring will automatically detect the codec negotiated between the peers of a call and execute the necessary transcoding while sending media so that the output audio matches the codec of the call.Adding New Media
Please use the following steps to upload a new Media File:
- Select Channel Monitoring > Media Files from the Workbench navigation bar.
- The Channel Monitoring - Media Files page is displayed.
- A "Currently there are no Media Files uploaded" message is presented if no Media Files are yet configured
- Click the Upload Media File button
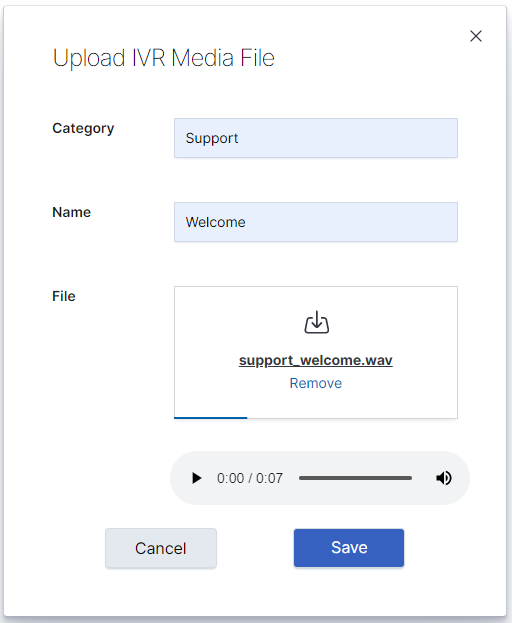
- The Upload IVR Media File dialog is displayed.
- In the Category field, provide a descriptive Category name (i.e. "Support") for the media being uploaded
- This category is used to logically group the files; if a Category already exists, it will display in the drop-down list; otherwise a new Category will be created
- In the Name field, provide a descriptive Name (i.e. "Welcome")
- For the File field, simply drag and drop the file on this field or click Select to browse to the file to be uploaded
- Note: Uploaded files must be in .wav format.
- Click the Save button.
Example images for context below:
Existing Media
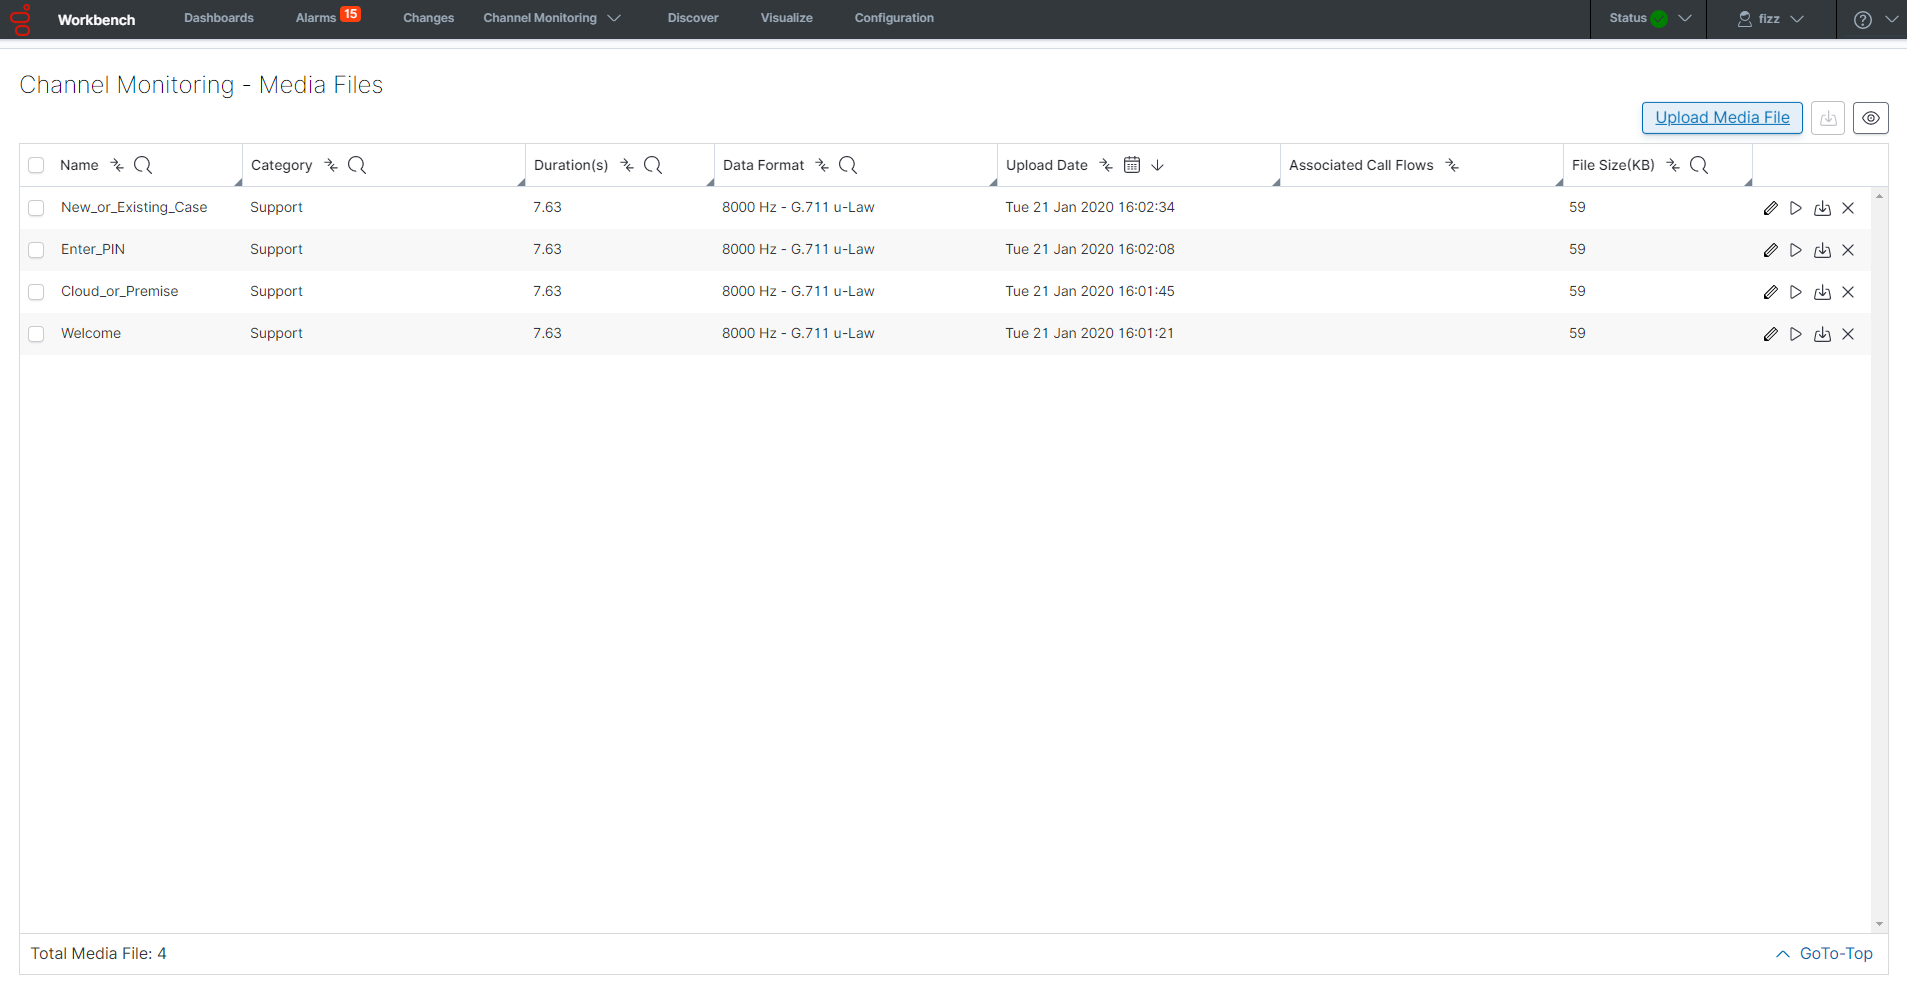
Once you have uploaded Media files, they are listed on the Channel Monitoring - Media Files page, as per the image above.
The Media File table provides the following details:
- ID - represents an unique ID for each Media file; it is an optionally displayed column.
- Name - represents the Name of the Media file; it is a default displayed column.
- Category - represents the Category group (i.e. Support, Sales) to which the Media File belongs to; it is a default displayed column.
- Duration(s) - represents the time Duration (seconds) of the Media file; it is an optionally displayed column.
- Data Format - represents the codec (uLaw/aLaw) details of the uploaded .WAV file; it is an optionally displayed column.
- Upload Date - represents the date/time which the Media file was uploaded to WB; it is a default displayed column.
- Associated Call Flows - represents the Call Flow Names which use this Media file within its Call Stages; it is a default displayed column.
- File Size (kB) - represents the size of the Media file in KB's; it is an optionally displayed column.
At the end of each row, there are options for the Media file:
- To Edit the Media File, select the Pencil button.
- To Playback/Listen to the Media File, select the Play button.
- To Download the Media File locally (for backup), select Download button.
- To Delete the Media File, select the Delete button.
Use the Show/Hide Columns button on top of the Media table to view/hide optionally displayed columns.
Warning
- Media Files should/can not be deleted if being used in an existing Call Flow within a Receive Media or Send Media Stage.
- To delete a Media File that is assigned to Call Flows, first unassign the Media File from the Call Flows, then delete the Media File.
This page was last edited on February 4, 2020, at 11:20.
Comments or questions about this documentation? Contact us for support!


